

B1289 on 2007-2010 Chevrolet Silverado 2500: Radio, Sound, and Display Fixes
On a 2007-2010 Silverado 2500, code B1289 almost always means there is a wiring problem causing the radio to flash or go blank with no sound. The most common cause is a shorted wire in 'Circuit 7066' near the rear entertainment system, a fix that costs under $25 in parts and is DIY-friendly.
- B1289 on a 2007-2010 Silverado 2500 is almost certainly a wiring issue, not a failed radio.
- The problem is a short or break in 'Circuit 7066' (typically a dark green wire), documented in GM Technical Service Bulletin PIT4474E.
- Symptoms include a blank/flashing radio screen, no sound, and no turn signal clicks.
- The fix is to find and repair the damaged wire, which is usually located in the headliner near the rear DVD player, chafing on a metal bracket.
- Do not replace the expensive radio head unit until you have inspected and ruled out this common wiring fault.
What's Unique About the 2007-2010 Chevrolet SILVERADO 2500
The GMT900 platform, which includes this Silverado 2500, has a well-documented issue with the entertainment system wiring. General Motors issued Technical Service Bulletin #PIT4474D (and later revisions like PIT4474E) specifically for this problem. The TSB notes that a blank radio screen with code B1289 is most often caused by a wiring fault in 'Circuit 7066', not a failed head unit. The most common failure point is where the harness chafes against a metal support bracket for the rear DVD player under the headliner. This makes the diagnosis more direct compared to other vehicles where a blank screen might lead to an unnecessary and expensive radio replacement.
Diagnostic Flowchart
Tap your situation to follow the diagnostic path that matches what you're seeing on this vehicle.
Symptoms You May Notice
- Radio or navigation screen is blank or flashes on and off.
- No sound from any speakers.
- Loss of audible turn signal clicks and warning chimes.
- Rear Seat Entertainment (RSE) screen is inoperative (if equipped).
- A popping or shorting sound may be heard from the speakers just before failure.
- In the instrument cluster, the audio section may display 'Audio Off'.
- Replacing the radio head unit without first inspecting the wiring for Circuit 7066. The TSB and extensive owner experiences confirm the wiring is the most probable cause.
- Replacing the amplifier. A failed amplifier can cause a loss of sound but typically does not make the head unit display go blank or set code B1289.
Most Likely Causes
- Shorted or Open Wire in Circuit 7066 🔴 High Probability As documented in GM TSB PIT4474E, the wiring harness for the rear entertainment system is prone to chafing against a sharp metal support bracket under the headliner, causing a short to ground. Vehicle vibrations over time cause the harness to rub through its insulation at this pinch point.
How to confirm: Visually inspect the wiring harness where it runs near the rear entertainment screen's mounting hardware under the headliner. The wire for Circuit 7066 is typically Dark Green. Test Circuit 7066 (often at pin 8 or 9 of the RSE connector) with a multimeter for a short to ground or an open circuit. Any continuity to ground confirms the short.
Typical fix: Repair the damaged section of the wire. This involves cutting out the chafed portion, splicing in a new piece of wire with butt connectors or solder, and protecting the repair with heat shrink tubing. It is critical to reroute the repaired wire or add protective conduit to prevent it from rubbing against the same bracket in the future.
Est. part cost: $5-$25
Rare But Worth Checking
- Failed Radio Head Unit: While the wiring is the most common cause, the radio's internal driver circuit can fail. This should only be considered after the wiring in Circuit 7066 has been thoroughly inspected and tested. Some owners report that smacking the dash temporarily restores function, which can indicate a cold or cracked solder joint inside the radio itself.
- Poor Ground Connection: A loose or corroded ground connection for the audio system (like ground G301 or G302 located under the passenger seat area) can cause various electrical issues, though it's less specific to B1289 and usually presents with a wider array of symptoms.
- Loose HMI or Radio Connectors: On some GMT900 models, the Human-Machine Interface (HMI) module is located behind the glove box. A loose main connector (often blue) can cause identical symptoms. It is worth checking that all connectors behind the radio 🎬 Watch: How to remove the dash and access radio connectors and at the HMI module are fully seated.
Diagnosis Steps
- Confirm symptoms: Radio display is blank/flashing and there is no audio.
- Scan for DTCs. Note if B1289 is present, especially with B1265 or B1288.
- Turn the ignition off and remove the key. Let the vehicle sit for at least 5 minutes to allow the radio's protection circuit to reset. This is a necessary step before testing.
- If the problem persists, access the wiring harness for the Rear Seat Entertainment (RSE) system. This typically requires carefully lowering the rear portion of the headliner, which may involve removing the rear dome light assembly.
- Locate Circuit 7066. The wire is typically Dark Green, but may also be Pink in some harnesses. Inspect it for chafing, pinching, or breaks, especially where it passes the metal RSE support bracket.
- If damage is found, repair the wire. Ensure the repaired section is protected and routed away from sharp edges.
- If no visible damage is found, use a multimeter to test Circuit 7066 for a short to ground. Disconnect the RSE connector and the radio connector. Test for continuity between the circuit 7066 pin at the radio harness and a known good chassis ground. Any continuity indicates a short.
- If the wiring is confirmed to be intact and not shorted, check for loose connectors at the back of the radio and at the HMI module (if applicable). If all wiring and connections are good, the fault may lie within the radio head unit itself.
Parts You'll Likely Need
- Wiring Repair Supplies — This is for repairing the shorted or broken wire in Circuit 7066, which is the most common fix for this code. Includes wire, butt connectors, solder, and heat shrink tubing.
Trusted brands: 3M
Aftermarket price range: $5-$25 - Radio Head Unit — Only needed in the rare case that the radio's internal circuitry has failed after the wiring harness has been confirmed to be good. Part numbers vary by trim and features (Bose, Navigation, etc.).
Trusted brands: ACDelco
OEM price range: $300-$800
Aftermarket price range: $200-$500
Related Codes That Often Appear With This One
- B1265 — This code for 'Entertainment Remote Enable Circuit Malfunction' is triggered by the same short in Circuit 7066 and is mentioned in the same TSB.
- B1288 — This code for 'Video Display Brightness Control Signal' is also directly related to the same wiring fault in Circuit 7066 and is mentioned in TSB PIT4474E.
Technical Service Bulletins (TSBs) & Recalls
- PIT4474D: Addresses a blank or flashing radio display with DTCs B1265, B1288, or B1289, and instructs technicians to repair a short to ground on circuit 7066.
- PIT4474E: Supersedes PIT4474D, expanding the model years and providing more detail on the fault condition, including the 2-minute flashing period before shutdown and the 5-minute power-down reset procedure.
Platform-Specific Known Issues
- A known issue, documented in TSB PIT4474E, involves the 'Entertainment Remote Enable Signal Wire' (Circuit 7066) shorting to ground. The most common location for this short is in the wiring harness near the rear DVD display screen under the headliner. Owners on forums like silveradosierra.com frequently describe finding a chafed dark green wire at this exact location, confirming the TSB's findings. The failure often starts intermittently before becoming permanent.
Mechanic-Grade Diagnostic Values
- Frequency on Circuit 7066 (at RSE connector) — expected: 100-300 Hz (PWM signal). Failure: A reading of 0 Hz or a value outside the specified range indicates a circuit fault or internal radio failure.
- Resistance to ground on Circuit 7066 (harness disconnected) — expected: Open Line (O.L.) or mega-ohms. Failure: A reading near 0 ohms indicates a direct short to ground in the wiring harness.
- Voltage on Circuit 7066 (Radio On Signal) — expected: ~12V (Battery Positive Voltage). Failure: A reading of 0V indicates a short to ground or an open circuit between the BCM/radio and the connector.
- System Voltage for DTC Test — expected: 9-16 Volts. Failure: The radio may not run the diagnostic for this circuit if the vehicle's system voltage is outside this range.
Hidden / Shadow Codes Worth Checking
- B1289 01: Video Display Brightness Control Signal Short to Battery (see via Requires a professional scan tool like a GM Tech2 or GDS2 that can read manufacturer-specific symptom bytes.)
- B1289 02: Video Display Brightness Control Signal Short to Ground (see via Requires a professional scan tool like a GM Tech2 or GDS2. This is the most common sub-code for this issue.)
- B1289 04: Video Display Brightness Control Signal Open Circuit (see via Requires a professional scan tool like a GM Tech2 or GDS2 to read the specific symptom byte.)
Scan Tool Commands That Help
- GDS2 / Tech2: Read DTC Information / Display DTC Information — Use this function to view not just the B1289 code, but also the critical 2-digit symptom byte (e.g., 01, 02, 04). This immediately tells the technician whether to hunt for a short to ground, an open circuit, or a short to power, drastically speeding up diagnosis.
Wiring & Ground Locations
- Circuit 7066 — Typically a Dark Green, Pink, or White wire running from the radio, through the dash, up the passenger C-pillar, and across the headliner to the Rear Seat Entertainment (RSE) display.. This is the specific wire that, when shorted to ground, causes the radio to shut down and set code B1289. The most common chafe point is against a metal RSE support bracket under the headliner.
- RSE Connector (Pin 9) — The main harness connector at the Rear Seat Entertainment (DVD) screen, located under the headliner.. This is a key test point. With the connector unplugged and ignition on, a technician can test for the 100-300 Hz PWM signal from the radio at Pin 9 to verify circuit integrity.
- Radio Connector X1 (Pin B3) — The main 24-pin connector on the back of the radio head unit. Pin B3 is in the second bank of pins.. This is the origin point of the 'Radio On Signal' on Circuit 7066. It can be used as the other end for continuity testing if an open circuit is suspected.
- G301 / G302 — G301 is located under the left side of the passenger seat; G302 is under the right side of the passenger seat, bolted to the floor pan.. These are major grounds for interior body components. While a failure here is a rare cause for B1289 alone, a loose or corroded connection can cause a wide array of difficult-to-diagnose electrical issues in the cabin, including radio problems.
Real Owner Repair Stories
- TahoeYukonForum.com user (2007-2014 GMT900 SUV (platform mate)) — Radio screen was flashing, then went completely blank. No sound from speakers and no warning chimes.
❌ Tried (didn't work) Replacing fuses, Disconnecting the battery for a short period
✅ What actually fixed it Found a chafed pink wire (Circuit 7066) inside the wiring harness located in the passenger side C-pillar. The wire's insulation was worn through, causing it to short against the metal pillar. The owner repaired the wire with a butt connector and heat shrink, then wrapped the harness in protective tape, which fully restored radio function.
When the Usual Fixes Don't Work
- In cases where a thorough inspection of Circuit 7066 from the radio to the RSE display reveals no chafing, breaks, or shorts to ground, the root cause may not be the TSB-documented wiring issue. Some owners have reported that after confirming the wiring is intact, the problem was traced to the radio head unit itself. The failure was not a complete radio death, but a fault on the internal circuit board, such as a cracked solder joint where the display panel connects. This is often confirmed if physically tapping on the dash or radio causes the screen to flicker. In these instances, replacing the head unit or performing a board-level solder repair was the correct and final fix, contrary to the common wisdom that it's 'always the wire'.
OEM Part Supersession History
Varies by option (e.g., 15850678)→Varies by option (e.g., 15951758)— Standard part evolution and updates.
Heads up: Radio part numbers are highly specific to the vehicle's options (Bose audio UQA/UQS, Navigation U3U/UVB, base audio UQ3, etc.). Using a radio from a vehicle with different options may result in a 'VIN locked' state or non-functional features. Always order by VIN or verify the RPO codes.
Model Year Variations Within This Range
- 2007-2010: The wire color for the problematic Circuit 7066 is not consistent across all harnesses and model years. While often Dark Green, it has also been documented by owners and in schematics as being Pink or White. A technician should verify the pin location (e.g., Pin 9 at the RSE connector) rather than relying solely on wire color.
Helpful Videos
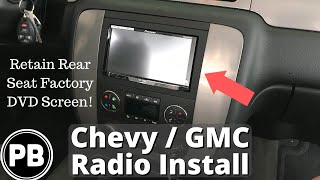
We Have This Part in Stock

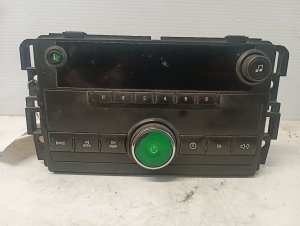


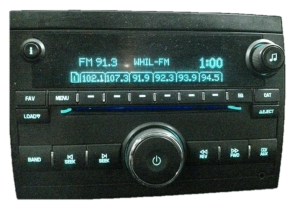


The information in this article is provided for general reference and educational purposes only. Vehicle specifications, procedures, and part compatibility can vary by production date, trim level, and region. Always consult your vehicle's factory service manual and verify part numbers before purchasing or performing repairs. Safety-critical components such as airbags, seat belts, and braking systems should be installed by a qualified professional.
- Chevrolet SILVERADO 2500:
- 🎬 Helpful Videos
- 🛍️ Shop This Part
- What's Unique About the 2007-2010 Chevrolet SILVERADO 2500
- Diagnostic Flowchart
- Symptoms You May Notice
- Most Likely Causes
- Rare But Worth Checking
- Diagnosis Steps
- Parts You'll Likely Need
- Related Codes That Often Appear With This One
- Technical Service Bulletins (TSBs) & Recalls
- Platform-Specific Known Issues
- Mechanic-Grade Diagnostic Values
- Hidden / Shadow Codes Worth Checking
- Scan Tool Commands That Help
- Wiring & Ground Locations
- Real Owner Repair Stories
- When the Usual Fixes Don't Work
- OEM Part Supersession History
- Model Year Variations Within This Range
- 🎟️ Get 5% Off