

B1288 on 2007-2014 GMC Yukon: Radio Flashing, Blank Screen, and Fixes
On 2007-2014 GMC Yukons, code B1288 almost always points to a shorted wire in the radio's remote enable circuit (Circuit 7066), as documented in GM Technical Service Bulletins. This causes a flashing or blank radio screen. The fix is typically a simple wire repair, which is very low-cost if you do it yourself.
- B1288 on a 2007-2014 Yukon almost always means you have a wiring issue, not a bad radio.
- The problem is most likely a shorted wire in 'Circuit 7066', which controls power to accessories like the rear DVD screen.
- Before spending money on a new radio, thoroughly inspect the wiring harness, especially near the rear entertainment system in the headliner.
- This is a known issue covered by GM Technical Service Bulletins PIT4474D and PIT4474E.
- The repair is often as simple as fixing the damaged wire, which is inexpensive but can require some time to access the wiring.
What's Unique About the 2007-2014 Gmc YUKON
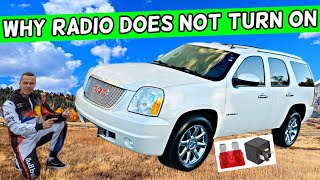
This issue is a well-documented problem on the GMT900 platform, which includes the GMC Yukon, Chevy Tahoe, Suburban, Silverado, and Cadillac Escalade. Unlike many other vehicles where a blank radio screen might mean a failed head unit, on these trucks, it's very frequently a wiring problem. General Motors issued specific Technical Service Bulletins (TSBs) pointing technicians directly to a wire known as 'Circuit 7066' which is prone to shorting to ground, especially in the wiring harness near the rear DVD player. 🎬 Watch: This video shows exactly how to find the shorted wire. The radio is designed to disable this circuit if a short is detected for more than two minutes, which causes the screen to go from flashing to completely blank.
Diagnostic Flowchart
Tap your situation to follow the diagnostic path that matches what you're seeing on this vehicle.
Symptoms You May Notice
- Radio or navigation screen is blank.
- Radio or navigation screen flashes on and off, sometimes showing the Chevy/GMC logo before going blank.
- No sound from the speakers.
- Rear DVD screen is inoperative (if equipped).
- The navigation disclaimer message may appear intermittently.
- Radio buttons are unresponsive.
- Replacing the radio/navigation head unit without first inspecting the wiring. This is a common and expensive mistake, as the problem is very often a simple wire short.
Most Likely Causes
- Shorted wire in Circuit 7066 🔴 High Probability As identified in GM Technical Service Bulletins PIT4474D and PIT4474E, the wiring harness for this circuit can become chafed and short to ground. The most common location for this is in the headliner area near the rear DVD display screen, where the harness can rub against a metal bracket or the chassis.
How to confirm: Visually inspect the wiring harness for Circuit 7066, particularly near the rear entertainment screen. Use a multimeter to test the circuit for a short to ground. Another diagnostic step is to disconnect the rear entertainment system; if the radio display begins working correctly, the short is almost certainly in the wiring leading to or within the rear unit.
Typical fix: Repair the damaged section of the wire using solder and heat shrink tubing, and re-route or protect it with Tesa tape or conduit to prevent future chafing.
Est. part cost: $1-$10
Rare But Worth Checking
- Faulty Radio Head Unit: If the wiring for Circuit 7066 tests normal with no shorts or opens, the internal circuitry of the radio itself may have failed. This can sometimes be caused by cracked solder joints on the main circuit board 🎬 See this walkthrough on how to repair internal radio circuit boards. where the LCD screen connects. This should only be considered after thoroughly checking the wiring, as it's a much less common failure point for this specific symptom.
- Faulty Rear Video Display: In rare cases, an internal fault within the rear video display could cause the issue on the circuit. Diagnostic procedures suggest this as a final step if the wiring and radio check out.
- Poor Ground Connection: While less specific to B1288, the GMT900 platform is known for having potential electrical issues due to poor or corroded grounds. A bad ground for the radio or related components could cause erratic behavior, though it's less likely to be the primary cause of this specific code.
Diagnosis Steps
- Verify the presence of code B1288, B1265, or B1289 using an OBD-II scanner capable of reading Body codes.
- Turn the ignition off and let the vehicle sit for at least 5 minutes to allow the radio to perform a full power-down and reset its protection logic.
- Turn the ignition back on. If the screen works temporarily (flashes) and then goes blank again after about two minutes, it strongly suggests a short circuit that the radio is detecting and shutting down.
- Access the wiring harnesses connected to the radio and, if equipped, the rear DVD player. This will require removing dash trim and/or 🎬 Watch: A quick guide on accessing the radio and checking power. lowering the headliner.
- Locate Circuit 7066, the 'Entertainment Remote Enable Signal' wire. The wire color is typically Dark Green.
- Visually inspect the entire length of the circuit that you can access, paying close attention to the harness near the rear DVD screen, as this is the most common chafe point according to GM.
- If no visual damage is found, use a multimeter to test Circuit 7066 for a short to ground.
- As a confirmatory test, try disconnecting the electrical connector to the rear DVD screen and see if the radio display returns to normal operation. If it does, the short is in that harness section.
- If a short is confirmed, repair the damaged wire with solder and heat-shrink tubing. Ensure the repaired wire is protected from chafing again by using cloth harness tape or re-routing it.
- If the circuit tests normal, the fault may be with the radio head unit (potential internal solder joint failure) or the rear display itself.
Parts You'll Likely Need
- Wire Repair Supplies — The most common cause is a broken or shorted wire that needs to be repaired, not a component that needs to be replaced.
Trusted brands: Solder, Heat shrink tubing, Tesa cloth harness tape
OEM price range: $1-$10
Aftermarket price range: $1-$10
Related Codes That Often Appear With This One
- B1265 — This code is also related to the radio and entertainment system and is explicitly mentioned alongside B1288 in GM service bulletins for the same fault condition.
- B1289 — Like B1265, this code is also cited in the same service bulletins for the blank/flashing screen issue caused by a short in Circuit 7066.
Technical Service Bulletins (TSBs) & Recalls
- PIT4474E: 'Navigation Or Radio Display Blank Or Flashing DTC B1265, B1288 Or B1289.' Points to a shorted remote enable signal wire (Circuit 7066). This bulletin supersedes previous versions.
- PIT4474D: An earlier version of the same bulletin, also identifying the flashing display and DTCs with a shorted Circuit 7066.
Platform-Specific Known Issues
- GM Technical Service Bulletin PIT4474E specifically calls out that a short to ground on Circuit 7066 will cause the radio/nav screen to flash or go blank and may set codes B1265, B1288, or B1289.
- The bulletin notes that the radio's internal protection will disable the circuit if the short persists for more than two minutes, causing the screen to go completely blank.
- The most common location for the short is identified as the wiring harness near the rear DVD display screen under the headliner.
- Circuit 7066 is the remote enable signal that feeds the amplifier, antenna module, and rear video display (if equipped with RPO U42).
Mechanic-Grade Diagnostic Values
- Voltage of Circuit 7066 at the radio connector with key on, radio on. — expected: Presence of DC voltage (typically a 5V or 12V reference signal).. Failure: A reading of 0V, especially with continuity to a known good ground, indicates a short to ground.
Scan Tool Commands That Help
- Tech 2 / GDS2: Read Body Control Module (BCM) and Radio (Entertainment) DTCs. — To confirm the presence of B1288, B1265, or B1289, as standard OBD-II scanners may not read manufacturer-specific body codes.
- Manual Procedure: Full Power-Down Reset — After a repair attempt or during diagnosis. The radio's internal protection logic will disable the enable circuit after detecting a short for 2 minutes. To reset this protection, the ignition must be turned OFF and Retained Accessory Power (RAP) must be off for at least 5 minutes. This is a required step to see if a repair was successful.
Wiring & Ground Locations
- Radio Connector X1 (Pin 6) — The main (often black) 14-pin connector on the back of the factory radio/navigation head unit.. Pin 6 is the specific pin for the 'Entertainment Remote Enable Signal' (Circuit 7066). This is the starting point for testing the circuit. NOTE: While TSBs may refer to the wire as Dark Green, wiring diagrams indicate the wire at this pin is often White. Verify by pin location.
- G301 — A chassis ground point located under the front passenger's seat.. This is a primary ground point for components in the passenger compartment. While not directly linked to the B1288 short, ensuring this ground is clean and tight is a good practice when diagnosing any radio or amplifier electrical issues in the area.
- Rear DVD Player Harness — In the headliner, near the overhead rear entertainment (RSE) screen.. This is the most common location for the Circuit 7066 wire to chafe against a metal bracket or the vehicle chassis, causing the short to ground described in GM's service bulletins.
Real Owner Repair Stories
- GM Technical Service Bulletins PIT4474D & PIT4474E (2007-2014 Cadillac, Chevrolet, and GMC Trucks/SUVs (GMT900 Platform)) — Radio/navigation screen is blank or flashes, no sound from speakers, rear DVD screen is inoperative.
❌ Tried (didn't work) Replacing the radio head unit without checking wiring., Replacing the amplifier without checking wiring.
✅ What actually fixed it The issue was consistently traced back to the 'Entertainment Remote Enable Signal' wire (Circuit 7066) being shorted to ground. The most frequent point of failure was the wiring harness in the headliner near the rear DVD screen. The official fix is to locate the short, repair the damaged section of the wire, and insulate or re-route it to prevent it from happening again.
Model Year Variations Within This Range
- 2009-2014: According to TSB PIT4474D, the remote enable signal from Circuit 7066 feeds the amplifier on most models, *except* for any 2009 and later Chevrolet Utility vehicles equipped with RPO STZ (specific content not detailed). On those vehicles, the circuit still feeds the antenna module and rear video display, so the root cause and symptoms remain the same even if the amplifier is not directly affected.
Helpful Videos

The information in this article is provided for general reference and educational purposes only. Vehicle specifications, procedures, and part compatibility can vary by production date, trim level, and region. Always consult your vehicle's factory service manual and verify part numbers before purchasing or performing repairs. Safety-critical components such as airbags, seat belts, and braking systems should be installed by a qualified professional.
- Gmc YUKON:
- 🎬 Helpful Videos
- What's Unique About the 2007-2014 Gmc YUKON
- Diagnostic Flowchart
- Symptoms You May Notice
- Most Likely Causes
- Rare But Worth Checking
- Diagnosis Steps
- Parts You'll Likely Need
- Related Codes That Often Appear With This One
- Technical Service Bulletins (TSBs) & Recalls
- Platform-Specific Known Issues
- Mechanic-Grade Diagnostic Values
- Scan Tool Commands That Help
- Wiring & Ground Locations
- Real Owner Repair Stories
- Model Year Variations Within This Range
- 🎟️ Get 5% Off