

B1288 on 2007-2013 GMC Sierra 1500: Radio and Display Faults Explained
On a 2007-2013 GMC Sierra, code B1288 almost always points to an issue with the radio, amplifier, or related wiring, often causing a blank or flashing screen. The most common fix is repairing a shorted wire in the headliner harness going to the rear DVD screen, as outlined in a GM Technical Service Bulletin. If wiring is intact, the radio head unit is the next likely culprit.
- B1288 on a 2007-2013 Sierra is a specific code for a fault in the radio's display or amplifier control circuit.
- The most common symptom is a radio/navigation screen that flashes and then goes blank.
- The primary cause is a shorted wire under the headliner, as detailed in GM TSB PIT4474D.
- Diagnosis involves disconnecting components (RSE, amplifier) one by one and performing a 5-minute power-off reset to see if the fault clears.
- If wiring is good, the radio head unit itself has likely failed.
What's Unique About the 2007-2013 Gmc SIERRA 1500
For the GMT900 platform, which includes the 2007-2013 Sierra, GM issued a Technical Service Bulletin (PIT4474D) that directly links B1288 with a blank or flashing radio display. The issue is often caused by a short to ground in the remote enable signal wire (Circuit 7066) that the radio sends to the amplifier and, if equipped, the rear seat entertainment (RSE) video display. The TSB notes that when the short first occurs, the screen may flash, but if the short persists for over two minutes, the radio's internal protection logic will shut down the circuit, causing the display to go completely blank. This makes diagnosing the code more specific than just assuming the radio itself has failed.
Diagnostic Flowchart
Tap your situation to follow the diagnostic path that matches what you're seeing on this vehicle.
Symptoms You May Notice
- Radio or navigation display is completely blank.
- Radio or navigation display is flashing or intermittent, especially right before going blank.
- No sound from the audio system, as the amplifier is not being turned on.
- Radio appears to be dead or unresponsive.
- Rear Seat Entertainment (RSE) screens are not working.
- Replacing the wrong component. For example, replacing the radio head unit when the actual problem is a $5 shorted wire under the headliner. Following the TSB diagnostic procedure of disconnecting components one by one is critical.
- Assuming a fuse is blown. While possible, the symptoms of a flashing screen followed by a blank screen are very specific to the short-circuit protection logic within the radio, as described in the TSB. The radio fuse (often #42 in the underhood fuse box) would typically result in a completely dead unit with no flashing.
Most Likely Causes
- Shorted Remote Enable Signal Wire 🔴 High Probability GM TSB PIT4474D specifically identifies a short to ground on this circuit (Circuit 7066) as a primary cause. The bulletin explicitly states the 'most common area of concern is a shorted wiring harness near the rear DVD display screen 🎬 Watch: This video shows how to find and fix the short. under the headliner.' The harness can get pinched or chafed over time.
How to confirm: Inspect the wiring harness for damage. This requires accessing the wiring under the headliner, which involves removing pillar trim, sun visors, and the overhead console. Test the remote enable signal wire (Circuit 7066) for a short to ground using a multimeter at the back of the radio. The wire color is typically Dark Green, but should be verified with a vehicle-specific diagram.
Typical fix: Repair the damaged section of the wiring harness and re-route it to prevent future chafing. This involves cutting out the damaged section, splicing in a new piece of wire, and protecting it with heat shrink tubing or high-quality electrical tape. Ensure the harness is secured away from any sharp metal edges.
Est. part cost: $5-$20 for wiring repair supplies. - Internal Radio/Head Unit Failure 🟡 Medium Probability If the wiring tests normal, the fault logic points to an internal failure of the radio itself, which is responsible for sending the signal and setting the code. Forum users on Reddit have reported replacing the head unit as the ultimate fix after verifying wiring was not the issue.
How to confirm: After confirming all related wiring is intact and has proper voltage/ground, the radio is the most likely remaining point of failure. A key diagnostic step is to disconnect all components on Circuit 7066 (amplifier, RSE) and test for a short on the wire itself. If no short is found in the wiring, the radio's output driver has likely failed.
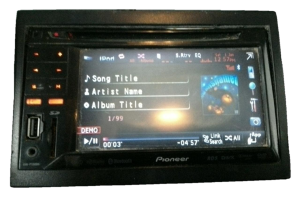
Typical fix: Replace the radio head unit. A replacement OEM unit will require programming by a dealer or a qualified shop to the vehicle's VIN. Many owners opt for an aftermarket touchscreen unit from brands like Pioneer or Kenwood 🎬 See this walkthrough for installing a new aftermarket radio., which can be installed with a special dash kit and wiring harness (e.g., from Crutchfield) to retain features like steering wheel controls.
Est. part cost: $150-$400 for a used/remanufactured OEM unit, $200-$600+ for a new aftermarket unit with an installation kit. - External Amplifier Failure (Bose Systems) ⚪ Low Probability The remote enable signal from the radio also controls the external amplifier on vehicles with premium sound systems. While less common than a wiring or radio fault, the amplifier can fail and short the circuit internally.
How to confirm: Disconnect the main electrical connector from the amplifier. Per TSB PIT4474D, after disconnecting, you must wait at least 5 minutes with the key off for the radio's internal protection to reset. If the radio display comes back to life after the reset, the amplifier is the source of the short.
Typical fix: Replace the factory amplifier. This part is typically located in the center console or under a seat. A replacement may also require programming.
Est. part cost: $65-$250 for a used or remanufactured OEM amplifier.
Rare But Worth Checking
- Rear Video Display Failure: If the truck is equipped with a Rear Seat Entertainment (RSE) system, the display unit itself can short out internally, causing this code. The diagnostic procedure involves disconnecting it to see if the fault clears, similar to the amplifier test. A user on Reddit with a 2013 Escalade reported the front display and rear screens going out simultaneously, which is a classic symptom of this failure.
Diagnosis Steps
- Scan the system for all DTCs. Note B1288 and any other codes like B1265 or B1289, which are directly related per TSB PIT4474D.
- Observe the symptoms. Does the radio display flash and then go blank? This strongly points towards the short-circuit scenario described in the TSB.
- Begin diagnosis by isolating components. The TSB recommends checking for a shorted harness near the rear DVD display first if equipped. Disconnect the Rear Seat Entertainment (RSE) module.
- If no RSE or if disconnecting it doesn't help, disconnect the amplifier (if equipped).
- After each component is disconnected, you MUST perform a full power-down reset. Turn the ignition off, remove the key, and wait at least 5 minutes. This allows the radio's internal circuit protection to reset. Then, turn the key on and check if the display works.
- If the display works after disconnecting a component, that component (or its direct wiring) is the source of the short.
- If the display remains blank with all external components disconnected, the short is in the main body harness or the radio itself has failed. Access the back of the radio and test the remote enable circuit (Circuit 7066, often a Dark Green wire) for a short to ground.
- If the wire is shorted to ground with everything unplugged, you must trace the harness and find the damage. If the wire is not shorted, the radio head unit is the confirmed cause of the failure.
Parts You'll Likely Need
- Radio/Navigation Head Unit
(OEM #22954632)— If wiring and external components are not at fault, the radio's internal circuitry has likely failed.
Trusted brands: ACDelco (OEM Remanufactured) 🎬 Watch: How to remove and replace the factory radio unit.
OEM price range: $250-$500 (Remanufactured)
Aftermarket price range: $200-$600+ - Radio Speaker Amplifier (Bose)
(OEM #20808897)— For vehicles with the Bose premium audio system (RPO Y91), the amplifier is a potential point of failure that can short the control circuit from the radio.
Trusted brands: ACDelco
OEM price range: $150-$300 (Remanufactured)
Aftermarket price range: $65-$200 (Used)
Related Codes That Often Appear With This One
- B1265 — This code is explicitly mentioned in TSB PIT4474D alongside B1288 as being related to the same radio/display fault.
- B1289 — Also mentioned in TSB PIT4474D, indicating a fault in the same system.
- U0073 — This is a general GMLAN communication bus fault. Widespread wiring issues, such as a pinched harness, can cause communication codes like this to appear alongside more specific body codes.
Technical Service Bulletins (TSBs) & Recalls
- PIT4474D: Navigation or Radio Display Blank Or Flashing DTC B1265 B1288 Or B1289.
Platform-Specific Known Issues
- A well-documented issue covered by TSB PIT4474D involves the remote enable signal wire (Circuit 7066) shorting to ground. The bulletin notes that the harness is often pinched or chafed near the rear DVD display screen under the headliner.
- The radio has an internal protection circuit. When a short is detected, it will first cause the screen to flash, then shut down the output after about 2 minutes, causing a blank screen. The radio must be fully powered down (key off for 5+ minutes) to reset this protection after the short is repaired.
Mechanic-Grade Diagnostic Values
- Voltage of Remote Enable Signal (Circuit 7066) — expected: Approximately +12V with Key On/Radio On.. Failure: 0V or a reading of high continuity (low resistance) to ground indicates a short, which is the primary cause of this DTC per TSB PIT4474D.
Scan Tool Commands That Help
- GM Tech 2: Read DTCs from Radio Control Module — A professional scan tool like the Tech 2 is required to reliably read manufacturer-specific Body (B) codes like B1288. A generic OBD-II scanner may not see these codes. The Tech 2 also allows a technician to view live data from the radio module to see if it is commanding the display and amplifier on, which is critical for confirming if the radio or an external component is at fault.
Wiring & Ground Locations
- Radio Connector X1 (24-pin) — The main gray 24-pin connector at the rear of the radio head unit.. Pin B3 on this connector is the 'Radio On Signal', which corresponds to Circuit 7066. It is typically a Pink or Dark Green wire. This is the wire that must be tested for a short to ground. Verifying the pin and wire color is the first step before tracing a harness short.
- Instrument Panel Grounds (e.g., G203, G302) — Located under the dashboard, typically secured to metal support structures near the kick panels or steering column.. While the fault is usually a short on a signal wire, a poor ground connection at the radio can cause a wide range of erratic electrical behavior. Verifying the radio's main ground (often on the main connector) and related chassis grounds is a good practice. Online service manuals or resources like charm.li can provide specific diagrams for all ground locations on the GMT900 platform.
OEM Part Supersession History
22954632 (Radio Head Unit)→22954632AA— Part revision or minor update by the manufacturer.
Heads up: Other potentially compatible part numbers for this radio family include 22997866, 23180744, 22888536, and 22856825. Always verify compatibility by VIN, as different option codes (RPOs) require different radio programming.20808897 (Bose Amplifier)→N/A— This part number appears to be stable through the model years.
Heads up: Interchangeable part numbers from earlier years or different models include 15186664, 15937318, and 25939528. While physically similar, ensure the RPO code for the audio system (e.g., UQA, Y91) matches the replacement amplifier's intended application.
Model Year Variations Within This Range
- 2007-2013: The diagnostic path for B1288 depends heavily on the vehicle's specific audio system, identified by its RPO code. Base models (RPO UQ3) only have the head unit. Premium Bose systems (RPO UQA, UQS, Y91) add an external amplifier. High-end trims could also have Rear Seat Entertainment (RPO U42). The amplifier and RSE module are additional potential failure points on Circuit 7066 and must be diagnosed separately.
- 2007-2013: Lower trim levels featured a 'Type A' dash with vents on either side of the radio, while mid- to upper-level trucks had a 'Type B' dash with vents above the radio. While this changes the appearance and trim removal process slightly, the underlying radio and electrical components are similar.
Helpful Videos
Used OEM Parts in Stock


New Aftermarket Parts Available

The information in this article is provided for general reference and educational purposes only. Vehicle specifications, procedures, and part compatibility can vary by production date, trim level, and region. Always consult your vehicle's factory service manual and verify part numbers before purchasing or performing repairs. Safety-critical components such as airbags, seat belts, and braking systems should be installed by a qualified professional.
- Gmc SIERRA 1500:
- 🎬 Helpful Videos
- 🛍️ Shop This Part
- What's Unique About the 2007-2013 Gmc SIERRA 1500
- Diagnostic Flowchart
- Symptoms You May Notice
- Most Likely Causes
- Rare But Worth Checking
- Diagnosis Steps
- Parts You'll Likely Need
- Related Codes That Often Appear With This One
- Technical Service Bulletins (TSBs) & Recalls
- Platform-Specific Known Issues
- Mechanic-Grade Diagnostic Values
- Scan Tool Commands That Help
- Wiring & Ground Locations
- OEM Part Supersession History
- Model Year Variations Within This Range
- 🎟️ Get 5% Off