

B1288 on 2007-2011 Chevrolet Silverado: Radio & Screen Fixes
On 2007-2011 Silverados, B1288 almost always means a wire has broken or shorted in the radio harness, not a bad radio. The fix is usually a simple, low-cost wire repair of 'Circuit 7066,' often found near the rear DVD player or in the dash harness. This is a well-documented issue on the GMT900 platform.
- B1288 on a 2007-2011 Silverado points to a wiring problem, not a bad radio, in almost all cases.
- The problem is a well-documented issue in GM's Technical Service Bulletin #PIT4474E.
- The fix involves finding and repairing a single wire (Circuit 7066), which is far cheaper than replacing the head unit.
- Do not replace the radio until you have thoroughly inspected and tested the wiring harness for shorts or breaks.
- The vehicle is safe to drive with this code, but you will lose audio for the radio, navigation, and safety chimes.
What's Unique About the 2007-2011 Chevrolet SILVERADO
The GMT900 platform, which includes the 2007-2011 Silverado, is well-known for this specific failure. General Motors issued Technical Service Bulletin #PIT4474E that directly addresses this code and points technicians to a likely wire break in circuit 7066. Unlike many vehicles where a blank screen points to a failed head unit, on these trucks, it's far more common to be a simple wiring issue that can be repaired for a fraction of the cost of a new radio. The TSB notes that when the short first occurs, the screen may flash, but if it remains shorted for over 2 minutes, the radio's internal protection engages and the screen goes blank until a full power-down reset is performed.
Diagnostic Flowchart
Tap your situation to follow the diagnostic path that matches what you're seeing on this vehicle.
Symptoms You May Notice
- Radio/navigation screen is blank or flashes on and off.
- No sound from the speakers.
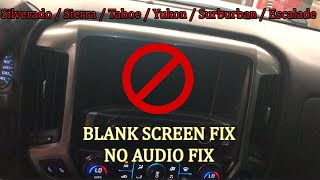
- Loss of audible turn signal clicks and vehicle warning chimes. 🎬 Watch: Fix for blank screens, no audio, and silent blinkers.
- Rear DVD screen (if equipped) is inoperative.
- Radio may appear to power on but no display or audio is present.
- Navigation disclaimer message may appear intermittently before failure.
- Replacing the radio head unit. This is the most common misdiagnosis. Owners and shops often assume a blank screen means the radio is dead, but on these trucks, the wiring is the much more likely culprit, as stated in TSB PIT4474E.
- Replacing the radio fuse. The radio often has power, but its protective circuits have disabled the display and amp output. Fuses #41 (AMP) and #42 (RADIO) in the under-hood fuse block may be checked, but are rarely the root cause.
- Replacing the display screen. The screen itself is typically just a display, while the radio module that fails to send it a signal is a separate component located behind it.
Most Likely Causes
- Shorted or Open Wire in Circuit 7066 🔴 High Probability As documented in TSB #PIT4474E, the wiring harness is susceptible to chafing and damage. On vehicles with a Rear Seat Entertainment (RSE) system (RPO U42), the most common failure point is in the headliner where the harness can rub against a metal support bracket near the DVD player. Other reported chafe points include behind the dash near radio support brackets or in the A-pillar trim.
How to confirm: Visually inspect the wiring harness for circuit 7066 (typically a Dark Green or Pink wire) for chafing or breaks, especially near the rear DVD unit or C-pillar. Alternatively, use a multimeter to test for a short to ground on the corresponding pin at the radio's main X1 connector. On many models, this is Pin 5 of the 14-pin X1 connector.
Typical fix: Repair the damaged section of the wire using a quality butt connector or by soldering and protecting it with heat shrink tubing. Reroute the wire or add protective conduit/Tesa tape to prevent future damage. After the repair, a full power-down (ignition off, driver door opened and closed, wait 5+ minutes) is required to reset the radio's internal protection circuit.
Est. part cost: $5-$15
Rare But Worth Checking
- Failed Radio Head Unit: While possible, this is much less common than the wiring issue. If the wiring for circuit 7066 tests normal (no shorts or opens) from the radio to all components, the radio's internal driver for that circuit may have failed. Some owners on forums report smacking the dash brings the display back temporarily, which can indicate a cold solder joint inside the radio itself.
- Failed Rear Video Display: In rare cases, an internal short within the rear DVD player itself could be the source of the problem. If disconnecting the rear display's harness causes the radio to start working again (after a power-cycle reset), the display unit is likely at fault.
Diagnosis Steps
- Verify the symptom: Confirm the radio screen is blank/flashing, there is no audio, and no audible chimes/turn signal clicks.
- Scan for Codes: Use a scanner capable of reading Body (B) codes to confirm B1288 is present. Note any other codes like B1265 or B1289 and any symptom bytes (e.g., '02' for short to ground).
- Consult TSB PIT4474E: This GM bulletin is the primary guide for this exact issue and confirms the likely cause is a short in circuit 7066.
- Inspect Harness (if RSE equipped): If the truck has a rear DVD player, the most likely fault location is the harness in the headliner near the unit. Partially drop the headliner to inspect for chafed or broken wires. The wire is typically Dark Green or Pink.
- Test the Circuit: Disconnect the radio's main X1 connector. Using a multimeter, check for continuity to ground on the pin for circuit 7066 (often Pin 5). If it shows continuity (a short), the wire is damaged somewhere in the vehicle.
- Isolate the Fault: If a short is found, disconnect components on that circuit one by one (e.g., unplug the rear DVD player, then the amplifier). If the short disappears after unplugging a component, the fault is in the wiring leading to that component or the component itself.
- Repair: Once the break or short is located, repair the wire securely. Protect the repair with heat shrink and/or Tesa tape to prevent future damage.
- Perform a Reset: After the repair, turn the ignition off, open and close the driver's door (to end Retained Accessory Power), and wait at least 5 minutes. This allows the radio's internal protection to reset. Start the vehicle to confirm the fix.
Parts You'll Likely Need
- Wiring Repair Supplies — The most common fix is repairing a broken wire, not replacing a major component. This requires basic electrical supplies like butt connectors, solder, and heat shrink tubing.
Trusted brands: 3M, Tesa
OEM price range: $5-$20
Aftermarket price range: $5-$20 - Radio/Navigation Head Unit
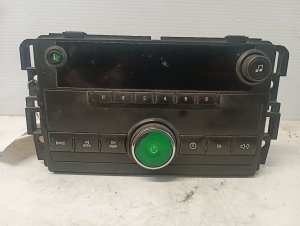
(OEM #15882766, 25797978, 25834541)— This is only needed in the rare case that the radio's internal circuitry has failed, and all wiring has been confirmed to be intact. Part numbers vary by year and options (Bose, Nav, etc.).
Trusted brands: ACDelco
OEM price range: $400-$1200
Aftermarket price range: $200-$600
Related Codes That Often Appear With This One
- B1265 — This code is also related to the entertainment system and is mentioned in the same TSB (#PIT4474E) as having the same root cause: a fault in circuit 7066.
- B1289 — Like B1265, this is another entertainment system code listed in TSB #PIT4474E, pointing to the same wiring failure in circuit 7066.
Technical Service Bulletins (TSBs) & Recalls
- PIT4474E: 'Navigation Or Radio Display Blank Or Flashing DTC B1265, B1288 Or B1289' - Identifies the cause as a shorted or open remote enable signal wire (Circuit 7066) and points to the harness near the rear DVD player as the most common problem area.
Platform-Specific Known Issues
- TSB #PIT4474E specifically calls out this issue for 2007-2011 models. It states that symptoms of a blank/flashing screen, no sound, and inoperative rear DVD with codes B1265, B1288, or B1289 are likely caused by a fault in circuit 7066 that requires repair.
- Owner Experience: A common story on forums involves the radio screen flashing intermittently at first, then going completely blank. After finding and repairing a chafed dark green or pink wire under the headliner near the C-pillar or DVD player, the radio function is restored after a power cycle.
Mechanic-Grade Diagnostic Values
- Video Display Mode Control Signal (Circuit 7066) — expected: 100 to 300 Hz Pulse Width Modulated (PWM) signal. Failure: A reading outside this frequency range, or a steady voltage/ground, indicates a fault in the circuit or the radio.
- System Voltage for DTC detection — expected: 9 to 16 Volts. Failure: The radio may not run diagnostics for this circuit if system voltage is outside this range.
Hidden / Shadow Codes Worth Checking
- B1288 01: Video Display Mode Control Signal Short to Battery. (see via Requires a professional scan tool like a GM Tech2 or GDS2 that can read manufacturer-specific body codes and symptom bytes.)
- B1288 02: Video Display Mode Control Signal Short to Ground. This is the most common failure mode. (see via Requires a professional scan tool like a GM Tech2 or GDS2 that can read manufacturer-specific body codes and symptom bytes.)
- B1288 04: Video Display Mode Control Signal Open Circuit. (see via Requires a professional scan tool like a GM Tech2 or GDS2 that can read manufacturer-specific body codes and symptom bytes.)
Scan Tool Commands That Help
- GM Tech2 / GDS2: Read Body Control Module (BCM) and Radio (Entertainment) DTCs — Used to confirm the presence of B1288 and, more importantly, to view the specific symptom byte (01, 02, or 04) to understand the nature of the fault before beginning physical inspection.
- GM Tech2 / GDS2: Clear DTCs — After the physical wiring repair is complete, the history DTC must be cleared from the radio's memory.
- GM Tech2 / GDS2: Special Functions -> VIN Relearn — This is required only if the radio head unit is replaced. The new radio must learn the vehicle's VIN to exit 'theft lock' mode and become operational.
Wiring & Ground Locations
- Radio Connector X1, Pin 6 — The main, largest connector on the back of the factory radio head unit.. This is the pin for the 'Entertainment Remote Enable Signal' (Circuit 7066). The wire color is typically White (WH). This is the origin point of the circuit that must be tested. Note: Some sources cite Pin 5, so visual verification of wire color is recommended.
- Radio Connector X1, Pin 8 — The main, largest connector on the back of the factory radio head unit.. This is the main ground for the radio unit, with a Black (BK) wire. A poor ground here can cause a wide range of erratic radio behaviors, although it is not the specific cause of a B1288 fault.
- Rear Video Display Connector, Pin 10 — The harness connector at the rear seat entertainment (RSE) video screen in the headliner.. This is the destination pin for the control circuit (Circuit 7066) on vehicles with RSE. Testing for the 100-300 Hz signal here can confirm if the signal is reaching the display.
- G2xx / G3xx Grounds — Inside the cabin, under trim panels. G2xx grounds are typically near the front seat area, while G3xx grounds are near the rear seat area.. While not the primary cause, a poor body ground in the vicinity of the radio, amplifier, or rear display could contribute to intermittent electrical issues. Knowing the general location of these grounds is useful for comprehensive diagnosis.
Model Year Variations Within This Range
- 2009+: According to TSB PIT4474E, the amplifier is NOT fed by Circuit 7066 on vehicles with RPO Y91 (Bose premium audio) or any 2009 and later Chevrolet Utility vehicles equipped with RPO STZ. On these models, the circuit still feeds the antenna module and rear video display, so the symptoms and primary wiring fault location remain the same, but the amplifier is not part of the diagnostic path for this specific circuit.
Helpful Videos
We Have This Part in Stock





The information in this article is provided for general reference and educational purposes only. Vehicle specifications, procedures, and part compatibility can vary by production date, trim level, and region. Always consult your vehicle's factory service manual and verify part numbers before purchasing or performing repairs. Safety-critical components such as airbags, seat belts, and braking systems should be installed by a qualified professional.
- Chevrolet SILVERADO:
- 🎬 Helpful Videos
- 🛍️ Shop This Part
- What's Unique About the 2007-2011 Chevrolet SILVERADO
- Diagnostic Flowchart
- Symptoms You May Notice
- Most Likely Causes
- Rare But Worth Checking
- Diagnosis Steps
- Parts You'll Likely Need
- Related Codes That Often Appear With This One
- Technical Service Bulletins (TSBs) & Recalls
- Platform-Specific Known Issues
- Mechanic-Grade Diagnostic Values
- Hidden / Shadow Codes Worth Checking
- Scan Tool Commands That Help
- Wiring & Ground Locations
- Model Year Variations Within This Range
- 🎟️ Get 5% Off