

B1265 on 2007-2014 GMC Yukon: Radio and Entertainment System Fixes
This code indicates a fault in the entertainment system's remote enable circuit, usually caused by a shorted wire. Symptoms include a blank or flashing radio/nav screen and no sound. The most common fix is repairing the dark green 'circuit 7066' wire, which is frequently found chafed and shorted to ground near the rear DVD screen or in the headliner.
- B1265 on a GMC Yukon almost always means the radio/navigation screen will be blank or flashing with no sound.
- The most probable cause is a shorted dark green wire in 'Circuit 7066', not a failed radio.
- Before replacing any expensive parts, inspect the wiring harness, especially near the rear DVD player or along the passenger A-pillar and headliner.
- This is a body electrical issue and does not affect the vehicle's ability to drive safely.
- The problem is well-documented by GM in service bulletins (PIT4474E), making diagnosis straightforward.
What's Unique About the 2007-2014 Gmc YUKON
The GMT900 platform, which includes the Yukon, Tahoe, Suburban, Silverado, and Escalade, is well-documented for this specific issue. GM issued Technical Service Bulletins (TSBs) PIT4474D and PIT4474E that directly address code B1265. The bulletins pinpoint the cause as a short to ground in the remote enable signal wire (Circuit 7066, a dark green wire), frequently occurring in the wiring harness near the rear DVD player in the headliner. This makes diagnosis more direct than on other vehicles where such a code might have vaguer causes. Owner forums corroborate this, with many users finding the chafed wire above the passenger sun visor area or along the A-pillar when a rear DVD unit isn't present.
Diagnostic Flowchart
Tap your situation to follow the diagnostic path that matches what you're seeing on this vehicle.
Symptoms You May Notice
- Radio or navigation screen is blank
- Radio or navigation screen flashes on and off, especially for the first two minutes after a reset
- No sound from the speakers
- Rear DVD screen is inoperative
- Navigation disclaimer message appears intermittently
- A 'pop' sound from the speakers when the radio attempts to turn on, followed by silence
- Replacing the radio fuse. While a good first step, the fuse is rarely the cause, as the radio often still has power but simply can't activate its accessories.
- Replacing the radio without first thoroughly checking Circuit 7066 for shorts. The wiring is the most common point of failure by a large margin.
Most Likely Causes
- Shorted Remote Enable Signal Wire (Circuit 7066) 🔴 High Probability As documented in GM TSBs PIT4474D and PIT4474E, the wiring harness, particularly near the rear DVD screen under the headliner, is prone to chafing against sharp metal frame components and shorting to the chassis ground. The wire is typically dark green.
How to confirm: Inspect the wiring harness that runs to the rear entertainment unit and the main amplifier. A common failure point is under the headliner near the DVD screen. Check for continuity to ground on the remote enable wire (dark green) at the back of the radio. A short to ground will be present when the fault occurs. Wiggling the harness in suspect areas may cause the radio to flicker, confirming the location of the short.
Typical fix: Locate the shorted section of the wire, which often shows visible damage like a cut or chafed insulation. Repair the insulation or splice in a new section of wire, and re-route or wrap it with protective tape to prevent future chafing. This is a wiring repair, not a part replacement.
Est. part cost: $0-$15 - Failed Radio/Head Unit ⚪ Low Probability While less common than the wiring issue, the internal circuitry of the radio that generates the enable signal can fail. This can sometimes be caused by a cold or cracked solder joint on the main board, or other internal component failure.
How to confirm: If the remote enable circuit wire (Circuit 7066) is confirmed to have no shorts after being disconnected from all components, the fault lies within the radio itself. A test light connected to the remote enable pin on the radio will not illuminate when the radio is turned on.
Typical fix: Replace the radio/head unit. In some cases, a skilled electronics technician can repair the internal board by re-flowing solder joints. Replacement units often require VIN programming by a dealer or specialist to function.
Est. part cost: $200-$600
Rare But Worth Checking
- Faulty Amplifier or Rear DVD Unit: A component connected to the enable circuit (like the amp or DVD player) can short internally, pulling the entire circuit down. This can be diagnosed by unplugging each component one by one to see if the radio display returns to normal. If unplugging the amplifier restores function, the amplifier is the cause of the short.
- Radio Software Anomaly: In some cases, particularly on newer platforms but relevant as a possibility, GM has issued bulletins for a false B1265 code being set with no actual symptoms. The fix in these cases is not a hardware repair but a radio software update performed by a dealer.
Diagnosis Steps
- Scan the Body Control Module (BCM) for codes B1265, B1288, or B1289.
- Confirm the symptoms: blank/flashing radio, no sound, inoperative rear DVD.
- Note that if the short exists for more than 2 minutes, the radio display will go from flashing to completely blank as the radio's internal protection engages.
- To reset the radio's protection circuit, turn the ignition off and wait at least 5 minutes for the radio to perform a full power-down. Disconnecting the battery also works.
- If the screen works temporarily after a reset, a short is highly likely. The problem will return once the short is detected again.
- Gain access to the rear of the radio and identify the remote enable wire (Circuit 7066, typically a dark green wire).
- With the radio on, use a multimeter or test light to check for voltage (should be ~12V) on this wire. If there is no voltage, the circuit is being shorted or the radio has failed.
- Disconnect the components on the circuit one by one (amplifier, rear DVD unit, antenna module). If the radio screen comes back on after unplugging a specific component, that component has an internal short.
- If disconnecting components doesn't help, the short is in the wiring harness itself. Inspect the harness for physical damage, especially under the headliner near the rear DVD screen, as specified in TSB PIT4474E. Also check the harness along the passenger A-pillar and behind the glove box.
- Repair any found damage to the wire's insulation and ensure it is routed away from sharp metal edges or secured properly.
Parts You'll Likely Need
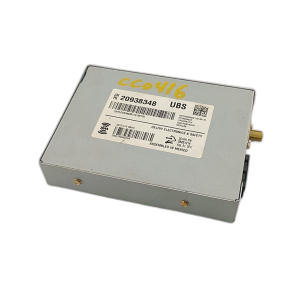
- Radio/Navigation Head Unit
(OEM #15940103, 20862567, 25894203)— This is only needed if the internal radio circuitry has failed, which is the less common cause. Most often, the issue is a wiring repair. Part numbers vary by year and options (Bose, Navigation).
Trusted brands: ACDelco (OEM)
OEM price range: $400-$800
Aftermarket price range: $200-$600 - Electrical Wire and Connectors — This is the most common fix. A small section of 18-22 AWG wire and butt connectors or solder are needed to repair the short in Circuit 7066.
OEM price range: $5-$20
Aftermarket price range: $5-$15
Related Codes That Often Appear With This One
- B1288 — This code is for 'Amplifier Control Circuit Malfunction' and is often triggered alongside B1265 because the amplifier is one of the primary components controlled by the remote enable circuit.
- B1289 — This code relates to the rear seat audio or video system and appears for the same reason as B1288; the rear entertainment unit is also on the same enable circuit.
Technical Service Bulletins (TSBs) & Recalls
- PIT4474E: 'Navigation Or Radio Display Blank Or Flashing DTC B1265, B1288 Or B1289' - Points to a shorted remote enable signal wire (Circuit 7066) as the cause, often near the rear DVD screen.
- PIT4474D: An earlier version of the same bulletin with the same diagnostic information, covering 2007-2013 models.
Platform-Specific Known Issues
- A known pattern failure involves the remote enable wire (Circuit 7066, dark green) shorting to ground in the harness located near the rear DVD display screen under the headliner, as per GM TSB PIT4474E.
- Forum users frequently report finding the chafed wire in the harness that runs up the passenger-side A-pillar and across the headliner, even on vehicles without a rear DVD system.
Mechanic-Grade Diagnostic Values
- Voltage on Circuit 7066 (Dark Green wire) at radio connector — expected: Approximately +12V when the radio is commanded on.. Failure: 0V or significantly less than 12V indicates a short to ground or an internal radio fault.
- Resistance to ground on Circuit 7066 (Dark Green wire) — expected: Open Line (O.L.) or very high resistance (Mega-ohms) when the circuit is disconnected from the radio.. Failure: Low resistance or continuity (near 0 ohms) indicates a short to ground in the harness or a connected component.
Scan Tool Commands That Help
- GM Tech2 / GDS2: Radio Output Control / Audio Amplifier Output Control — While not a direct command for B1265, a technician can use a bidirectional scan tool to attempt to command the amplifier or other audio components on/off. If the components do not respond despite the command, it helps confirm a fault in the control circuit (like 7066) or the component itself, distinguishing it from a head unit software issue.
Wiring & Ground Locations
- Radio Connector X1, Pin 5 — The main 16-pin connector at the rear of the factory radio unit.. This is the specific pin for the 'Entertainment Remote Enable' signal (Circuit 7066, Dark Green wire). All voltage and continuity tests for the circuit should start here to determine if the fault is in the radio or downstream in the wiring/components.
- G304 — At the base of the right (passenger side) 'B' pillar.. This is a major chassis ground point for components in the passenger compartment. While the radio has its own ground, wiring chafing in the B-pillar or headliner area could short Circuit 7066 to a metal structure connected to this ground.
- Radio Ground Wire — Pin 8 on the main 16-pin radio connector (X1), typically a Black wire.. A poor radio ground can cause a variety of erratic electrical issues. While not the primary cause of B1265, verifying the radio has a solid ground is a fundamental step. The ground wire connects to a chassis ground point behind the dashboard, often on a metal support bracket.
Real Owner Repair Stories
- TahoeYukonForum.com user (2007-2014 GMT900 platform vehicle) — Radio screen flashing then going blank, no audio.
❌ Tried (didn't work) Replacing the radio fuse., Resetting the radio by disconnecting the battery (symptoms returned).
✅ What actually fixed it Found the dark green wire (Circuit 7066) chafed and shorting to a metal bracket in the wiring harness that runs up the passenger A-pillar and across the headliner toward the sun visor area. The user repaired the wire's insulation with electrical tape and secured it away from the metal edge, which permanently resolved the issue.
OEM Part Supersession History
25894203→20807045, 25797978, 25834541, 25846421— Standard part evolution and minor revisions by the manufacturer.
Heads up: When replacing a radio, the replacement unit must be compatible with the vehicle's specific options (e.g., Bose amplifier UQA, Navigation U3U). A radio from a non-Bose vehicle will not work correctly in a Bose-equipped vehicle without reprogramming, as the data streams differ.
Model Year Variations Within This Range
- 2009+: Factory Bluetooth became available starting in 2009 models. This involves a different VCIM (Vehicle Communication Interface Module) and may have slight variations in radio software or wiring compared to 2007-2008 models.
- 2009+: A 6-speed transmission was introduced in 2009, which is unrelated to the radio but indicates a model year refresh point where other electronic changes may have occurred.
Helpful Videos
We Have This Part in Stock



The information in this article is provided for general reference and educational purposes only. Vehicle specifications, procedures, and part compatibility can vary by production date, trim level, and region. Always consult your vehicle's factory service manual and verify part numbers before purchasing or performing repairs. Safety-critical components such as airbags, seat belts, and braking systems should be installed by a qualified professional.
- Gmc YUKON:
- 🎬 Helpful Videos
- 🛍️ Shop This Part
- What's Unique About the 2007-2014 Gmc YUKON
- Diagnostic Flowchart
- Symptoms You May Notice
- Most Likely Causes
- Rare But Worth Checking
- Diagnosis Steps
- Parts You'll Likely Need
- Related Codes That Often Appear With This One
- Technical Service Bulletins (TSBs) & Recalls
- Platform-Specific Known Issues
- Mechanic-Grade Diagnostic Values
- Scan Tool Commands That Help
- Wiring & Ground Locations
- Real Owner Repair Stories
- OEM Part Supersession History
- Model Year Variations Within This Range
- 🎟️ Get 5% Off