

B1265 on 2007-2013 Chevrolet Avalanche: Radio Screen Blank or Flashing Fix
On a 2007-2013 Avalanche, this code almost always means the radio/navigation screen is blank or flashing due to a shorted wire. The most likely culprit is a damaged wire (circuit 7066) near the rear DVD screen in the headliner, as per GM Technical Service Bulletins. The fix is a simple wiring repair, not a new radio.
- B1265 on a 2007-2013 Avalanche or its sister trucks/SUVs means your radio/nav screen is blank or flashing because of a wiring issue, not necessarily a bad radio.
- Before buying any parts, inspect the wiring harness near the rear overhead DVD player. This is the most common failure point according to GM service bulletins.
- The fix is usually a cheap and straightforward wiring repair for someone comfortable with basic auto electrics.
- After repairing the wire, you MUST perform a 5-minute power-down reset for the radio to start working again.
- Do not replace the expensive radio head unit until you have ruled out a short in circuit 7066, or you will likely waste money and not fix the problem.
What's Unique About the 2007-2013 Chevrolet AVALANCHE
This issue is extremely common and well-documented by General Motors for the entire GMT900 truck and SUV platform, including the Avalanche, Silverado, Sierra, Tahoe, and Escalade. GM released multiple Technical Service Bulletins (TSBs) that pinpoint the cause to a specific wire, circuit 7066, shorting out. The most common failure point is where the harness runs near the rear DVD player, making it a predictable and diagnosable problem, unlike generic radio failures on other vehicles.
Diagnostic Flowchart
Tap your situation to follow the diagnostic path that matches what you're seeing on this vehicle.
Symptoms You May Notice
- Radio or navigation screen is completely blank
- Radio or navigation screen flashes on and off (often for about 2 minutes before going blank)
- No sound from any speakers
- Rear DVD screen is inoperative
- The navigation disclaimer message may appear intermittently
- Instrument cluster may display 'Audio Off'
- Replacing the radio/navigation head unit without first inspecting the wiring for circuit 7066. The TSBs strongly indicate the problem is usually the wiring, and a new radio will exhibit the same symptoms if the shorted wire is not repaired.
Most Likely Causes
- Shorted Entertainment Remote Enable Circuit (7066) 🔴 High Probability As documented in GM TSBs PIT4474D and PIT4474E, the wiring harness is prone to chafing and shorting to ground near the rear DVD display screen located in the headliner. The wire can get pinched or rub against the metal support bracket for the DVD player.
How to confirm: Visually inspect the wiring harness for damage where it runs near the rear entertainment screen's mounting hardware under the headliner. The wire for circuit 7066 is the primary suspect, though color can vary. With the radio connector unplugged, use a multimeter set to continuity to test between the circuit 7066 pin and a clean chassis ground. Any continuity confirms a short.
Typical fix: Repair the damaged section of the wire using solder and heat shrink tubing. Re-route the repaired wire away from any sharp metal edges to prevent a recurrence. After the repair, a full power-down reset is required: leave the key off with retained accessory power (RAP) off for at least 5 minutes to allow the radio to re-enable the circuit.
Est. part cost: $1-$10 - Faulty Radio/Head Unit ⚪ Low Probability
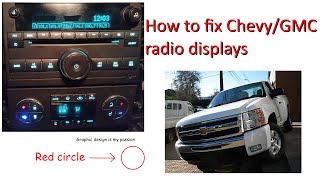
How to confirm: If circuit 7066 is inspected and tests normal with no shorts, and all related fuses are good, the internal circuitry of the radio itself may have failed. This is confirmed by exclusion after verifying the wiring is intact. Note that the 'radio' is the silver module behind the screen 🎬 See this walkthrough on how to access and fix the display., not the screen assembly itself.
Typical fix: Replace the radio head unit (the module behind the screen). This often requires programming by a dealer or qualified shop to work with the vehicle's VIN.
Est. part cost: $200-$800 - Blown Fuse ⚪ Low Probability
How to confirm: Check the vehicle's fuse boxes (both in the cabin and under the hood) for fuses labeled for the radio ('RAIDO'), amplifier ('AMP'), or entertainment system. Visually inspect the fuse or test with a multimeter.
Typical fix: Replace the blown fuse with a new one of the exact same amperage. If the new fuse blows immediately, it confirms a persistent short circuit exists that must be found.
Est. part cost: $1-$5
Diagnosis Steps
- Verify the symptoms: Confirm the radio/nav screen is blank or flashing and there is no audio.
- Scan for DTCs: Use an OBD-II scanner capable of reading body codes to confirm B1265 is present, likely along with B1288 or B1289.
- Check Fuses: Inspect the fuses for the radio and amplifier in the interior and under-hood fuse panels.
- Access Wiring: Carefully lower the rear portion of the headliner to access the wiring harness for the rear DVD screen (if equipped). This is the most common trouble spot.
- Inspect Circuit 7066: Locate the wire for circuit 7066 in the harness. Per TSB PIT4474D, this is the most common failure point. Look for signs of chafing, pinching, or bare wire touching the vehicle's metal chassis or the sharp edges of the DVD player bracket.
- Test the Circuit: If no visual damage is found, disconnect the main radio connector (requires removing dash trim 🎬 Watch: A quick guide to fixing a frozen or black screen. and the 7mm bolts holding the radio unit). Use a multimeter to test for continuity to ground on the entertainment remote enable circuit pin. If continuity to ground exists, a short is confirmed.
- Repair Wire: If a short is found, cut out the damaged section of wire, splice in a new piece using solder and heat-shrink tubing, and carefully re-route or protect it with loom/tape to prevent future damage.
- Reset the System: CRITICAL STEP - After the repair, the radio requires a full power-down to reset its internal protection. Turn the ignition off, open and close the driver's door to disable Retained Accessory Power (RAP), and let the vehicle sit undisturbed for at least 5 minutes.
- Verify Repair: Turn the ignition on and check if the radio and screen now function correctly. Clear all DTCs.
Parts You'll Likely Need
- Wiring Repair Supplies
(OEM #N/A)— The most common fix is repairing a shorted wire, which requires basic electrical supplies like wire, solder, and heat shrink.
Trusted brands: 3M
OEM price range: $1-$15
Aftermarket price range: $1-$15 - Radio Head Unit (Module) — In the rare case that the wiring is intact, the radio's internal driver for the enable circuit has failed and the unit must be replaced. This is the silver box behind the screen, not the screen itself.
Trusted brands: ACDelco
OEM price range: $400-$800
Aftermarket price range: $200-$500
Related Codes That Often Appear With This One
- B1288 — This code is also related to the entertainment system and is often triggered by the same short circuit on circuit 7066, as noted in TSB PIT4474E.
- B1289 — Like B1288, this code is frequently stored alongside B1265 due to the same wiring fault in the entertainment enable circuit, as documented in TSB PIT4474E.
Technical Service Bulletins (TSBs) & Recalls
- PIT4474E: Supersedes previous versions and expands the model years. Notes that a blank/flashing radio screen with DTCs B1265, B1288, or B1289 requires inspection and repair of circuit 7066. It lists all affected GMT900 platform vehicles.
- PIT4474D: Specifies that the cause for a blank/flashing radio with code B1265 is often circuit 7066 shorting to ground, most commonly near the rear DVD screen. Details the 5-minute power-down reset procedure.
Platform-Specific Known Issues
- A known issue, documented in TSB PIT4474D and PIT4474E, involves the entertainment remote enable signal wire (Circuit 7066) shorting to ground. The most common location for this short is in the wiring harness near the rear DVD display screen under the headliner.
- The failure progression is often a flashing screen for approximately 2 minutes, after which the radio's internal protection trips and the screen goes completely blank.
Mechanic-Grade Diagnostic Values
- Entertainment Remote Enable Circuit (7066) Voltage — expected: Discrete 12V signal when the radio is commanded ON.. Failure: 0V (short to ground) or voltage present when radio is OFF (short to voltage). The DTC will set if the fault is detected for more than 250 milliseconds.
Hidden / Shadow Codes Worth Checking
- B1265 01: Switched 14 Volt Performance Short to Battery. The radio has detected a short to voltage on the entertainment remote enable circuit. (see via A professional scan tool capable of reading GM-specific body codes and symptom codes, such as a Tech 2 or GDS2.)
- B1265 02: Switched 14 Volt Performance Short to Ground. The radio has detected a short to ground on the entertainment remote enable circuit. This is the most common variant for this platform. (see via A professional scan tool capable of reading GM-specific body codes and symptom codes, such as a Tech 2 or GDS2.)
Scan Tool Commands That Help
- SPS (Service Programming System): Radio Reprogramming — In rare cases, particularly on other GM models, DTC B1265 has been caused by an incorrect factory software calibration. If the wiring (Circuit 7066) and all connected components (Amp, RSE) have been verified to be free of shorts, reprogramming the radio with the latest calibration could be a final diagnostic step before replacing the radio module.
Wiring & Ground Locations
- Circuit 7066 Path — Originates at the main radio connector, then routes to the Amplifier (typically in the center console), the rear video display (in the headliner), and the antenna module.. This is the circuit that sets the code. A short to ground anywhere along this path will cause the B1265 DTC and associated symptoms. The most common chafe point is in the headliner near the rear DVD screen bracket.
- G104 / G105 — G104 is on the left rear of the engine block; G105 is on the lower left front of the engine block on some model years.. While not a direct cause of the short in Circuit 7066, these are major engine-to-chassis grounds. Verifying they are clean and tight is a best practice for resolving any unusual electrical issue, ensuring stable system voltage for all modules, including the radio.
OEM Part Supersession History
Various (e.g., 15868808, 25799567)→25941137 (Common replacement for later years)— Revisions and consolidation of part numbers over the production run.
Heads up: A critical distinction exists between the early-style 'metal chassis' radios and the later 'plastic chassis' radios, which appeared around 2010. They are not interchangeable. A vehicle originally equipped with a metal chassis radio must use a metal chassis replacement, and vice-versa.20918429, 20934592→25941137— Part number updates.
Heads up: These part numbers are generally associated with the later plastic chassis radios.
Model Year Variations Within This Range
- 2007-2009 vs 2010-2013: The physical construction of the radio module changed around the 2010 model year from a 'metal chassis' design to a 'plastic chassis' design. The two types are not interchangeable, making it critical to source the correct type of radio if a replacement is needed.
Helpful Videos
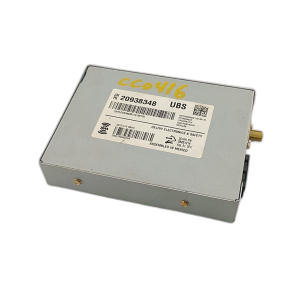
We Have This Part in Stock




The information in this article is provided for general reference and educational purposes only. Vehicle specifications, procedures, and part compatibility can vary by production date, trim level, and region. Always consult your vehicle's factory service manual and verify part numbers before purchasing or performing repairs. Safety-critical components such as airbags, seat belts, and braking systems should be installed by a qualified professional.
- Chevrolet AVALANCHE:
- 🎬 Helpful Videos
- 🛍️ Shop This Part
- What's Unique About the 2007-2013 Chevrolet AVALANCHE
- Diagnostic Flowchart
- Symptoms You May Notice
- Most Likely Causes
- Diagnosis Steps
- Parts You'll Likely Need
- Related Codes That Often Appear With This One
- Technical Service Bulletins (TSBs) & Recalls
- Platform-Specific Known Issues
- Mechanic-Grade Diagnostic Values
- Hidden / Shadow Codes Worth Checking
- Scan Tool Commands That Help
- Wiring & Ground Locations
- OEM Part Supersession History
- Model Year Variations Within This Range
- 🎟️ Get 5% Off