

B1008 on 2015-2020 GMC Yukon XL: Service Front Camera & Lane Assist Fixes
On a 2015-2020 GMC Yukon XL, code B1008 almost always means the front camera for the driver-assist systems cannot calibrate. The most common cause is an aftermarket windshield that misaligns the camera. Before replacing parts, verify the windshield is a genuine GM part and that the camera's view is unobstructed. This is not a DIY fix due to the need for professional ADAS calibration tools.
- B1008 on a 2015-2020 Yukon XL is an ADAS camera calibration failure, not usually a broken part.
- The number one cause is a recently replaced, non-OEM (aftermarket) windshield. Check for the 'GM' logo on the glass before attempting any other repairs.
- Do not replace the front camera module unless you have definitively ruled out the windshield, obstructions, and mounting issues.
- A fix requires professional-level tools to perform a specific ADAS calibration procedure after the root cause is corrected.
What's Unique About the 2015-2020 Gmc YUKON XL
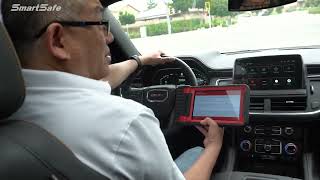
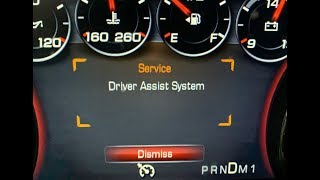
The K2XX platform, which includes the 2015-2020 Yukon XL, is highly sensitive to windshield replacements. GM issued multiple Technical Service Bulletins (TSBs) and an official position statement because the ADAS camera system requires the specific optical quality and precise bracket placement found only on OEM windshields. Many aftermarket windshields have improperly manufactured camera brackets that cause the camera to see the vehicle's hood, which makes successful calibration impossible and triggers the B1008 code. 🎬 Watch: Troubleshooting common service driver assist messages and codes. Factory windshields use alignment pins to ensure correct placement, a feature often missing on aftermarket glass.
Diagnostic Flowchart
Tap your situation to follow the diagnostic path that matches what you're seeing on this vehicle.
Symptoms You May Notice
- "Service Front Camera" message on the instrument panel.
- "Service Lane Departure Warning" message.
- "Service Lane Keep Assist" message.
- "Service Driver Assist" message.
- Lane Departure Warning and Lane Keep Assist features are disabled.
- Forward Collision Alert is inoperative.
- Indicator lights for affected safety systems may be illuminated.
- Replacing the Front View Camera Module when the root cause is a non-OEM windshield. TSBs specifically warn against this.
- Assuming a new windshield is the only problem. One owner on a forum replaced their aftermarket windshield with an OEM one for $750, only to find the camera and another sensor were also faulty, though the dealer's diagnosis was suspect.
Most Likely Causes
- Aftermarket or Improperly Installed Windshield 🔴 High Probability The camera bracket on non-OEM windshields is often misaligned, preventing the camera from seeing the road correctly and making calibration impossible. GM TSBs PIT5535B, C, and E all point to this as the primary cause.
How to confirm: Check for the "GM" logo in the corner of the windshield glass. If the logo is missing, the windshield is aftermarket. Also, inspect the installation quality: the gap between the top of the windshield and the roof sheet metal should be 3.6 mm (+/- 1 mm), and the glass should be sub-flush with the roofline, not proud of it.
Typical fix: Replacement of the aftermarket windshield with a genuine GM OEM part, followed by professional camera calibration. One owner on the TahoeYukonForum reported a cost of over $750 for the OEM windshield alone.
Est. part cost: $700-$1200 for an OEM windshield. - Front Camera View Obstruction 🟡 Medium Probability Anything on the windshield can block the camera's view and prevent it from seeing lane markings or other required calibration targets.
How to confirm: Visually inspect the area of the windshield in front of the camera module (near the rearview mirror) for dirt, mud, snow, stickers, debris, or a poorly placed tint strip.
Typical fix: Clean the inside and outside of the windshield thoroughly. TSB PIT6473C outlines a specific procedure using 70% isopropyl alcohol and lint-free wipes.
Est. part cost: $0 - Improperly Mounted Camera Module ⚪ Low Probability If the camera was recently disturbed for another repair or during a windshield replacement, it may not have been re-seated correctly in its bracket.
How to confirm: Visually inspect the front camera module to ensure it is fully seated and secured in its mounting bracket on the windshield. The TSB shows diagrams of how it should clip in.
Typical fix: Reseat the camera module correctly in its bracket, followed by a calibration procedure.
Est. part cost: $0 - Faulty Front View Camera Module ⚪ Low Probability While less common than windshield issues, the internal electronics of the camera can fail.
How to confirm: This is diagnosed by exclusion. If the windshield is confirmed OEM, the view is clear, the mounting is secure, and the calibration procedure still fails, the module itself is likely the cause. TSB PIT5535 explicitly warns not to replace the module if B1008 Sym 4B is the only code present.
Typical fix: Replace the Front View Camera Module, followed by SPS programming and the ADAS calibration procedure.
Est. part cost: $170-$250 for an OEM module.
Rare But Worth Checking
- Yaw Rate Sensor Issue: TSB PIT5535E suggests that if no other cause is found, a yaw sensor relearn should be performed using a GM scan tool, indicating a rare but possible link to the vehicle's stability control system inputs.
- Internal Camera Lens/Windshield Contamination: TSB PIT6473E describes how smears, dust, or lint on the inside of the windshield or on the camera lens itself can degrade performance and potentially cause faults. It recommends a specific cleaning procedure with isopropyl alcohol and lint-free wipes as a diagnostic step.
Diagnosis Steps
- Scan the vehicle with a high-quality scanner to confirm the presence of B1008 and check for the '4B' symptom byte.
- Thoroughly clean the windshield, both inside and out, in the area of the front camera. Consider using the procedure from TSB PIT6473 (isopropyl alcohol and lint-free wipes).
- Inspect for any obstructions like aftermarket hood deflectors, stickers, or tint strips blocking the camera's view.
- Verify the windshield is a genuine GM part by looking for the 'GM' logo in the lower corner. If it is aftermarket, this is the most likely cause.
- If the windshield is OEM, inspect its installation. Ensure the gap to the roof is correct (3.6 mm +/- 1 mm) and that the glass is not sitting proud of the roofline.
- Check that the camera module is securely clipped into its bracket on the windshield.
- If all physical checks pass, attempt a front camera calibration using a GM GDS2 scan tool or equivalent professional equipment. This is a professional-level job.
- If calibration fails with a confirmed OEM windshield and no obstructions, suspect a faulty camera module.
Parts You'll Likely Need
- OEM Windshield — This is the most common fix. The optical quality and precise bracket placement of the OEM glass are required for the ADAS camera to calibrate successfully. Part number varies based on options like Head-Up Display (HUD) and rain sensor; always verify with VIN.
Trusted brands: GM Genuine Parts
OEM price range: $700-$1200
Aftermarket price range: $300-$700 - Front View Camera Module
(OEM #23335318, 23264148)— This part is only replaced if it is confirmed to be faulty after all other causes (especially the windshield) have been ruled out. Part numbers can change; always verify with a VIN.
Trusted brands: ACDelco, GM Genuine Parts
OEM price range: $170-$250
Aftermarket price range: $100-$180
Related Codes That Often Appear With This One
- B1008 Sym 4B — The symptom byte '4B' specifically means 'Calibration Not Learned' and is the most common variant of this code, confirming the issue is a calibration failure.
- B395D — This code for 'Camera Misaligned' may be set along with B1008 when the physical alignment of the camera is the root cause of the calibration failure.
Technical Service Bulletins (TSBs) & Recalls
- PIT5535E: Service Front Camera, Service Lane Departure Warning, and Service Lane Keep Assist Message with DTC B1008 Sym 4B. Instructs to check for aftermarket windshields or obstructions before replacing parts.
- PIT6473C/E: Details a specific cleaning procedure for the camera lens and inside of the windshield using isopropyl alcohol to resolve performance issues that could lead to faults.
Platform-Specific Known Issues
- Technical Service Bulletin PIT5535E directly addresses code B1008 Sym 4B on this vehicle. It instructs technicians to NOT replace the Front View Camera Module if this is the only code set. Instead, it directs them to inspect for aftermarket windshields, improper windshield installation (gap > 3.6mm +/- 1mm), or obstructions blocking the camera's view.
- The TSB notes that some aftermarket windshields cause the camera to see the vehicle's hood, which it interprets as a fault and prevents the calibration from completing.
- A real-world owner experience on TahoeYukonForum.com highlights the diagnostic challenge: a dealer blamed a non-OEM windshield, the owner paid over $750 for an OEM replacement, but the problem persisted. The dealer then found the camera and a distance sensor were the actual culprits and replaced them under warranty as a 'courtesy,' suggesting that even with an OEM windshield, other component failures can occur.
Hidden / Shadow Codes Worth Checking
- U026A / U216A: These codes can be set when the Front Camera Module (FCM) becomes unresponsive due to a software anomaly. (see via A professional scan tool like the GM GDS2. TSB 22-NA-046 indicates the fix is to reprogram the module, not replace it.)
- VPM Fail Counters: Not a DTC, but a set of internal counters in the Video Processing Module (VPM) that track specific failure types (e.g., signal loss, resets). These provide more granular diagnostic data than a simple DTC. (see via In GDS2, navigate to: Module Diagnostics > K157 Video Processing Module > Video Processing Module Internal Status.)
Scan Tool Commands That Help
- GDS2: Front View Camera Learn — This is the primary function required after replacing the camera module or windshield to teach the camera its position and the road ahead. It is a multi-step process that may require SPS programming first.
- GDS2: Cancel Camera Learn — This function is found in the same menu as the learn procedure and can be used to reset the learning process. The path is
Module Diagnostics > Frontview Camera Module > Configuration/Reset Functions. - GDS2: Yaw Rate Sensor Recalibration — TSB PIT5535E recommends performing this if B1008 persists after checking the windshield and camera mounting. An incorrect yaw rate input can cause the camera to fail calibration. The path is
EBCM > special functions > Yaw Rate Sensor Recalibration.
Wiring & Ground Locations
- G218 — Behind the driver's side dash panel, near the A-pillar.. This is a major body ground for the Body Control Module (BCM). While not exclusive to the camera, a poor connection here can cause widespread communication issues between modules, potentially interrupting the camera's ability to communicate or calibrate properly.
- X51R Right Instrument Panel Fuse Block — In the right side of the instrument panel.. TSB information regarding a parasitic drain from the camera module instructs technicians to pull fuse F11DR from this block to power cycle the module as a diagnostic step.
Real Owner Repair Stories
- TahoeYukonForum.com user 'UsualSuspect' (2024 GMC Sierra 1500 (newer platform, but identical ADAS issue)) — Lane departure chiming randomly, adaptive cruise control disengaging or not engaging.
❌ Tried (didn't work) Initial diagnosis by dealer pointed to the aftermarket (Safelite) windshield.
✅ What actually fixed it The owner first replaced the aftermarket windshield with an OEM one for over $750, but the issue was not resolved. The dealer then found the front camera and a separate 'Distance Sensor' were also faulty. They replaced these parts under warranty as a 'courtesy,' resolving the problem. This highlights that the issue can be more complex than just the windshield.
"I Checked Everything" — The Actual Cause
- A known issue documented in TSB 23-NA-095 is the front camera module causing a parasitic battery drain due to a software flaw that prevents it from entering sleep mode. A technician might chase a wiring short or replace a good battery, when the actual root cause is a software bug in the camera module that requires a dealer reprogram, not a hardware replacement.
When the Usual Fixes Don't Work
- While an aftermarket windshield is the most common cause, it is not the only cause, and replacing it is not a guaranteed fix. A documented case on a GM truck forum showed an owner who replaced an aftermarket windshield with an expensive OEM one, only to find the problem persisted. The final repair required replacing both the camera module and a separate distance sensor, which the dealer did under warranty. This proves that compound failures can occur, and a simple windshield swap may not be sufficient.
OEM Part Supersession History
23264148, 23335317, 23495137→84237650— Standard part evolution and potential internal revisions by the manufacturer.
Heads up: Using a part number from the wrong year range, even if it physically fits, may lead to communication or feature errors. Always verify the correct, latest part number with the vehicle's VIN.
Model Year Variations Within This Range
- 2015-2020: While the core issue is consistent across the generation, the specific part number for the Front View Camera Module has been superseded multiple times. For example, early models (2015-2016) used P/N 23264148, which was later replaced by 84237650. This indicates internal hardware or software revisions that may not be backward-compatible without programming. Always confirm the part number via VIN.
Helpful Videos
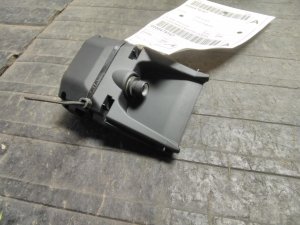
Used OEM Parts in Stock


New Aftermarket Parts Available



The information in this article is provided for general reference and educational purposes only. Vehicle specifications, procedures, and part compatibility can vary by production date, trim level, and region. Always consult your vehicle's factory service manual and verify part numbers before purchasing or performing repairs. Safety-critical components such as airbags, seat belts, and braking systems should be installed by a qualified professional.
- Gmc YUKON XL:
- 🎬 Helpful Videos
- 🛍️ Shop This Part
- What's Unique About the 2015-2020 Gmc YUKON XL
- Diagnostic Flowchart
- Symptoms You May Notice
- Most Likely Causes
- Rare But Worth Checking
- Diagnosis Steps
- Parts You'll Likely Need
- Related Codes That Often Appear With This One
- Technical Service Bulletins (TSBs) & Recalls
- Platform-Specific Known Issues
- Hidden / Shadow Codes Worth Checking
- Scan Tool Commands That Help
- Wiring & Ground Locations
- Real Owner Repair Stories
- "I Checked Everything" — The Actual Cause
- When the Usual Fixes Don't Work
- OEM Part Supersession History
- Model Year Variations Within This Range
- 🎟️ Get 5% Off