

B1008 on 2017 GMC Sierra: Front Camera and Lane Assist Faults Explained
On a 2017 GMC Sierra, code B1008 almost always means the front camera for the driver-assist systems has failed to calibrate. This is most often caused by a recent windshield replacement with a non-OEM (aftermarket) part. Before replacing any parts, check if the windshield is genuine GM glass and ensure the camera's view is completely clean.
- B1008 Sym 4B means 'Calibration Not Learned' for the front camera.
- The number one cause is an aftermarket windshield that misaligns the camera.
- Always check for a 'GM' logo on the windshield glass before attempting any other repair.
- Do NOT replace the front camera module unless you have definitively ruled out the windshield, obstructions, and mounting issues.
- Any fix, whether it's a new windshield or camera, will require a professional ADAS calibration with specialized tools.
What's Unique About the 2017-2017 Gmc SIERRA
The 2017 GMC Sierra is part of the K2XX platform, which heavily integrated ADAS features tied to the windshield-mounted camera. This system is extremely sensitive to the optical quality and precise camera bracket placement found on genuine GM windshields. GM issued multiple Technical Service Bulletins (TSBs) because aftermarket glass brackets are often misaligned, causing the camera to see the truck's hood or an incorrect view of the road, which it interprets as a fault and prevents calibration. TSBs include images taken with engineering tools that visually confirm an aftermarket windshield can cause the camera to see the hood, while a factory windshield provides a clear view. This makes verifying the windshield's authenticity a mandatory first step in diagnosis for this platform.
Diagnostic Flowchart
Tap your situation to follow the diagnostic path that matches what you're seeing on this vehicle.
Symptoms You May Notice
- "Service Front Camera" message on the driver information center (DIC)
- "Service Lane Departure Warning" message on the DIC
- "Service Lane Keep Assist" message on the DIC
- "Service Driver Assist" message on the DIC
- Lane Keep Assist (LKA) and Lane Departure Warning (LDW) features are inoperative
- Forward Collision Alert (FCA) is disabled
- Automatic High Beams may be inoperative
- The Lane Keep Assist indicator light may be white or amber instead of green
- In rare cases, a dead battery due to a parasitic drain from the camera module not entering sleep mode
- Replacing the Front Camera Module. This is the most common misdiagnosis. TSBs strongly advise against replacing the camera until all other possibilities, especially the windshield, have been ruled out.
Most Likely Causes
- Aftermarket or Improperly Installed Windshield 🔴 High Probability As documented in multiple GM Technical Service Bulletins (PIT5535B, C, and E), the camera brackets on aftermarket windshields are often misaligned. Most aftermarket windshields also lack the factory alignment/locating pins, making a correct installation more difficult and prone to error. This misalignment can cause the camera to see the vehicle's hood, which prevents the calibration from completing.
How to confirm: Check for the 'GM' logo in the corner of the windshield glass; its absence confirms it is an aftermarket part. Also, inspect the gap between the top of the windshield and the roof, which should be 3.6 mm (+/- 1 mm). A larger or inconsistent gap, or the glass being proud of (not flush with) the roofline, indicates improper installation.
Typical fix: Replace the aftermarket windshield with a genuine GM OEM part, followed by a professional ADAS camera calibration.
Est. part cost: $500-$1200 - Obstructed Camera View 🟡 Medium Probability
How to confirm: Visually inspect the area of the windshield directly in front of the camera module (behind the rearview mirror). Look for dirt, mud, snow, ice, stickers, window tint, or even a bug deflector on the hood that could be in the camera's line of sight.
Typical fix: Thoroughly clean the windshield. Remove any obstructions. TSB PIT6473C recommends a specific procedure using 70% isopropyl alcohol and lint-free wipes on both the lens and the glass.
Est. part cost: $0 - Camera Calibration Required 🟡 Medium Probability Calibration can be lost or required after a windshield replacement, collision repair, suspension work, or even disconnecting the camera. The B1008 Sym 4B code specifically means the calibration has not been learned. GM has explicitly stated that calibration is required whenever the windshield or camera is replaced or reinstalled.
How to confirm: This is confirmed using a professional scan tool like the GM GDS2. If the code B1008 Sym 4B is present, a calibration is needed.
Typical fix: Perform a 'Front View Camera Module Calibration' using a professional scan tool. This is typically a dynamic (on-road) procedure that requires driving on well-marked roads at speeds between 35-56 MPH. The labor cost for calibration alone typically ranges from $250 to $600.
Est. part cost: $0 (Labor cost only) - Improperly Mounted Camera ⚪ Low Probability
How to confirm: Remove the plastic trim behind the rearview mirror and verify the camera module is fully seated and secured in its bracket on the windshield pins, as shown in diagrams in TSB PIT5535E. A user on Chevrolet Forum reported their camera fell out entirely after a botched windshield replacement.
Typical fix: Reseat the camera module correctly in its bracket.
Est. part cost: $0 - Failed Front Camera Module ⚪ Low Probability TSBs explicitly warn technicians NOT to replace the camera module if B1008 Sym 4B is the only code, as the cause is almost always external to the module itself.
How to confirm: This is a diagnosis of exclusion. If the windshield is OEM, the view is clear, the mounting is secure, and the calibration procedure repeatedly fails even after attempting software updates, the module itself may be faulty.
Typical fix: Replace the Front Camera Module, followed by SPS programming and calibration by a dealer or qualified shop.
Est. part cost: $250-$450
Rare But Worth Checking
- Software Glitch Causing Parasitic Drain: TSB 23-NA-095 describes a software fault where the camera module fails to enter sleep mode, causing a dead battery along with the service messages. This can sometimes be triggered by an OnStar task. The fix is a software update (reprogramming the FCM) is the specified fix, not hardware replacement.
- Yaw Sensor Issue: TSB PIT5535E mentions that before suspecting the camera system, a technician should verify there are no yaw sensor issues and perform a yaw sensor relearn using GDS2 if necessary. An issue with the yaw rate sensor could potentially interfere with the camera's dynamic calibration process.
Diagnosis Steps
- Read the trouble codes with a professional-grade scanner to confirm B1008 and check for the '4B' symptom byte, which indicates a calibration failure.
- Thoroughly clean the windshield area in front of the camera, both inside and out.
- Inspect the windshield for a genuine 'GM' logo to rule out an aftermarket replacement.
- If the windshield is aftermarket, replacing it with an OEM part is the most likely fix.
- If the windshield is OEM, inspect the installation quality. Check that the gap between the top of the windshield and the roof is 3.6 mm (+/- 1 mm) and that the glass is flush with the roofline.
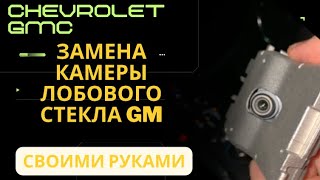
- Inspect the camera module to ensure it is securely mounted in its bracket and fully seated on the windshield pins. 🎬 Watch: See how to properly seat and replace the camera module.
- Check for any available software updates for the Front Camera Module, especially if a parasitic battery drain is also a symptom (related to TSB 23-NA-095).
- Attempt a dynamic camera calibration using a GM-specific scan tool (GDS2) or equivalent, following the official service procedure.
- If calibration fails and all other steps have been verified, suspect a faulty Front Camera Module.
Parts You'll Likely Need
- OEM Windshield — This is the most common fix. Aftermarket windshields often have misaligned camera brackets that prevent successful ADAS calibration, triggering code B1008.
Trusted brands: GM Genuine
OEM price range: $600-$1200
Aftermarket price range: $300-$700 - Front View Camera Module
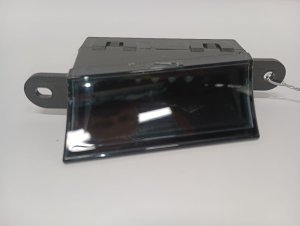
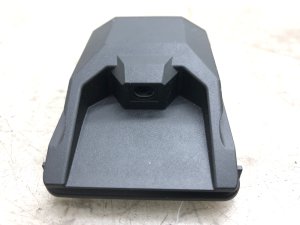
(OEM #23366913)— This part is only replaced after all other causes (windshield, obstruction, mounting, calibration) have been ruled out. The original part may be superseded by a newer number like 84517633; always verify with the vehicle's VIN.
Trusted brands: ACDelco, GM Genuine Parts
OEM price range: $250-$450
Aftermarket price range: $150-$300
Related Codes That Often Appear With This One
- U3000 with symptom bytes 44, 49, 54, or 57 may be set in the Front View Camera Module in conjunction with a parasitic battery drain, as described in TSB 23-NA-095.
Technical Service Bulletins (TSBs) & Recalls
- PIT5535E: Service Front Camera, Service Lane Departure Warning, and Service Lane Keep Assist Message... may
Platform-Specific Known Issues
- Per GM TSB PIT5535E, this platform is highly sensitive to aftermarket windshields, which may lack the proper alignment pins and optical clarity, causing the B1008 code to set and calibration to fail. The TSB even includes engineering diagrams showing how an aftermarket windshield can cause the camera to see the truck's hood, which prevents the 'learn' procedure from completing.
Mechanic-Grade Diagnostic Values
- Front View Camera Module (K36) Power Supply Voltage — expected: 11 to 14 V with ignition on. Failure: Below 11V or 0V indicates a wiring or fuse issue.
- Front View Camera Module (K36) Ground Circuit Resistance — expected: Below 5.0 Ω to a known good chassis ground. Failure: High resistance or OL (Open Line) indicates a poor ground connection.
- Object Detection CAN Bus Resistance at DLC — expected: Approximately 60 Ω between Pin 3 and Pin 11. Failure: 120 Ω indicates an open circuit; ~0 Ω indicates a short between the bus lines.
Hidden / Shadow Codes Worth Checking
- B1008 Sym 4B: This is the primary symptom byte, meaning 'Calibration Not Learned'. It confirms the issue is a failure of the dynamic learn procedure, not a general hardware fault. (see via GM GDS2 or equivalent professional-grade scan tool.)
Scan Tool Commands That Help
- GDS2: Front View Camera Module Learn — This is the primary dynamic calibration procedure required after replacing the camera or windshield, or if the B1008 4B code is set. It requires driving on well-marked roads at speeds between 35-56 mph.
- GDS2: Cancel Camera Learn — Used to reset a failed or stuck learn procedure before attempting a new calibration. If this command fails with a 'Conditions Not Met' error, it may indicate a faulty camera module.
- GDS2: Extended Camera Relearn Procedure — Detailed in TSB 23-NA-095, this is used when the standard dynamic calibration repeatedly fails (e.g., gets stuck). It involves specific steps like covering the camera and letting the vehicle sleep for over 30 minutes before re-attempting.
- GDS2: Yaw Sensor Relearn — As an edge-case diagnostic step recommended by TSB PIT5535, this should be performed if B1008 4B persists after verifying the windshield and camera mounting, as corrupt yaw rate data can interfere with calibration.
Wiring & Ground Locations
- K36 Front View Camera Module Connector — At the camera module, behind the plastic trim of the interior rearview mirror.. This is the primary connection point for the camera. Pin 6 is typically the power supply (12V+ ignition) and Pin 7 is the ground. Verifying power and ground here is a key electrical diagnostic step.
- G218 — On the driver's side at the base of the A-pillar, behind the kick panel or dash insulator mat.. This is a critical ground for the Body Control Module (BCM). TSB PIT5405C notes that a poor connection at G218 can cause a wide range of electrical issues and communication DTCs, which could potentially interfere with camera module operation. Technicians should ensure the ground eyelet is not trapped by the insulator mat.
- Object Detection CAN Bus — Pins 3 and 11 on the Data Link Connector (DLC) under the driver's side dashboard.. This is the specific communication bus for the front camera and other ADAS sensors. It is separate from the main high-speed CAN bus on pins 6 and 14. Diagnostic issues can arise from a faulty tool or problems on this specific bus.
Real Owner Repair Stories
- Go-Parts analysis of a 2019 GMC Yukon (same K2XX platform) (2019 GMC Yukon) — Code B1008:4B was present, and ADAS calibration would not complete after a component was removed/reinstalled.
❌ Tried (didn't work) Attempting calibration with an Autel MaxiSys Ultra scan tool., Attempting a 'cancel camera learn' function with the OEM GDS2 software, which resulted in a 'conditions not met' error.
✅ What actually fixed it The front camera module (FCM) was determined to be faulty. The module was replaced, followed by SPS programming and a successful dynamic calibration.
When the Usual Fixes Don't Work
- While an aftermarket windshield is the most common cause, it is not the only one. In a documented case on a similar platform, a technician followed all TSBs regarding the windshield and mounting, but calibration repeatedly failed. The 'Cancel Camera Learn' command on the GDS2 scan tool also failed, pointing to an internal module fault. Replacing the Front Camera Module, followed by programming and calibration, ultimately resolved the B1008 Sym 4B code. This confirms that while rare, the camera module itself can be the root cause.
OEM Part Supersession History
23366913→84517633— Standard part revision and update by the manufacturer.
Heads up: The new part number (84517633) is the correct service replacement for the original. Always verify the correct part number with the vehicle's VIN before ordering.
Helpful Videos
Used OEM Parts in Stock



New Aftermarket Parts Available




The information in this article is provided for general reference and educational purposes only. Vehicle specifications, procedures, and part compatibility can vary by production date, trim level, and region. Always consult your vehicle's factory service manual and verify part numbers before purchasing or performing repairs. Safety-critical components such as airbags, seat belts, and braking systems should be installed by a qualified professional.
- Gmc SIERRA:
- 🎬 Helpful Videos
- 🛍️ Shop This Part
- What's Unique About the 2017-2017 Gmc SIERRA
- Diagnostic Flowchart
- Symptoms You May Notice
- Most Likely Causes
- Rare But Worth Checking
- Diagnosis Steps
- Parts You'll Likely Need
- Related Codes That Often Appear With This One
- Technical Service Bulletins (TSBs) & Recalls
- Platform-Specific Known Issues
- Mechanic-Grade Diagnostic Values
- Hidden / Shadow Codes Worth Checking
- Scan Tool Commands That Help
- Wiring & Ground Locations
- Real Owner Repair Stories
- When the Usual Fixes Don't Work
- OEM Part Supersession History
- 🎟️ Get 5% Off