

B1008 on 2014-2018 GMC Sierra 1500: Front Camera & Lane Assist Fault Guide
On a 2014-2018 GMC Sierra, code B1008 almost always means the front camera for the driver-assist systems has a problem, most often caused by an aftermarket windshield. The fix usually requires installing a genuine GM windshield and recalibrating the camera, which is a job for a professional.
- B1008 on a 2014-2018 Sierra is a specific code for the front driver-assist camera, most often with symptom byte 4B indicating a 'Calibration Not Learned' status.
- Before replacing any parts, you MUST verify the windshield is a genuine GM part (look for the 'GM' logo). An aftermarket windshield is the most common cause of this code.
- Do not replace the camera module if B1008 is the only code. The problem is far more likely to be the windshield, an obstruction, or improper mounting.
- This is not a DIY repair. The fix requires a professional scan tool (GDS2) to perform a specific on-road calibration procedure after the physical repair is complete.
What's Unique About the 2014-2018 Gmc SIERRA 1500

The 2014-2018 Sierra (and its K2XX platform mates like the Silverado, Tahoe, and Yukon) integrated advanced safety features that rely on a forward-facing camera. GM has issued multiple Technical Service Bulletins (TSBs) for these trucks, warning that code B1008 is 🎬 Watch: Troubleshooting code B1008 on a GMC Yukon frequently caused by non-OEM (aftermarket) windshields that prevent the camera from calibrating correctly. The precise alignment of the camera bracket on the windshield is critical, and many aftermarket windshields do not meet the required specifications, causing the camera to see a portion of the truck's hood and fail the calibration procedure.
Diagnostic Flowchart
Tap your situation to follow the diagnostic path that matches what you're seeing on this vehicle.
Symptoms You May Notice
- "Service Front Camera" message on the instrument cluster.
- "Service Lane Departure Warning" message
- "Service Lane Keep Assist" message
- "Service Driver Assist" message on the Driver Information Center (DIC).
- Lane Keep Assist (LKA) system is inoperative; icon on dash stays white and does not turn green.
- Lane Departure Warning (LDW) system is inoperative
- IntelliBeam (automatic high beams) may not function correctly.
- Forward Collision Alert is disabled.
- In some cases, a parasitic battery drain leading to a dead battery (related to TSB 23-NA-095).
- Replacing the front camera module without first verifying the windshield is a genuine GM part. TSBs specifically warn against this, as an aftermarket windshield is the most common cause.
Most Likely Causes

- Aftermarket or Improperly Installed Windshield 🔴 High Probability The camera bracket on non-OEM windshields is often misaligned, causing the camera to see part of the truck's hood, which prevents calibration. GM TSBs PIT5535E and PIT5535B directly cite this as a primary cause. Many aftermarket windshields also lack the alignment/locating pins used by the factory, making correct installation more difficult.
How to confirm: Check for the 'GM' logo in the corner of the windshield glass. If it's missing, the windshield is aftermarket. Also, inspect the gap between the top of the windshield and the roof; it should be 3.6 mm (+/- 1 mm) according to TSB PIT5535E.
Typical fix: Replace the aftermarket windshield with a genuine GM (OEM) part and perform ADAS camera calibration.
Est. part cost: $500-$1200 - Front Camera View Obstructed 🟡 Medium Probability Dirt, snow, ice, stickers, or even large bug deflectors can block the camera's line of sight, preventing it from seeing the road properly and completing calibration.
How to confirm: Visually inspect the area of the windshield in front of the camera (behind the rearview mirror) for any dirt, debris, cracks, or other obstructions. TSBs specifically mention this as a key diagnostic step.
Typical fix: Clean the windshield thoroughly. Remove any stickers or objects that may be blocking the camera's view.
Est. part cost: $0 - Improperly Mounted Camera Module ⚪ Low Probability If the camera module is not fully seated in its bracket on the windshield, it will be misaligned and unable to calibrate. This can happen after a minor accident or if the rearview mirror assembly is disturbed. TSB PIT5535E instructs technicians to verify the camera bracket is fully seated on the windshield pins.
How to confirm: Remove the plastic cover behind the rearview mirror and verify the camera module is securely clipped into its mounting bracket and the bracket is secure on the glass.
Typical fix: Reseat the camera module correctly in its bracket. If the bracket is damaged, it may need replacement.
Est. part cost: $0-$50 - Failed Front Camera Module ⚪ Low Probability While less common than windshield or obstruction issues, the camera module itself can fail electronically. This can be an internal short or a hardware failure that prevents it from running the calibration software.
How to confirm: After confirming the windshield is OEM, the view is clear, and the camera is mounted correctly, a diagnostic scan tool (like the dealer's GDS2) is needed to test the module. If calibration fails repeatedly with a 'conditions not met' error even with OEM software, the module is suspect.
Typical fix: Replace the front camera module and perform the ADAS calibration procedure.
Est. part cost: $170-$250
Rare But Worth Checking
- Software Anomaly Causing Parasitic Drain:
- Vehicle Ride Height Changed:
Diagnosis Steps
- Read the trouble codes with a professional scan tool to confirm B1008 and symptom byte 4B ('Calibration Not Learned').
- Thoroughly clean the exterior and interior of the windshield in front of the camera module, as per TSB guidelines.
- Inspect the area for any obstructions like stickers, phone mounts, tint strips, or cracks in the glass.
- Verify if the windshield is a genuine GM part by looking for the 'GM' logo in the corner.
- If an aftermarket windshield is installed, it is the most probable cause. Replacement with an OEM windshield is the recommended next step before replacing any parts.
- If the windshield is OEM, inspect the camera to ensure it is securely mounted in its bracket and the bracket is fully seated on the windshield pins.
- Using a compatible scan tool (GM GDS2 is the factory tool), attempt the 'Front View Camera Module Calibration' procedure. This is typically an on-road driving procedure that requires specific conditions (clear lane markings, specific speeds) to be met.
- If calibration fails and all other steps have been checked, suspect a faulty camera module. A case study on a K2XX platform vehicle showed that even when all external factors were correct, a faulty module prevented calibration. Replacement requires programming and calibration.
Parts You'll Likely Need

- OEM Windshield — The most common cause of B1008 is an aftermarket windshield with an improperly positioned camera bracket, which prevents successful calibration.
Trusted brands: GM Genuine Parts
OEM price range: $500-$1200
Aftermarket price range: $300-$700 - Front View Camera Module
(OEM #84304790, 84304792, 84421057)— If the windshield is OEM and confirmed to be installed correctly, and the camera still fails to calibrate, the module itself may have failed. Multiple part numbers exist, so matching to the vehicle's VIN is critical.
Trusted brands: ACDelco, GM Genuine Parts
OEM price range: $170-$250
Aftermarket price range: $100-$180
Related Codes That Often Appear With This One
- U023A: Lost Communication With Front View Camera Module
- U026A: Lost Communication With Video Processing Module 'A'
- U3000 with symptom 44, 49, 54, or 57: These can be set in the Front View Camera Module in relation to software issues or parasitic drain.
Technical Service Bulletins (TSBs) & Recalls
- PIT5535E: Service Front Camera, Service Lane Departure Warning, and Service Lane Keep Assist Message with DTC B1008 Sym 4B.
- PIT5535C: An earlier version of the TSB with the same guidance.
- PIT5535B: Warns not to replace the camera module if B1008 Sym 4B is the only code and details how aftermarket windshields cause the issue.
- 23-NA-095: Addresses a parasitic battery drain caused by a software flaw in the front camera module, which can be a related symptom.
Platform-Specific Known Issues
- GM Technical Service Bulletin PIT5535E explicitly states that for a B1008 Sym 4B code, technicians should check for an aftermarket windshield or obstructions before replacing any parts. It details how to check for proper windshield installation, including a 3.6 mm (+/- 1 mm) gap to the roofline.
- TSB PIT5535B warns not to replace the front view camera if B1008 Sym 4B is the only code set, detailing how aftermarket windshields can cause the camera's view to be blocked by the hood, which is not visible to a technician's scan tool but prevents calibration.
- TSB 23-NA-095, while for newer models, highlights a related software issue where the camera module can cause a parasitic battery drain. This indicates the sensitivity of the module's software.
Hidden / Shadow Codes Worth Checking
- B1008 Sym 4B: Indicates 'Calibration Not Learned'. This is the most common symptom byte associated with this DTC and points directly to a failure in the dynamic calibration process. (see via A professional scan tool like the GM GDS2 is required to view symptom bytes.)
Scan Tool Commands That Help

- GM GDS2: Front View Camera Module Calibration — This function initiates the dynamic (on-road) learn procedure required after replacing the windshield, the camera module, or if the module has lost its calibration for any reason. The tool puts the module into learn mode before the drive.
- GM GDS2: Front View Camera Module Programming and Setup — This is a Service Programming System (SPS) function required when a new Front View Camera Module is installed. The module must be programmed with the correct software and vehicle configuration before the calibration/learn procedure can be performed.
- GM GDS2: Clear DTCs — Used after a repair attempt to clear the B1008 code. If the code returns immediately or after a drive cycle, it indicates the root cause has not been resolved.
Wiring & Ground Locations
- K115 — The Front View Camera Module itself, mounted to the windshield behind the rearview mirror.. This is the module setting the code. All power, ground, and data lines terminate here. Physical mounting and connection integrity are critical.
- G303 — On the lower left 'B' pillar, behind the trim panel in extended/crew cab models.. Body grounds like G303 are crucial for the proper function of various modules within the cabin. While not a direct ground for the camera, poor body grounds can introduce electrical noise and voltage issues that affect sensitive modules.
- Engine Block to Firewall/Chassis Ground Strap — A braided strap typically running from the rear of the engine block/cylinder head to a stud on the firewall.. This is a primary ground path for the entire vehicle's electrical system. Corrosion or breakage of this strap can cause widespread, difficult-to-diagnose electrical issues, including problems with sensitive electronic modules that may not have a dedicated fault.
Real Owner Repair Stories
- Autel Consultant Case Study (2019 GMC Yukon) — B1008:4B code present, front view camera would not exit 'Learn Mode' after multiple calibration attempts.
❌ Tried (didn't work) Attempting to calibrate the module using an Autel MaxiSys Ultra scan tool., Clearing codes and re-initiating the learn procedure multiple times.
✅ What actually fixed it The Front View Camera Module itself was faulty and had to be replaced. After installing a new module and programming it, the calibration completed successfully. OEM service information suggested that if a flash program doesn't fix the issue, the module should be replaced.
OEM Part Supersession History
84304790, 84304792→84421057, 84505299, 85659299— Standard part evolution and updates by the manufacturer.
Heads up: Part numbers are specific to vehicle options (e.g., with/without forward collision warning). Always verify the correct part number using the vehicle's VIN. Using a part from a vehicle with different options may cause it to not program or function correctly.
Model Year Variations Within This Range
- 2014-2018: All vehicles from 2014 onward require the GDS2 scan tool for diagnostics, as older tools like the Tech2/Tech2Win are not supported. GM also updated its policy around 2017 to officially require camera calibration after any windshield replacement, whereas previously it was not explicitly mandated.
Helpful Videos
Used OEM Parts in Stock


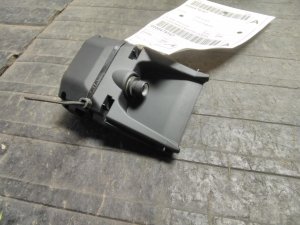


New Aftermarket Parts Available




The information in this article is provided for general reference and educational purposes only. Vehicle specifications, procedures, and part compatibility can vary by production date, trim level, and region. Always consult your vehicle's factory service manual and verify part numbers before purchasing or performing repairs. Safety-critical components such as airbags, seat belts, and braking systems should be installed by a qualified professional.
- Gmc SIERRA 1500:
- 🎬 Helpful Videos
- 🛍️ Shop This Part
- What's Unique About the 2014-2018 Gmc SIERRA 1500
- Diagnostic Flowchart
- Symptoms You May Notice
- Most Likely Causes
- Rare But Worth Checking
- Diagnosis Steps
- Parts You'll Likely Need
- Related Codes That Often Appear With This One
- Technical Service Bulletins (TSBs) & Recalls
- Platform-Specific Known Issues
- Hidden / Shadow Codes Worth Checking
- Scan Tool Commands That Help
- Wiring & Ground Locations
- Real Owner Repair Stories
- OEM Part Supersession History
- Model Year Variations Within This Range
- 🎟️ Get 5% Off