

B1008 on 2015-2020 Chevrolet Tahoe: Front Camera & Lane Assist Fault Guide
On a 2015-2020 Tahoe, code B1008 almost always means the front camera for the driver-assist systems has a problem, often caused by an aftermarket windshield. The fix usually requires installing a GM-branded windshield and recalibrating the camera, which is a job for a professional.
- B1008 on a 2015-2020 Tahoe is a specific code for the front driver-assist camera, not a generic fault.
- Before replacing any parts, check if the windshield is a genuine GM part. An aftermarket windshield is the most likely cause of this code.
- Do not replace the camera module if the only code is B1008, as the problem is likely the windshield or an obstruction.
- This is not a DIY repair. Any fix involving the camera or windshield requires professional ADAS calibration, which can cost between $250 and $600.
What's Unique About the 2015-2020 Chevrolet TAHOE

The K2XX platform, which includes the 2015-2020 Tahoe, has a driver-assist system that is highly sensitive to the optical quality and precise bracket placement of the windshield. GM has issued multiple Technical Service Bulletins (TSBs) warning technicians that B1008 is frequently caused by non-OEM (aftermarket) windshields that prevent the camera from calibrating correctly, even if the camera itself is perfectly fine. TSBs explain that aftermarket windshield brackets can be misaligned, causing the camera to see the vehicle's hood, which prevents the calibration from completing. [1, PIT5535E] This makes windshield replacement a primary point of failure for this system.
Diagnostic Flowchart

Tap your situation to follow the diagnostic path that matches what you're seeing on this vehicle.
Symptoms You May Notice
- "Service Front Camera" message on the driver information center.
- "Service Lane Departure Warning" or "Service Lane Keep Assist" message. [1, PIT5535E, PIT5535C]
- "Service Driver Assist" message on the DIC.
- Lane Keep Assist (LKA) and Lane Departure Warning (LDW) systems are inoperative.
- Forward Collision Alert (FCA) is disabled.
- In some cases, a faulty camera module can cause a parasitic battery drain, leading to a dead battery, as noted in TSB 23-NA-095.
- Replacing the Front View Camera Module when the actual fault is an aftermarket windshield. TSBs specifically warn against this, as it will not solve the problem and is a waste of money.
Most Likely Causes

- Aftermarket or Improperly Installed Windshield 🔴 High Probability GM TSBs PIT5535E and PIT5535C directly state that aftermarket windshields often have improperly placed camera brackets, which can partially block the camera's view of the road (sometimes seeing the hood) and prevent calibration. [1, PIT5535E, PIT5535C] TSBs also note that improper installation, like leaving too much old urethane or not seating the glass on its alignment pins, can cause misalignment.
How to confirm: Inspect the corner of the windshield for a "GM" logo. If the logo is missing, the windshield is aftermarket. The TSBs explicitly advise checking this before replacing any parts. [1, PIT5535E, PIT5535C] Also inspect the gap between the top of the windshield and the roof; it should be 3.6 mm (+/- 1 mm).
Typical fix: Replace the aftermarket windshield with a genuine GM (OEM) windshield, followed by a professional ADAS calibration.
Est. part cost: $500-$1200 - Front Camera View Obstruction 🟡 Medium Probability The system is designed to disable itself if its vision is compromised for safety reasons.
How to confirm: Visually inspect the windshield area in front of the camera (near the rearview mirror) for dirt, debris, snow, ice, stickers, or a poorly placed tint strip. TSB PIT6473C provides a detailed procedure for cleaning the inside and outside of the glass and the camera lens itself with 70% isopropyl alcohol and lint-free wipes to eliminate any residue.
Typical fix: Clean the windshield thoroughly. The system should return to normal function once the obstruction is removed.
Est. part cost: $0 - Faulty Front Camera Module ⚪ Low Probability While less common than windshield issues, the camera module can fail electronically. Some TSBs also point to software glitches that can make a good camera unresponsive or cause a battery drain. A technician in a forum noted a case where both the camera and HUD failed due to bad circuits, costing ~$1700 to repair.
How to confirm: If the windshield is OEM, the view is clear, and the camera is securely mounted, a diagnostic scan tool can be used to check for communication with the module. If the module is unresponsive or fails internal tests after attempting a software update, it is likely faulty.
Typical fix: A dealer should first attempt to reprogram the Front Camera Module with the latest software per TSB 23-NA-095, which can fix parasitic drain and inoperability issues. If reprogramming fails, replace the Front View Camera Module and perform the required programming and calibration.
Est. part cost: $170-$250 - Loose Camera Mounting or Damaged Bracket ⚪ Low Probability The camera bracket is bonded to the windshield. A poor bond or physical damage can cause misalignment. The camera itself also clips into this bracket and can become loose.
How to confirm: Physically inspect the camera to ensure it is securely clipped into its bracket and that the bracket is firmly attached to the windshield. One owner on a forum resolved a "Service Front Camera" message simply by pushing on the plastic cover around the camera until it clicked back into place.
Typical fix: Secure the camera in its bracket. If the bracket itself is loose from the glass, the windshield typically needs to be replaced.
Est. part cost: $0-$1200
Rare But Worth Checking
- Wiring Harness Damage: In rare cases, the wiring or connector to the Front View Camera Module can become damaged or corroded, causing a loss of communication. TSB PIT5700C mentions checking for opens or damage in the wiring.
- Yaw Sensor Issue: TSB PIT5535E and its predecessors suggest verifying there are no yaw sensor issues and performing a yaw sensor relearn with GDS2 as a diagnostic step before focusing on the windshield.
Diagnosis Steps
- Read the trouble codes with a professional scan tool to confirm B1008 and the specific symptom byte (e.g., 4B).
- Thoroughly clean the exterior and interior of the windshield in front of the camera module, per TSB guidelines.
- Inspect the interior for any obstructions like stickers, phone mounts, or tint strips blocking the camera's view.
- Check the windshield for a 'GM' logo, typically in one of the lower corners, to determine if it is factory original or aftermarket. [1, PIT5535E, PIT5535C]
- If the windshield is aftermarket, this is the most probable cause. The recommended fix is replacement with an OEM windshield.
- If the windshield is OEM, inspect the camera to ensure it is securely mounted in its bracket and that the plastic trim is fully seated.
- If all physical checks pass, the issue may be a software glitch, a faulty camera module, or a wiring problem. A dealer or qualified shop should check for available software updates first, especially TSB 23-NA-095 for parasitic drain or unresponsiveness.
- A technician may attempt an 'Extended Camera Relearn Procedure' outlined in TSB 23-NA-095, which involves covering the camera, letting the vehicle sleep, and following a specific sequence to force a successful learn.
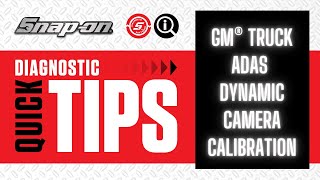
- Any replacement of the camera or windshield requires a dynamic ADAS calibration procedure using a GM-specific scan tool (GDS2) to complete the repair.
Parts You'll Likely Need
- OEM Windshield — The most common cause of B1008 is an aftermarket windshield with an improperly positioned camera bracket, which prevents successful calibration.
Trusted brands: GM Genuine Parts
OEM price range: $500-$1200
Aftermarket price range: $300-$700 - Front View Camera Module
(OEM #23335318, 23264148)— If the windshield is OEM and the camera is confirmed to be faulty or unresponsive after software updates have been attempted, it will need to be replaced.
Trusted brands: ACDelco, GM Genuine Parts
OEM price range: $170-$250
Aftermarket price range: $100-$180
Related Codes That Often Appear With This One
- U026A — This code indicates 'Lost Communication With Front View Camera Module' and may appear if the camera has failed completely or has a wiring issue.
- U3000 — TSB 23-NA-095, which addresses the parasitic drain issue, notes that DTC U3000 with various symptom bytes (44, 49, 54, 57) may be set in the Front View Camera Module.
Technical Service Bulletins (TSBs) & Recalls
- PIT5535E: Service Front Camera, Service Lane Departure Warning, and Service Lane Keep Assist Message with DTC B1008 Sym 4B, often due to an aftermarket windshield. [PIT5535E, 1]
- PIT5535C: An earlier version of the bulletin with the same guidance for code B1008 Sym 4B. [PIT5535C]
- 23-NA-095: Addresses a parasitic battery drain and inoperative camera caused by a software glitch that can be fixed by reprogramming the module.
- PIT5700C
Platform-Specific Known Issues
- GM Technical Service Bulletin PIT5535E directly addresses B1008 Sym 4B on this vehicle, pointing to aftermarket windshields as a primary cause of calibration failure. The TSB explains that the camera may see the hood, preventing the learn procedure from completing. [1, PIT5535E]
- GM TSB 23-NA-095 notes that a software flaw, sometimes triggered by an OnStar task, can cause the front camera module to stay active when the vehicle is off, leading to a parasitic battery drain. The fix is a software update.
Hidden / Shadow Codes Worth Checking
- B1008 Sym 4B: Indicates the front view camera module has determined it is improperly mounted or its view is blocked, preventing calibration. This is the most common symptom byte for this DTC. (see via Professional scan tool like GM's GDS2 or high-end aftermarket scanners (e.g., Autel).)
- U3000 Sym 44, 49, 54, or 57: These codes may be set in the Front View Camera Module in conjunction with a parasitic battery drain or inoperability issue, as described in TSB 23-NA-095. (see via GM GDS2 Scan Tool during diagnosis for related issues.)
Scan Tool Commands That Help
- GDS2: Front View Camera Module Calibration / Learn — This procedure is mandatory after replacing the front camera module or the windshield to allow the camera to learn its position and the road ahead. Failure to perform this will result in B1008 setting.
- GDS2: Extended Camera Relearn Procedure — Use when a standard camera relearn fails to complete (e.g., gets stuck at 94%). The procedure involves covering the camera, letting the vehicle sleep for over 30 minutes, uncovering, clearing DTCs, running the learn (which may still show 'No'), then power cycling the module by unplugging it while the vehicle sleeps again. This is a technician-level procedure for stubborn modules.
- GDS2: Yaw Sensor Relearn — As a preliminary diagnostic step recommended by TSB PIT5535B, before extensive windshield or camera diagnosis, to ensure the yaw sensor is not contributing to the system fault.
- Autel MaxiSys / GDS2: Cancel Camera Learn — If the module appears to be stuck in a 'learn mode' and will not accept a new calibration. This function attempts to reset the learning status. If it fails with a 'Conditions Not Met' error, it can indicate a hardware fault within the module itself.
Wiring & Ground Locations
- Left I/P Junction Block — Located under the plastic cover to the left of the driver's foot brake pedal.. On some GM trucks of this era, camera power and signal wires can be accessed at this junction block. For example, the factory camera 12v power wire may be found in a specific pin of the white 'X11' plug. This provides a known location to begin testing for power and ground issues without having to remove the headliner or A-pillar trim first.
- Front Camera Connector Pins — At the camera module connector behind the rearview mirror.. On related GM vehicles, the camera video positive and negative wires are often found in pins 6 and 7 of the mirror/camera connector. These wires are sometimes wrapped in blue foil tape further up the harness. Knowing these pin locations allows a technician to test for a signal directly at the source.
Real Owner Repair Stories
- YouTube Case Study by Autel Consultant (2019 GMC Yukon (K2XX Platform, same as Tahoe)) — DTC B1008:4B was present after a minor accident where the rearview mirror was dislocated. The ADAS systems were inoperative.
❌ Tried (didn't work) Attempting to calibrate the front camera using an Autel Maxisys Ultra scan tool; the procedure failed with a 'conditions not met' error., Attempting to perform the calibration/reset function using the official GM GDS2 diagnostic software; this also failed to complete.
✅ What actually fixed it The front camera module itself was determined to be internally faulty. Replacing the front camera module and then performing the required programming and calibration resolved the code and restored function. This was the final step suggested by OEM service information when software and calibration attempts fail.
OEM Part Supersession History
23264148→84237650— Standard part evolution for design improvements or manufacturer changes.
Heads up: Part number 84237650 is listed as a direct replacement for 23264148, 23335317, and 23495137, indicating compatibility for the intended applications. However, any replacement requires SPS programming and GDS2 calibration.23335318→Unknown— This part number is specifically listed for the 2015 model year. It may have been superseded by a later number in the chain, but direct evidence is not present.
Model Year Variations Within This Range
- 2015-2018: Earlier models in this range, especially in lower LS trims, were less likely to be equipped with the full ADAS suite (Lane Keep Assist, Forward Collision Alert) that uses the front camera. These features became more common on LT and Premier trims from 2016 onwards.
- 2019-2020: The optional 6.2L V8 engine paired with a 10-speed automatic transmission became available starting in 2019. While not directly related to the camera, vehicles with higher-end options like the 6.2L engine were more likely to also have the ADAS packages that include the front camera.
Helpful Videos
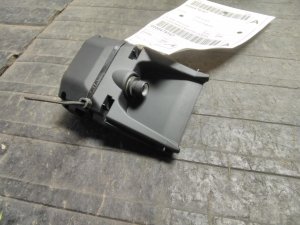
Used OEM Parts in Stock


New Aftermarket Parts Available



The information in this article is provided for general reference and educational purposes only. Vehicle specifications, procedures, and part compatibility can vary by production date, trim level, and region. Always consult your vehicle's factory service manual and verify part numbers before purchasing or performing repairs. Safety-critical components such as airbags, seat belts, and braking systems should be installed by a qualified professional.
- Chevrolet TAHOE:
- 🎬 Helpful Videos
- 🛍️ Shop This Part
- What's Unique About the 2015-2020 Chevrolet TAHOE
- Diagnostic Flowchart
- Symptoms You May Notice
- Most Likely Causes
- Rare But Worth Checking
- Diagnosis Steps
- Parts You'll Likely Need
- Related Codes That Often Appear With This One
- Technical Service Bulletins (TSBs) & Recalls
- Platform-Specific Known Issues
- Hidden / Shadow Codes Worth Checking
- Scan Tool Commands That Help
- Wiring & Ground Locations
- Real Owner Repair Stories
- OEM Part Supersession History
- Model Year Variations Within This Range
- 🎟️ Get 5% Off