

B1008 on 2014-2018 Chevrolet Silverado 1500: Front Camera and Lane Assist Faults Explained
On a 2014-2018 Silverado 1500, code B1008 almost always means the front camera for driver-assist systems can't calibrate. The most common cause is an aftermarket windshield. Before replacing parts, verify the windshield is a genuine GM part and that the camera's view is unobstructed. A professional ADAS recalibration is required for the fix.
- B1008 on a 2014-2018 Silverado means the front ADAS camera has failed to calibrate, disabling features like Lane Keep Assist.
- Before authorizing any expensive repairs, check if your windshield has the official 'GM' logo. A non-GM (aftermarket) windshield is the #1 cause of this code.
- Do not replace the camera module unless a professional has ruled out the windshield, obstructions, and mounting issues.
- Any fix, including windshield replacement, requires a professional ADAS camera recalibration with specialized tools.
- The truck is safe to drive, but be aware that important driver assistance safety features will not be active.
What's Unique About the 2014-2018 Chevrolet SILVERADO 1500
For this generation of Silverado (K2XX platform), the integration of ADAS features made windshield replacement a much more complex task than on older trucks. The front camera system is extremely sensitive to the optical quality of the glass and the precise placement of the camera mounting bracket. General Motors has issued multiple Technical Service Bulletins (TSBs) warning that aftermarket windshields are a primary cause of code B1008. TSBs explain that their brackets can be misaligned, causing the camera to see the truck's hood and fail its calibration check. Notably, TSBs clarify that this view of the hood can only be seen using special engineering tools, not with the standard GDS2 scan tool found at dealerships, making diagnosis tricky.
Diagnostic Flowchart
Tap your situation to follow the diagnostic path that matches what you're seeing on this vehicle.
Symptoms You May Notice
- "Service Front Camera" message on the instrument cluster
- "Service Lane Departure Warning" message
- "Service Lane Keep Assist" message
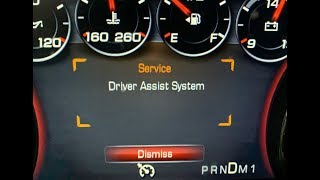
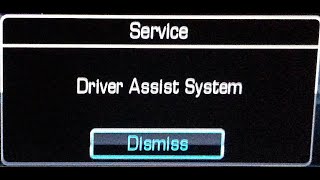
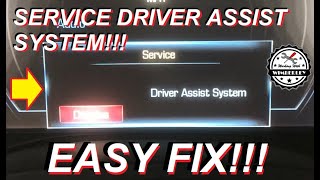
- "Service Driver Assist" message
- Lane Departure Warning system is inoperative
- Lane Keep Assist function is inoperative
- Forward Collision Alert system is inoperative 🎬 Watch: A quick guide to troubleshooting the haptic seat system.
- Adaptive Cruise Control may be inoperative or unavailable.
- IntelliBeam (automatic high beams) may not function correctly 🎬 Watch: See how these driver assist messages appear on the dash.
- Replacing the Front Camera Module when the actual fault is with an aftermarket windshield or a need for recalibration. This is a costly mistake, as the new module will also fail to calibrate. TSBs explicitly warn against this.
Most Likely Causes
- Aftermarket or Improperly Installed Windshield 🔴 High Probability GM TSBs PIT5535E and PIT5535C directly state that aftermarket windshields often have improperly positioned camera mounting brackets. These non-OEM windshields may lack the factory alignment pins, making correct placement difficult.
How to confirm: Inspect the lower corner of the windshield (typically the passenger side) for a 'GM' logo; if missing, the windshield is aftermarket. Additionally, TSB PIT5535E advises checking the gap between the top of the windshield and the roof sheet metal; it should be 3.6 mm (+/- 1 mm). An incorrect gap indicates improper installation.
Typical fix: Replacement of the aftermarket windshield with a genuine GM OEM part, followed by professional ADAS camera calibration.
Est. part cost: $800-$1500 - Front Camera Module Requires Recalibration 🔴 High Probability The system requires recalibration after a windshield replacement, if the camera is disturbed, or sometimes due to software glitches. The B1008-4B code specifically means 'Calibration Not Learned'.
How to confirm: This must be confirmed with a professional scan tool (like the GM GDS2) that can read the ADAS module status and attempt a calibration.
Typical fix: Perform the Front View Camera Module dynamic calibration procedure. This involves a technician using a scan tool while driving the vehicle on well-marked roads (typically between 35-56 mph) until the learn process completes.
Est. part cost: $0 - Obstructed Camera View 🟡 Medium Probability Anything on the windshield can block the camera's view and prevent it from seeing the lane markings necessary for calibration and operation.
How to confirm: Visually inspect the area of the windshield directly in front of the camera module for dirt, debris, stickers, cracks, or poorly installed tint strips. Owners have also reported issues caused by toll transponders (like an EZ-Pass) mounted too close to the camera or internal condensation/fogging on the glass in that area.
Typical fix: Clean the windshield thoroughly or remove any obstructions. Relocate any transponders away from the camera area. Use the defroster with A/C to clear internal moisture. If the windshield is damaged, it must be replaced.
Est. part cost: $0 - Improperly Mounted Camera Module ⚪ Low Probability If the camera is not fully seated in its bracket on the windshield, it will be misaligned and cannot calibrate. This can happen after a jarring impact or during a sloppy windshield replacement.
How to confirm: A technician can remove the trim around the rearview mirror and physically inspect if the camera module is loose or not clipped securely into its mounting bracket on the windshield pins.
Typical fix: Reseat the camera module correctly in its bracket and perform a recalibration.
Est. part cost: $0
Rare But Worth Checking
- Faulty Front Camera Module: While possible, TSBs strongly advise against replacing the camera module until all other causes have been definitively ruled out. In some cases, a failed module may not respond to scan tool commands or may have an internal software fault that prevents calibration even with a correct windshield. A case study on a similar GM platform confirmed a faulty module was the ultimate cause after all other steps failed.
- Wiring or Connector Issue: Damage to the wiring harness or connector for the camera module, especially after a windshield replacement, can cause a loss of communication or power, setting this code.
- Software Fault Causing Parasitic Drain: TSB 23-NA-095 describes a condition where a software glitch in the front camera module can cause it to stay awake, leading to a dead battery. This issue can also cause ADAS features to become unavailable and may be accompanied by DTC U3000. The fix is a software update performed by a dealer, not a hardware replacement.
Diagnosis Steps
- Read the trouble codes with a professional-grade scan tool to confirm B1008 with symptom byte 4B ('Calibration Not Learned').
- Crucial First Step: Heed the warning in TSB PIT5535B: "Do NOT replace the Front View Camera Module if it is only setting DTC B1008 SYM4B."
- Thoroughly inspect the windshield area in front of the camera for any obstructions like dirt, stickers, tint strips, toll transponders, or damage.
- Verify if the windshield is a genuine GM part by looking for the 'GM' logo in the corner. If it is an aftermarket windshield, this is the most likely cause.
- If the windshield is OEM, inspect the installation quality. Check the gap between the top of the windshield and the roof; it should be 3.6 mm (+/- 1 mm).
- Inspect the camera to ensure it is securely mounted in its bracket and fully seated on the windshield pins.
- If all physical inspections pass, the next step is to attempt a dynamic camera calibration using a GM-compatible scan tool (GDS2). This requires driving on well-marked roads at speeds generally between 35-56 mph.
- If calibration fails and all other causes are ruled out, check for any related TSBs regarding software updates, such as TSB 23-NA-095 for parasitic drain issues.
- As a final step, diagnose the camera module and its wiring. If the module is found to be faulty, it will need to be replaced, programmed (SPS), and then calibrated.
Parts You'll Likely Need
- OEM Windshield — This is the most common fix. Aftermarket windshields often have misaligned camera brackets that prevent successful ADAS calibration, triggering code B1008.
Trusted brands: GM Genuine
OEM price range: $800-$1500
Aftermarket price range: $400-$800 - Front View Camera Module
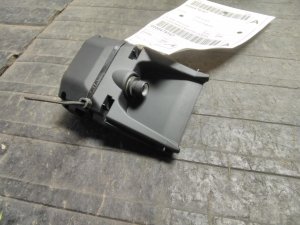
(OEM #84517633 (supersedes 23366913))— This part is replaced only as a last resort after all other causes (windshield, obstruction, calibration, software) have been ruled out. Part numbers are year/model specific and often superseded, so always verify with a VIN.
Trusted brands: ACDelco
OEM price range: $200-$400
Aftermarket price range: $150-$300
Related Codes That Often Appear With This One
- U3000 (with symptom bytes 44, 49, 54, or 57): May be set in the Front View Camera Module in conjunction with a parasitic battery drain or inoperability issue, as described in TSB 23-NA-095.
Technical Service Bulletins (TSBs) & Recalls
- PIT5535E: Service Front Camera, Service Lane Departure Warning, and Service Lane Keep Assist Message with DTC B1008 Sym 4B.
- PIT5535C: An earlier version of the bulletin with the same guidance.
- PIT5535B: An even earlier version that explicitly states 'Do NOT replace the Front View Camera Module if it is only setting DTC B1008 SYM4B'.
- 23-NA-095: Addresses a software fault in the front camera module that can cause a dead battery and may be accompanied by DTC U3000.
Platform-Specific Known Issues
- Technical Service Bulletin PIT5535E explicitly warns technicians to check for aftermarket windshields and camera obstructions as the primary cause for B1008 Sym 4B before replacing any parts.
- TSBs explain that the mounting bracket on non-OEM glass can be misaligned because they often lack the alignment/locating pins used on factory windshields.
- Improper windshield installation can be identified by measuring the gap between the top of the windshield and the roof sheet metal (spec: 3.6 mm +/- 1 mm) or checking if the glass sits proud of (higher than) the roofline.
Hidden / Shadow Codes Worth Checking
- B1008 Sym 4B: The symptom byte '4B' specifically means 'Calibration Not Learned'. This confirms the issue is a failure of the dynamic learn procedure, not a simple circuit or hardware fault. A generic scanner might only show B1008. (see via A professional-grade scan tool like the GM GDS2 is required to view the two-character symptom byte.)
Scan Tool Commands That Help
- GDS2: Front View Camera Module Calibration — This is the primary dynamic (on-road) learn procedure required after any repair affecting the camera, such as windshield replacement, camera replacement, or correcting a mounting issue.
- GDS2: Cancel Camera Learn / Reset — This function is used to reset a failed or corrupt learning status in the module before attempting a new dynamic calibration procedure.
- GDS2: Yaw Sensor Relearn — As a secondary diagnostic step, some TSBs recommend performing a Yaw Sensor Relearn if the B1008 Sym 4B code persists after verifying the windshield and camera mounting are correct. Corrupt yaw rate data can interfere with the ADAS calibration process.
- SPS (Service Programming System): Module Programming & Configuration — This is a mandatory three-step process (SPS Programming, SPS Configuration, GDS2 Learn) that must be performed whenever the Front View Camera Module is replaced. Failure to program the new module will prevent it from functioning or calibrating.
Wiring & Ground Locations
- K115 Front View Camera Module - Power — At the K115 module connector.. A Pink wire should provide battery voltage to the module. Loss of this power will cause the module to be inoperative.
- K115 Front View Camera Module - Ground — At the K115 module connector.. A Black wire provides the ground connection. A poor ground can cause intermittent operation or failure to communicate.
- K115 Front View Camera Module - LIN Bus — At the K115 module connector.. A Dark Green wire serves as the LIN Bus data line for communication with other vehicle modules. Damage to this wire will set communication codes and prevent the system from operating.
OEM Part Supersession History
23366913→84517633— Standard part revision and update by the manufacturer.
Heads up: While the newer part is generally backward compatible, it is critical to always verify the correct part number for the vehicle's specific VIN and RPO codes, as different ADAS option packages (e.g., Lane Keep Assist vs. Forward Collision Alert only) may use different modules.
Model Year Variations Within This Range
- 2014-2017: The Service Parts Identification (SPID) label containing all the vehicle's RPO codes is typically a sticker found inside the glove box.
- 2018: For the 2018 model year, GM began transitioning to a QR code on the driver's side door jamb (B-pillar) certification label. This QR code contains the VIN and all RPO codes, which can be read with a smartphone app. The glove box sticker may be absent on these later models.
Helpful Videos
Used OEM Parts in Stock




New Aftermarket Parts Available




The information in this article is provided for general reference and educational purposes only. Vehicle specifications, procedures, and part compatibility can vary by production date, trim level, and region. Always consult your vehicle's factory service manual and verify part numbers before purchasing or performing repairs. Safety-critical components such as airbags, seat belts, and braking systems should be installed by a qualified professional.
- Chevrolet SILVERADO 1500:
- 🎬 Helpful Videos
- 🛍️ Shop This Part
- What's Unique About the 2014-2018 Chevrolet SILVERADO 1500
- Diagnostic Flowchart
- Symptoms You May Notice
- Most Likely Causes
- Rare But Worth Checking
- Diagnosis Steps
- Parts You'll Likely Need
- Related Codes That Often Appear With This One
- Technical Service Bulletins (TSBs) & Recalls
- Platform-Specific Known Issues
- Hidden / Shadow Codes Worth Checking
- Scan Tool Commands That Help
- Wiring & Ground Locations
- OEM Part Supersession History
- Model Year Variations Within This Range
- 🎟️ Get 5% Off