

B1008 on 2016-2020 Cadillac CT6: Front Camera Calibration Fault Explained (TSB PIT5535)
On a 2016-2020 Cadillac CT6, code B1008, particularly with symptom byte 4B, almost always points to a problem with the front-facing ADAS camera's ability to calibrate. The most common cause, documented in GM TSB PIT5535, is an aftermarket windshield that misaligns the camera. Before replacing any parts, inspect the windshield for a 'GM' logo and ensure the camera's view is completely clear.
- B1008 on your CT6 means the front camera for your safety systems has a calibration problem.
- The most common cause is NOT a bad camera, but an aftermarket windshield that misaligns the camera's view, as detailed in GM TSB PIT5535.
- Before paying for any repairs, check your windshield for the 'GM' logo and clean it thoroughly inside and out.
- Do not replace the front camera module unless a professional has ruled out all other possibilities, starting with the windshield.
- Any replacement of the camera or ADAS-equipped windshield requires professional calibration with a GM-specific scan tool.
What's Unique About the 2016-2020 Cadillac CT6
The Cadillac CT6 relies on a precisely positioned front camera for its advanced driver-assistance systems (ADAS). General Motors issued technical service bulletins (TSBs PIT5535 series) specifically because this system is highly sensitive to windshield replacements. Unlike many other vehicles, using an aftermarket windshield that lacks the exact OEM alignment/locating pins and optical qualities is a very common trigger for code B1008. These pins ensure perfect alignment; without them, the camera bracket can be misaligned just enough to see the hood, which prevents the camera from calibrating correctly.
Diagnostic Flowchart
Tap your situation to follow the diagnostic path that matches what you're seeing on this vehicle.
Symptoms You May Notice
- "Service Front Camera" message on the instrument cluster
- "Service Lane Departure Warning" message
- "Service Lane Keep Assist" message
- "Service Driver Assist" message
- Lane Keep Assist (LKA) system is inoperative; icon may not turn green
- Forward Collision Alert (FCA) system is inoperative
- IntelliBeam (automatic high beams) may not function correctly
- Adaptive Cruise Control may be disabled
- Replacing the Front View Camera Module. The official GM TSBs strongly advise against replacing the camera module as the first step, as the problem is far more likely to be physical (windshield, obstruction) rather than a failed part. The TSB explicitly states 'Do NOT replace the Front View Camera Module if it is only setting DTC B1008 SYM4B'.
Most Likely Causes
- Aftermarket or Improperly Installed Windshield 🔴 High Probability GM TSBs PIT5535E, C, and B directly link this code to non-OEM windshields. These windshields often lack the correct camera bracket alignment pins, causing the camera's view to be misaligned and see a portion of the hood, which makes calibration impossible.
How to confirm: Check the corner of the windshield (usually lower right) for a "GM" logo. If the logo is missing, it is an aftermarket part. Also, inspect the gap between the top of the windshield and the roof; it should be 3.6 mm (+/- 1 mm). A windshield that sits proud of (higher than) the roofline is also a sign of improper installation.
Typical fix: Replace the aftermarket windshield with a genuine GM OEM part to ensure correct camera alignment and successful calibration.
Est. part cost: $800-$1500 - Obstructed Camera View 🟡 Medium Probability The camera requires a perfectly clear view to function. Any debris, sticker, or even smudges on the inside of the glass can prevent it from seeing the road and passing its self-test.
How to confirm: Visually inspect the area of the windshield in front of the camera module (near the rearview mirror) for dirt, mud, snow, ice, stickers, or poorly placed toll tags. Also check for bug deflectors or windshield banners.
Typical fix: Clean the windshield thoroughly, both inside and out. Remove any obstructions. TSB PIT6473C recommends a specific procedure using 70% isopropyl alcohol and lint-free wipes on both the lens and the glass.
Est. part cost: $0 - Loose Camera Module or Bracket ⚪ Low Probability Vibrations or improper service (like a mirror replacement or failed windshield replacement) can cause the camera or its mounting bracket to become loose. The TSB specifically calls out checking that the bracket is fully seated on the windshield pins.
How to confirm: Carefully remove the plastic cover behind the rearview mirror. Check if the camera module is securely clipped into its bracket and if the bracket is firmly attached to the windshield mount. The TSB has diagrams showing the correct seating.
Typical fix: Reseat the camera module and/or bracket until they are secure.
Est. part cost: $0
Rare But Worth Checking
- Faulty Front View Camera Module: While the TSBs advise against replacing the camera first, the module can fail internally. This should only be considered after all other causes, especially the windshield, have been ruled out. A failed calibration attempt using OEM tools that results in a 'conditions not met' error can point to a faulty module.
- Yaw Rate Sensor Issue: A TSB mentions that if no other cause is found, a yaw sensor relearn should be performed using a GM diagnostic tool (GDS2), indicating a potential, though rare, link to the system's stability control inputs.
- Improperly Cleaned Lens or Windshield Interior: GM issued TSB PIT6473C describing how smears, dust, or lint on the camera lens or the inside of the windshield can impair performance and cause faults. A meticulous cleaning with isopropyl alcohol and lint-free wipes is the recommended fix.
Diagnosis Steps
- Read the code with a scanner that can read GM-specific B-codes and symptom bytes. Confirm B1008 Sym 4B.
- Inspect the windshield for any obstructions like dirt, snow, ice, stickers, or tint over the camera area. Clean the exterior and interior glass thoroughly.
- Check for the 'GM' logo on the windshield to determine if it is a factory or aftermarket part.
- Inspect the windshield installation quality. Measure the gap between the top of the windshield and the roof (should be 3.6 mm +/- 1 mm) and check if the glass is flush with the roofline.
- If the windshield is aftermarket or improperly installed, this is the most likely cause. The fix is an OEM replacement.
- Inspect the camera module behind the rearview mirror. Ensure it and its bracket are securely mounted and fully seated on the windshield pins per TSB diagrams.
- If all physical inspections pass, consider performing the detailed cleaning procedure from TSB PIT6473C using isopropyl alcohol.
- If the issue persists, connect a GM-specific scan tool (GDS2) to attempt the 'Front View Camera Module Calibration' or a 'Cancel Camera Learn' procedure.
- If calibration fails and the windshield is OEM and properly installed, the Front View Camera Module may be faulty and require replacement, programming (SPS), and calibration.
Parts You'll Likely Need
- OEM Windshield
(OEM #84615564 (w/o Head-Up Display), 84219867 (w/ Head-Up Display))— This is the most common fix when an aftermarket windshield is installed, as it's required for proper ADAS camera alignment. Part number depends on vehicle options; always verify with VIN.
Trusted brands: GM Genuine
OEM price range: $700-$1500
Aftermarket price range: $400-$800 - Front View Camera Module
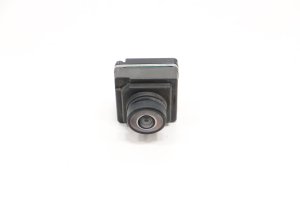
(OEM #23507082)— This part is replaced only if it is proven to be faulty after all other diagnostic steps (especially windshield verification) have been completed. Part number may be superseded; verify with VIN.
Trusted brands: ACDelco, GM Genuine
OEM price range: $600-$850
Aftermarket price range: $200-$400
Technical Service Bulletins (TSBs) & Recalls
- PIT5535E: Service Front Camera, Service Lane Departure Warning, and Service Lane Keep Assist Message with DTC B1008 Sym 4B, often caused by aftermarket windshields or obstructions.
- PIT5535C: An earlier version of the same bulletin with nearly identical information regarding DTC B1008 and its causes.
- PIT5535B: An even earlier TSB that provides extensive detail, diagrams, and a list of affected platform-mate vehicles.
- PIT6473C: Details a specific cleaning procedure for the camera lens and inside of the windshield to resolve performance issues.
Platform-Specific Known Issues
- Technical Service Bulletin PIT5535E explicitly warns that an aftermarket windshield can cause this code and advises checking for one before replacing any parts.
- The front camera system is sensitive to improper mounting, and TSB PIT5535B provides specific diagrams for verifying the camera bracket is fully seated.
- A poorly installed windshield that is not flush with the roofline can also cause excessive wind noise in addition to the B1008 code.
Hidden / Shadow Codes Worth Checking
- B1008 Sym 4B: This is the primary symptom byte associated with this fault. It specifically indicates the front view camera module (K115) has determined it is improperly mounted or its view is blocked, preventing calibration. (see via A professional scan tool capable of reading GM-specific body codes, such as the dealer GDS2 or a high-end aftermarket scanner.)
Scan Tool Commands That Help
- GM GDS2: Front View Camera Module Calibration — This is a dynamic learn procedure required after replacing the windshield or the camera module itself. The vehicle must be driven on a well-marked road above 37 mph (60 km/h) to complete the process.
- GM GDS2 / High-End Aftermarket (e.g., Autel): Cancel Camera Learn — This function is used to reset a failed or incomplete learn procedure. If this command fails with a 'conditions not met' error, it strongly suggests a hardware issue with the camera module itself, assuming all physical checks (windshield, mounting) have passed.
- GM GDS2: Yaw Sensor Relearn — TSB PIT5535E suggests performing this as a final step if no other cause for the B1008 code can be found, indicating a rare but possible link to the vehicle's stability control system inputs.
Wiring & Ground Locations
- K115 Front View Camera Module — Located on the front windshield, typically integrated into the rearview mirror mounting base.. This is the module setting the code. Its physical mounting and clear view are the primary subjects of diagnosis.
- Front Camera Connector — The electrical pigtail connector that plugs directly into the K115 Front View Camera Module.. A loose or corroded connection at this point can cause communication or power issues for the camera, leading to faults. The connector needs to be securely seated.
- Passenger Compartment Fuse Block Ground — There is often a main grounding bolt located near the passenger footwell fuse box.. While not a specified ground point for the K115 module in the available documentation, a poor body ground in this area could potentially affect the various modules related to the ADAS system. Checking for clean, tight grounds is a general best practice for electrical faults.
Real Owner Repair Stories
- YouTube: MAXISYS ULTRA | Troubleshooting B1008 4B Front Camera on A 2019 GMC Yukon (2019 GMC Yukon) — DTC B1008 Sym 4B was present, and the front camera was stuck in 'Learn Mode' after a calibration attempt.
❌ Tried (didn't work) Attempting a standard 'Front Camera Module Learn' procedure., Attempting a 'Cancel Camera Learn' reset function using an Autel scanner and OEM software. This failed with a 'conditions not met' error.
✅ What actually fixed it The diagnostic conclusion was a faulty Front View Camera Module. After exhausting all software and reset procedures outlined in the TSB, the hardware itself was condemned. The final fix was to replace the camera module.
OEM Part Supersession History
23326969→23507082— Standard part number update/revision by the manufacturer.
Heads up: No known incompatibility. 23507082 is the correct service replacement for the original part. Always verify with VIN.
Model Year Variations Within This Range
- 2019-2020: The Front View Camera Module part number 23507082 is primarily listed for 2016-2018 models. While the B1008 fault and its causes are the same for 2019-2020 models, the specific camera part number may differ for the facelifted years. It is critical to verify the correct part number by VIN for 2019 and 2020 vehicles.
Helpful Videos
Used OEM Parts in Stock


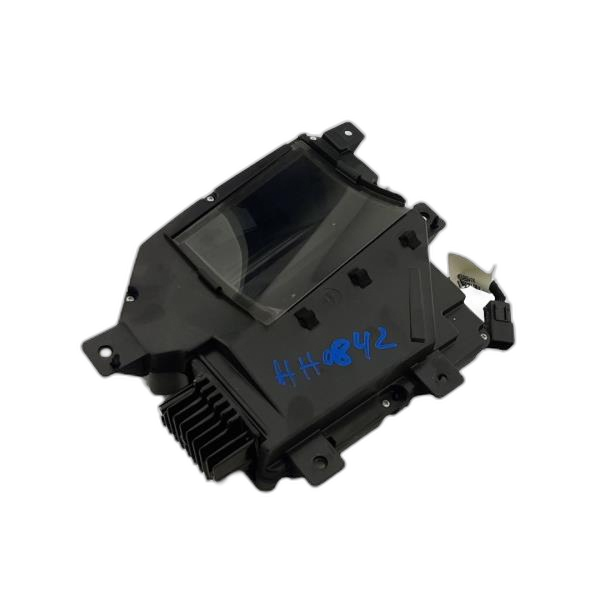

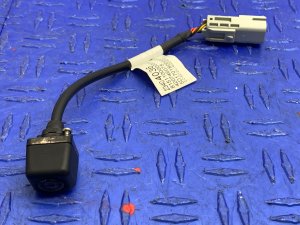
New Aftermarket Parts Available




The information in this article is provided for general reference and educational purposes only. Vehicle specifications, procedures, and part compatibility can vary by production date, trim level, and region. Always consult your vehicle's factory service manual and verify part numbers before purchasing or performing repairs. Safety-critical components such as airbags, seat belts, and braking systems should be installed by a qualified professional.
- Cadillac CT6:
- 🎬 Helpful Videos
- 🛍️ Shop This Part
- What's Unique About the 2016-2020 Cadillac CT6
- Diagnostic Flowchart
- Symptoms You May Notice
- Most Likely Causes
- Rare But Worth Checking
- Diagnosis Steps
- Parts You'll Likely Need
- Technical Service Bulletins (TSBs) & Recalls
- Platform-Specific Known Issues
- Hidden / Shadow Codes Worth Checking
- Scan Tool Commands That Help
- Wiring & Ground Locations
- Real Owner Repair Stories
- OEM Part Supersession History
- Model Year Variations Within This Range
- 🎟️ Get 5% Off