

OBD-II Code B0150: Left Frontal Restraint Sensor Circuit Malfunction
The Ultimate 2026 Guide to Diagnosing and Fixing B0150
- Code B0150 disables your entire airbag system, making the vehicle unsafe to drive until repaired.
- Corroded wiring and connectors at the front bumper cause over 80% of B0150 codes, not a failed sensor.
- Always disconnect the negative battery terminal and wait 15 minutes before touching any yellow SRS wiring to prevent accidental airbag deployment.
- You must use an SRS-capable OBD-II scanner costing $60 or more to read and clear this code; standard $20 engine readers cannot access the airbag module.
- Swap the left and right front impact sensors; if the code changes to B0155, the sensor is dead, but if B0150 remains, the wiring is broken.
What Does B0150 Mean?
Code B0150 indicates the Restraints Control Module (RCM) detected a fault in the left (driver's side) frontal crash sensor's electrical circuit. This sensor tells the RCM when a collision is severe enough to deploy the airbags. When this code triggers, the RCM illuminates the airbag warning light and disables the entire Supplemental Restraint System (SRS) as a failsafe.
Technical definition: Left Frontal Restraint Sensor Circuit Malfunction. The Restraints Control Module (RCM) sets this Diagnostic Trouble Code (DTC) when it detects an abnormal resistance reading from the left frontal impact sensor's circuit. The fault is typically an open circuit (broken wire), a short to ground, or a short to voltage, preventing the RCM from monitoring the sensor.
Can I Drive With B0150?
no_recommended. Do not drive the vehicle. Code B0150 indicates a critical fault in the safety system that completely disables the airbags. In a frontal collision, the airbags will not deploy, drastically increasing the risk of serious injury or death. The vehicle remains mechanically operational, but it is fundamentally unsafe.
Common Causes
- Corroded or Damaged Wiring and Connectors (Very Common) — The front crash sensor wiring sits at the very front of the vehicle, making it highly vulnerable to moisture, road salt, and physical damage. Rust particles entering the connector create high resistance, triggering the code.
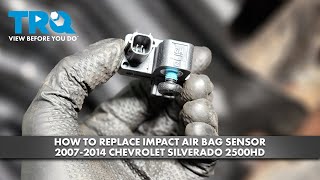
- Faulty Left Frontal Restraint Sensor (Common) — The sensor fails internally over time due to vibration, moisture intrusion, or an internal short circuit. It is a sealed unit that requires full replacement. 🎬 See how to replace a GM front impact sensor
- Minor Physical Damage or Misalignment (Common) — A minor parking lot bump, curb strike, or large pothole damages the sensor, its mounting bracket, or the connector without leaving visible bumper damage. Precise alignment is critical.
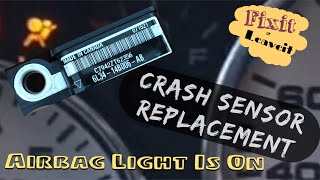
- Faulty Seatbelt Buckle Switch (Less Common) — The driver's seatbelt buckle switch informs the SRS module if the belt is latched. Debris or internal switch failure creates system-wide faults occasionally associated with B0150. 🎬 Watch: 7 common causes for an airbag light
- Water Intrusion in Cabin (Rare) — Water leaking from a bad windshield seal or clogged sunroof drain damages wiring harnesses or the Restraints Control Module (RCM), leading to various SRS codes.
- Faulty Restraints Control Module (RCM) (Very Rare) — The RCM rarely fails in a way that isolates to a single sensor circuit. Consider this only after proving all wiring, connectors, and the sensor are perfectly functional.
Symptoms
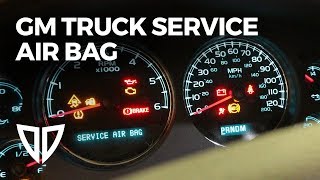
- Airbag Warning Light and DIC Message — The SRS/airbag warning light illuminates continuously on the instrument cluster, often accompanied by a 'Service Airbag System' message on the Driver Information Center.
- Seatbelt Warning Light On — The seatbelt warning light illuminates or flashes, indicating a general fault within the restraint system.
- Passenger Airbag 'Off' Light Illuminated — A driver-side SRS fault forces the passenger airbag 'off' light to stay on erratically.
- Airbag System Disabled (also visible on scanner) — The vehicle's computer disables the supplemental restraint system as a failsafe, preventing airbag deployment in a collision.
Diagnostic Flowchart
Tap your situation to follow the diagnostic path that matches what you're seeing on this code.
Common Fixes & Costs
- Repair or Replace Wiring/Connector — Parts: $20-$75, Labor: $150-$400, ~1.5 hr book time (Intermediate)
- Replace Left Frontal Restraint Sensor
— Parts: $70-$400, Labor: $100-$200, ~1.2 hr book time
(Intermediate)
Ford F-150 (2009-2014): OEM AL3Z-14B004-A (Alt: Dorman 590-221)
Chevrolet/GMC Silverado/Sierra (2007-2013): OEM 20884470 (Alt: ACDelco 20884470, Dorman 590-271)
Nissan Titan (2005-2015): OEM 98581-ZT08A (Alt: Genuine W0133-2394041) - Replace Seatbelt Buckle Assembly — Parts: $80-$200, Labor: $100-$250, ~1.0 hr book time (DIY)
- Replace Restraints Control Module (RCM) — Parts: $500-$1500, Labor: $150-$350, ~1.8 hr book time (Professional)
Used vs. New Parts: Buying Guide
When a used part is worth it: Never use a salvaged or junkyard frontal impact sensor. These are one-time-use safety components. A used sensor hides damage from previous accidents, moisture intrusion, or internal corrosion.
Donor quality checklist:
- Used sensors offer no reliable quality cues. Internal integrity is impossible to verify visually.
- Avoid parts with any visible rust, corrosion, or physical damage to the housing or connector.
- The only way to guarantee safety is with a new OEM or premium aftermarket part.
Decision logic:
- If The part is a critical SRS component like an impact sensor. → Always buy a new, high-quality OEM or reputable aftermarket part. Cost savings never justify the safety risk.
- If Budget is extremely tight. → Postpone the repair until you can afford a new part, and do not drive the vehicle. A used sensor provides a false sense of security.
Warranty tradeoff: Salvage yard parts carry a 30-day warranty covering only the part, not labor. New aftermarket parts offer 1-year to lifetime warranties. New OEM parts carry the manufacturer's warranty.
Worst-case if a used part fails: $0 financially, but costs your life if the used part fails to trigger deployment in an accident.
What Happens If You Wait — Timeline
- 0-3 months: An intermittent fault begins. The airbag light turns on during cold starts or wet weather and goes off later. The SRS system is disabled only when the light is on. (MPG impact: 0%% · Added cost: $0. The repair is simple cleaning and applying dielectric grease.)
- 3-6 months: The fault becomes permanent. The airbag light stays on continuously. The entire SRS system is permanently disabled due to worsening corrosion. (MPG impact: 0%% · Added cost: $50-$400. Connector pins corrode beyond saving, requiring a new connector pigtail or sensor.)
- 6-12 months: Corrosion wicks up the copper wire from the connector, causing high resistance or a complete break inside the insulation. The sensor fails internally. (MPG impact: 0%% · Added cost: $200-$800. Repair involves complex wiring diagnostics and sensor replacement.)
- 12+ months: Catastrophic harness damage occurs. Severe neglect or rodent damage requires replacing a major section of the vehicle's wiring harness. (MPG impact: 0%% · Added cost: $1500-$4000+. A simple sensor issue cascades into a major electrical system repair.)
Cost of Not Fixing It
- Immediate: Airbag system is disabled. In a frontal collision, the driver's airbag will not deploy, drastically increasing the risk of serious injury or death. (Added cost: N/A)
- 0-12 months: Automatic failure of vehicle safety inspections. This results in fines or the inability to legally register the vehicle. (Added cost: $50-$300 in fines or re-inspection fees.)
- Ongoing: Reduced resale value. A car with an active airbag light is difficult to sell privately, and dealers significantly reduce trade-in offers. (Added cost: $500-$2000 reduction in vehicle value.)
Diagnosis Steps
- Safety First: Disconnect the Battery
Always disconnect the negative terminal of the 12V battery and wait at least 15 minutes before touching the SRS system. This discharges the RCM capacitors, preventing accidental airbag deployment.
Tools: Wrench set (Beginner) - Read Codes and Check for TSBs
Use an SRS-capable OBD-II scanner to confirm B0150 is active. Search for Technical Service Bulletins (TSBs) for your specific year, make, and model, as manufacturers often outline specific repair procedures for known B0150 issues.
Tools: SRS-capable OBD-II Scanner (Beginner) - Visually Inspect the Sensor and Wiring
Locate the left frontal crash sensor behind the front bumper cover or grille. Inspect the sensor, connector, and wiring harness for physical damage, green/white corrosion, or frayed wires.
Tools: Flashlight, Inspection Mirror (Intermediate) - Clean and Reseat the Connector
Disconnect the sensor. Clean the pins on both the sensor and harness side with electrical contact cleaner and a small brush. Apply dielectric grease to the connector seal, reseat it firmly, clear the codes, and test.
Tools: Electrical Contact Cleaner, Dielectric Grease, Small Brush (Intermediate) - Test by Swapping Sensors
If the left and right frontal impact sensors share the same part number, swap them. Clear the codes and drive. If the code changes to B0155 (Right Frontal Sensor), the sensor is faulty. If B0150 returns, the wiring is the problem.
Tools: Basic Hand Tools (Intermediate) - Advanced: Perform Resistance Tests on Wiring
With the sensor and RCM disconnected, use a multimeter to check the resistance of the two wires between the sensor and RCM connectors. Resistance under 1.0 ohm is normal. 'OL' (Open Line) indicates a broken wire.
Tools: Multimeter, Vehicle-Specific Wiring Diagram (Advanced) - Advanced: Check for Shorts to Power and Ground
Check each wire in the sensor circuit for continuity to a clean chassis ground (short to ground) and voltage with the key on (short to power). Signal wires must show 'OL' to ground and zero voltage.
Tools: Multimeter, Vehicle-Specific Wiring Diagram (Advanced) - Advanced: Check Live Data Resistance
Use an advanced scan tool to monitor the live resistance value for the left frontal impact sensor. Normal circuits read 2.0 to 4.0 ohms. Readings over 10.0 ohms indicate an open circuit; readings under 1.5 ohms indicate a short.
Tools: Advanced Diagnostic Scan Tool (Professional) - Perform Zero-Point Calibration / Initialization
On modern vehicles, a new sensor requires initialization with the RCM to register and communicate correctly. This requires a professional-grade scan tool with manufacturer-specific software.
Tools: Advanced Diagnostic Scan Tool (Professional) - Diagnose the Restraints Control Module (RCM)
If the sensor and wiring pass all tests, suspect the RCM. Stop DIY testing here. RCM diagnosis requires an oscilloscope and professional programming to replace.
Tools: Advanced Diagnostic Scan Tool, Oscilloscope (Professional)
When This Code Triggers (Freeze-Frame Conditions)
- Fault Status: Active/Confirmed (The fault is currently present during the SRS module's self-test at startup.)
- Ignition Cycle Counter: Varies (Indicates how many times the vehicle has been started since the fault was first detected.)
- System Voltage: 11.5V - 14.5V (SRS modules monitor battery voltage; voltage drops below 11.5V trigger spurious codes.)
- Fault Occurrence Counter: Varies (Shows how many times the specific fault condition has been met, isolating intermittent issues.)
Related Codes
- B0150 — This is the identical fault code but for the Right Frontal Restraint Sensor. Swapping sensors and seeing the code change to B0155 confirms a dead sensor.
- B0151 — Indicates the left frontal restraint sensor circuit is shorted to battery voltage, pointing specifically to the signal wire touching a power source.
- B0152 — Indicates the left frontal restraint sensor circuit is shorted to ground, helping technicians find where the wire contacts the chassis.
- B0001 — A fault in the driver's side airbag deployment circuit. If present with B0150, it points to a shared wiring harness issue or a failing RCM.
Climate & Environmental Factors
- High Humidity & Moisture: High humidity accelerates corrosion on sensor internals, connector pins, and wiring. Water intrusion directly causes short circuits.
- Road Salt & De-icing Agents: Road salt kicks up into the front bumper area, creating a highly corrosive environment that drastically shortens the life of the sensor and wiring.
- Extreme Cold: Cold temperatures cause wiring and connectors to contract, creating intermittent open circuits in marginal connections. The light often triggers on cold mornings and disappears when warm.
- Extreme Heat: Sustained heat degrades plastic connectors and wire insulation, making them brittle and susceptible to cracking from engine vibration.
How to Talk to a Mechanic About This Code
Say this: "I have an airbag light on and my scanner shows code B0150 for the left frontal restraint sensor circuit. Since this is a circuit code, please test the wiring and connector before recommending a sensor replacement."
This signals you understand that a 'circuit' code points to wiring, not just the sensor. It directs the technician to perform a proper diagnosis instead of immediately replacing the most expensive part.
Avoid saying:
- 'My airbag light is on, can you fix it?' (Too vague; invites unnecessary part replacement).
- 'Just replace the front sensor.' (You will pay for a sensor you didn't need if the wiring is bad).
- 'I heard this is a common problem, just do whatever you normally do.' (Gives up your control over the repair process).
Questions to ask before authorizing the repair:
- What was the result of the wiring and connector inspection? Was there corrosion or damage?
- Did you test the sensor to confirm it failed by swapping it with the right-side sensor?
- If the sensor needs replacement, is the part a new OEM component?
- Does the repair estimate include clearing the SRS codes and confirming the light stays off?
- What is the warranty on the parts and labor for this specific repair?
Where to Take It: Dealer vs Independent vs Chain
- Dealer:
A safe but expensive choice. Best if you suspect a complex issue beyond a simple sensor or wiring fault, or if your car is under warranty.
Best for: Vehicles under warranty., Complex cases requiring Restraints Control Module (RCM) replacement and programming., Recalls or manufacturer-specific known issues (TSBs).
Downsides: Highest labor rates., Dealers default to replacing entire wiring harnesses for a single damaged connector due to liability policies. (Typical cost: +50% vs. baseline) - Independent Shop:
Best fit for most cases. A reputable independent shop handles the most common causes of B0150 at a much lower cost than a dealer.
Best for: Out-of-warranty vehicles where cost is a major factor., Diagnosing and repairing common wiring or connector issues., Sensor replacement on most common makes and models.
Downsides: The shop must have an SRS-capable scan tool and technicians experienced with safety systems., May lack the software to program a new RCM if needed. (Typical cost: +0% vs. baseline) - Chain Shop:
AVOID. Airbag system repair is a safety-critical task requiring specialized knowledge. Do not trust it to a generalist chain shop.
Best for: Simple, unrelated maintenance like oil changes or tires.
Downsides: Technician skill and equipment for SRS systems are highly variable., High pressure to upsell leads to incorrect diagnosis., Not equipped or trained for complex electrical or safety system diagnostics. (Typical cost: -10% vs. baseline)
When to Walk Away From the Repair
If the estimated repair cost exceeds 50% of the car's private-party value, seriously consider selling the vehicle as-is or trading it in.
- Car worth $5000, fix is $600: Fix it. The repair cost is a small fraction of the car's value and restores a critical safety feature.
- Car worth $4000, fix is $2200: Walk away. The repair cost is over 50% of the car's value. The car is unsafe to drive and has a significantly reduced 'as-is' value.
- Car worth $15000, fix is $1800: Fix it. While expensive, the repair is well below the 50% threshold and necessary for safety and resale value.
What Scan Tool You Need for This Code
Minimum: A scanner that reads and clears Supplemental Restraint System (SRS) / Airbag codes. A basic engine-only code reader will NOT work for B0150.
A standard $20 OBD-II scanner only accesses the Powertrain Control Module. Code B0150 is stored in the Restraints Control Module (RCM), requiring an advanced tool to communicate.
Budget: BlueDriver Bluetooth Pro (~$100) — Reads and clears SRS/Airbag codes on most major brands, provides freeze-frame data, and generates repair reports. An excellent choice for DIYers.
Mid-range: Innova 5610 or Autel ML629 (~$180) — Provides dedicated handheld access to SRS, ABS, Engine, and Transmission modules. Graphs live data to diagnose intermittent connection issues.
Professional: Autel MaxiCOM MK808Z or THINKCAR THINKSCAN 689BT (~$450-600) — Offers full-system diagnostics, advanced bi-directional controls, and performs special functions like RCM programming or sensor calibration.
Rent vs buy: Auto parts store loaner tools are typically basic engine code readers. Due to liability, they do not rent SRS-capable scanners. Buying a budget-friendly SRS scanner is your best option.
How to Clear the Code After You Fix It
- Ensure all repairs are complete and the battery is reconnected.
- Use an SRS-capable OBD-II scan tool to access the Restraints Control Module.
- Select 'Clear Codes' or 'Reset DTCs' to turn off the airbag light.
- Turn the ignition off, wait 30 seconds, and turn it back on to confirm the light performs its 7-second self-check and stays off.
Drive cycle (~10 minutes): The SRS system does not require a complex drive cycle. A simple key-on, key-off cycle is sufficient. The RCM performs a self-test every time the vehicle starts. If the light stays off after the initial 7-second bulb check, the repair is successful.
Readiness monitors affected: Supplemental Restraint System
Watch out for:
- Using a standard $20 engine code reader, which cannot communicate with the SRS module.
- Clearing the code without fixing the root electrical problem, causing the light to return instantly.
- Failing to wait 15 minutes after disconnecting the battery before starting work, risking accidental airbag deployment.
Will This Fail Emissions / State Inspection?
Yes — this code typically fails an OBD-II emissions inspection.
- California: An airbag light is NOT part of the emissions (smog) inspection. A vehicle passes smog with the light on, but it remains a critical safety failure.
- New York: An illuminated airbag warning light is an advisory item, not an automatic failure. The inspector notes it, but it does not prevent passing the safety inspection.
- Texas: An illuminated airbag light is NOT a cause for failure during the Texas state safety inspection. The SRS system is not on the required checklist.
Most Commonly Affected Vehicles
- Ford F-150 (2009-2014) — Frontal impact sensors behind the grille are highly prone to corrosion from water and road salt. The wiring harness connector is a common failure point.
- Chevrolet / GMC Silverado / Sierra / Tahoe / Suburban (2007-2013) — Sensors mounted to the radiator core support fail frequently due to wiring harness issues or internal sensor corrosion.
- Nissan Titan / Frontier / Xterra (2005-2015) — The exposed front impact sensor fails commonly due to corrosion. The sensor is often a different part number side-to-side, preventing a diagnostic swap.
- Hyundai Elantra / Sonata (2011-2017) — Faulty front impact sensors on the upper radiator support are common. Always verify the exact part number by VIN.
- BMW 3-Series (F30) / 5-Series (F10) (2012-2018) — Sensors located behind the front bumper cover fail frequently. Replacement does not require programming, but the code must be cleared with a capable scanner.
- Subaru Outback / Forester / Legacy (2010-2022) — Subarus are known for Occupant Detection System (ODS) issues causing general SRS faults. Check for open recalls like WRA-24 before replacing front sensors.
- Honda Accord / Civic / CR-V (2008-2015) — Seat belt buckle switch issues trigger SRS faults frequently. This repair is often covered by Honda's lifetime seatbelt warranty.
- MINI Cooper (R56) (2007-2013) — Famous for passenger seat occupancy sensor mat failures exceeding $1,500. This triggers its own codes but relates to general SRS faults.
Manufacturer-Specific Notes
- Honda: Honda provides a lifetime warranty on seat belts. If an SRS fault traces to a malfunctioning seatbelt buckle switch, dealers replace it free of charge.
- General Motors (GM): GM trucks and SUVs suffer from severe corrosion within front impact sensor connectors. TSB 21-NA-005 details how rust particles create high resistance, triggering circuit codes.
- Subaru: Subaru issued recall WRA-24 (NHTSA 24V-227) for 2020-2022 models regarding Occupant Detection System (ODS) sensors short-circuiting. Always check for open recalls when diagnosing SRS lights.
- Ford: Ford's SRS wiring is highly sensitive to resistance changes. TSB 12-5-11 addresses intermittent airbag lights by applying electrical grease to connectors to ensure a clean signal.
Real Owner Stories
2011 Chevy HHR with 'Service Airbag' Message
The 'Service Airbag' message stayed on continuously with no accident history.
What they tried:
- Cleaned the front impact sensor connector under the hood.
- Disconnected the battery multiple times to reset the system.
Outcome: The light remained on. An advanced scanner revealed history code B1000-00, pointing to a faulty Sensing and Diagnostic Module (SDM/RCM), not the frontal sensor.
Lesson: A general 'Service Airbag' light requires a proper scan. Cleaning connectors won't fix a failed main module.
2016 Chevy Silverado 1500 - Swapped Connectors
After an engine replacement, the truck cranked but wouldn't start, throwing sensor voltage codes.
What they tried:
- The shop suspected a bad fuel rail pressure sensor.
Outcome: A technician found two identical main harness connectors swapped during reassembly. Reversing them fixed the issue.
Lesson: If B0150 appears immediately after a major front-end repair, the shop likely swapped or forgot to plug in the sensor connector.
2019 Honda Civic with Minor Front-End Damage
A minor bumper scrape triggered the airbag light. The body shop quoted $3,300.
What they tried:
- The shop insisted on replacing the entire $840 engine wiring harness due to one damaged SRS connector.
Outcome: The owner took it to an automotive electrical specialist who replaced just the connector pigtail for a fraction of the cost.
Lesson: Dealers default to full harness replacements for liability. Splicing a new connector pigtail is a safe, cost-effective alternative if done by a wiring professional.
Intermittent Airbag Light in Cold Weather on a 2015 Ford F-150
The airbag light illuminated only on cold mornings and turned off by the afternoon.
What they tried:
- A mechanic scanned the truck and found a stored B0150 code with a high occurrence count.
Outcome: The mechanic found a brittle connector seal. Cleaning the pins and applying dielectric grease permanently resolved the intermittent fault.
Lesson: Intermittent, temperature-dependent lights are classic signs of marginal electrical connections. Cleaning and protecting the connector is the most effective first step.
How to Prevent This Code From Triggering
- Apply Dielectric Grease to Sensor Connectors (Every 3-5 years or during front-end service.) — Dielectric grease seals electrical connectors from moisture and road salt, preventing the corrosion that causes most circuit faults.
- Wash the Undercarriage and Front End (Monthly, especially in winter.) — Washing away road salt and de-icing chemicals prevents accelerated corrosion of the sensor body and wiring harness.
- Install Protective Wire Loom or Harness Tape (Once, as a proactive upgrade.) — Adding split-loom tubing or high-temperature fabric tape provides a physical barrier against abrasion and moisture for exposed factory wiring.
- Perform Visual Inspections After Minor Impacts (After any curb strike, pothole impact, or parking bump.) — Minor impacts crack the sensor housing without leaving bumper damage. Catching physical damage early prevents electrical failure.
Frequently Asked Questions
Can I reset the airbag light myself?
You can clear the code with an SRS-capable scan tool. However, if the underlying electrical fault remains, the light returns instantly upon startup.
Is it safe to drive with the B0150 code?
No. The airbag system is disabled, meaning airbags will not deploy in an accident. This dramatically increases the risk of severe injury or death.
Will a B0150 code fail a safety inspection?
Yes. In virtually all regions with mandatory vehicle safety inspections, an illuminated airbag warning light is an automatic failure.
Why did the light come on after my car battery died?
Low voltage from a dying battery causes temporary communication glitches in the SRS module, storing a 'ghost' code. Clear the code with a scanner after installing a new battery; if it returns, a genuine fault exists.
Can a minor accident cause this code without airbag deployment?
Yes. Frontal impact sensors are sensitive and vulnerable. A minor impact cracks the housing or damages the wiring, triggering the code even without deployment.
What is the difference between an impact sensor and an airbag module?
The impact sensor detects the crash at the front of the car. The airbag module (RCM) receives that signal and decides whether to deploy the airbags.
Can I use a frontal impact sensor from a junkyard?
Never use a junkyard sensor. SRS components are single-use safety devices that may have unseen internal damage from previous accidents or moisture. Always buy new.
Key Takeaways
- Code B0150 disables your entire airbag system, making the vehicle unsafe to drive until repaired.
- Corroded wiring and connectors at the front bumper cause over 80% of B0150 codes, not a failed sensor.
- Always disconnect the negative battery terminal and wait 15 minutes before touching any yellow SRS wiring to prevent accidental airbag deployment.
- You must use an SRS-capable OBD-II scanner costing $60 or more to read and clear this code; standard $20 engine readers cannot access the airbag module.
- Swap the left and right front impact sensors; if the code changes to B0155, the sensor is dead, but if B0150 remains, the wiring is broken.
Helpful Videos



The information in this article is provided for general reference and educational purposes only. Vehicle specifications, procedures, and part compatibility can vary by production date, trim level, and region. Always consult your vehicle's factory service manual and verify part numbers before purchasing or performing repairs. Safety-critical components such as airbags, seat belts, and braking systems should be installed by a qualified professional.
- 🎬 Helpful Videos
- What Does B0150 Mean?
- Can I Drive With B0150?
- Common Causes
- Symptoms
- Diagnostic Flowchart
- Common Fixes & Costs
- Used vs. New Parts: Buying Guide
- What Happens If You Wait — Timeline
- Cost of Not Fixing It
- Diagnosis Steps
- When This Code Triggers (Freeze-Frame Conditions)
- Related Codes
- Climate & Environmental Factors
- How to Talk to a Mechanic About This Code
- Where to Take It: Dealer vs Independent vs Chain
- When to Walk Away From the Repair
- What Scan Tool You Need for This Code
- How to Clear the Code After You Fix It
- Will This Fail Emissions / State Inspection?
- Most Commonly Affected Vehicles
- Manufacturer-Specific Notes
- Real Owner Stories
- 2011 Chevy HHR with 'Service Airbag' Message
- 2016 Chevy Silverado 1500 - Swapped Connectors
- 2019 Honda Civic with Minor Front-End Damage
- Intermittent Airbag Light in Cold Weather on a 2015 Ford F-150
- How to Prevent This Code From Triggering
- Frequently Asked Questions
- Can I reset the airbag light myself?
- Is it safe to drive with the B0150 code?
- Will a B0150 code fail a safety inspection?
- Why did the light come on after my car battery died?
- Can a minor accident cause this code without airbag deployment?
- What is the difference between an impact sensor and an airbag module?
- Can I use a frontal impact sensor from a junkyard?
- Key Takeaways
- 🎟️ Get 5% Off