

OBD-II Code B0087: Left Rear Safety Sensor Circuit Malfunction
The Ultimate 2026 Guide: What B0087 means, why it triggers, and how to fix it for good
- Code B0087 disables your entire airbag system, meaning no airbags or pretensioners will deploy in a crash until repaired.
- On 2014-2019 GM trucks, inspect the driver's side rear door jamb harness first; broken wires here are the number one cause of this code.
- For GM SUVs and sedans like the Equinox or Cruze, fix the code for free by using a small pick to tighten the spread female pins inside the sensor's electrical connector.
- Always disconnect the negative battery terminal and wait 15 minutes before touching any yellow SRS connectors to prevent accidental airbag deployment.
- Read the two-digit suffix on your scan tool (like B0087-04); an '04' guarantees a broken wire, while a '39' confirms a dead sensor.
What Does B0087 Mean?

Code B0087 indicates the Supplemental Restraint System (SRS) module detects an electrical fault in the left rear safety sensor circuit. This sensor is typically a side impact sensor in the rear door, but on some vehicles, it refers to a seat belt pretensioner or third-row seat belt load limiter. This fault immediately triggers the airbag warning light and deactivates the entire safety system until repaired.
Technical definition: The SAE/ISO definition is "Left Side Restraints Sensor 3 Circuit Malfunction." For General Motors, this specifically refers to the Left Rear Side Impact Sensor. For other manufacturers, it indicates a fault in the Third-Row Center Seat-Belt Load-Limiter Deployment Control circuit.
Can I Drive With B0087?
No — Do Not Drive. Driving with code B0087 is dangerous. The code signifies a critical fault in the Supplemental Restraint System (SRS). The vehicle disables the entire airbag and seat belt pretensioner system as a fail-safe. In a collision, your airbags and pretensioners WILL NOT DEPLOY, drastically increasing the risk of severe injury or death.
Common Causes


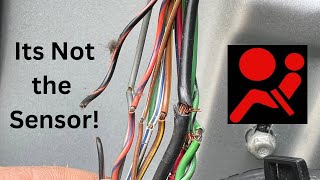
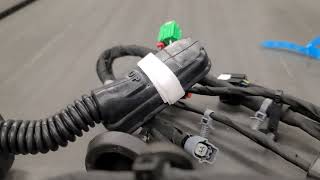
- Broken Wires in Door Harness (Very Common) — On 2014-2019 GM trucks and SUVs, wires inside the flexible rubber boot between the rear door and body become brittle and snap from repeated door usage. 🎬 Watch: How to find and repair broken door harness wires This is the definitive leading cause for this code on these vehicles.
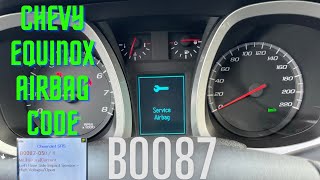
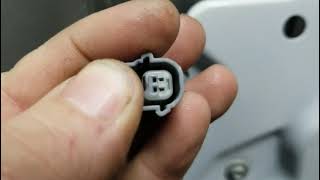
- Loose or Spread Connector Pins (Common) — The electrical connector for the impact sensor develops a poor connection. On the Chevy Equinox, Terrain, and Cruze, the female pins inside the sensor's connector spread apart over time. Carefully tightening these pins with a pick resolves the code without replacing parts. 🎬 See how to fix spread connector pins on Equinox and Cruze
- Unseated Connector Under Seat (Common) — Large yellow SRS connectors under the seats are frequently left unplugged or partially seated after interior detailing or seat removal. The SRS module detects the open circuit immediately.
- Failed Seat Belt Pretensioner (Common) — The seat belt pretensioner contains a pyrotechnic charge with an internal circuit monitored by the SRS module. If this circuit fails its resistance check (falling outside the standard 2.0-3.0 ohm range), it triggers the code.
- Failed Side Impact Sensor (Less Common) — Side impact sensors fail internally, though wiring issues are statistically more common. An internal sensor failure typically sets a specific suffix code like B0087-39.
- Water Damage to Components (Uncommon) — Water intrusion from clogged sunroof drains, failing window seals, or interior deep cleaning causes corrosion and short circuits in sensor connectors or the airbag control module.
- Incorrect Part Installed (Uncommon) — Installing an incompatible replacement sensor causes the SRS module to reject the mismatched component ID, setting the code with a '-3A' suffix.
- Faulty Airbag Control Module or Software (Rare) — In rare instances, the main computer that controls the airbag system fails or experiences a firmware glitch. This requires a dealer to reflash the module with updated software or replace the unit entirely.
Symptoms
- Airbag Warning Light On — A continuously illuminated red or yellow airbag light on the dashboard.
- Service Airbag System Message — The driver information center displays "Service Airbag" or "Service Restraints System."
- Other Door Electronics Failing — On vehicles prone to door harness failures (like the Chevy Silverado), the power window or power door lock on the same door stops working simultaneously. This guarantees a broken wire in the door jamb.
- Failed State Inspection — The vehicle automatically fails state safety inspections due to the critical safety system failure.
Diagnostic Flowchart
Tap your situation to follow the diagnostic path that matches what you're seeing on this code.
Common Fixes & Costs
- Repairing Broken Wires in Door Harness — Parts: $5-$15, Labor: $150-$300, ~1.5 hr book time (Intermediate)
- Tightening Connector Pins — Parts: $0, Labor: $100-$200, ~1 hr book time (DIY)
- Replacing Door Wiring Harness
— Parts: $120-$220, Labor: $200-$350, ~2 hr book time
(Intermediate)
Chevrolet Silverado / GMC Sierra 1500 (2014-2019, Crew Cab): OEM
Chevrolet Silverado / GMC Sierra 1500 (2014-2019, Double Cab): OEM - Replacing Side Impact Sensor
— Parts: $80-$150, Labor: $100-$200, ~1 hr book time
(DIY)
Chevrolet Silverado / GMC Sierra (2014-2019): OEM
Chevrolet Equinox / GMC Terrain (2010-2017): OEM - Replacing Seat Belt Assembly (with Pretensioner)
— Parts: $250-$500, Labor: $150-$300, ~1.2 hr book time
(Intermediate)
Part numbers are highly specific to VIN, trim, and interior color. Always verify with a dealer.: OEM - Replacing/Reflashing Airbag Control Module (SDM/BCM) — Parts: $400-$800, Labor: $150-$300, ~2.5 hr book time (Professional)
Used vs. New Parts: Buying Guide
When a used part is worth it: For a door wiring harness, a used part from a low-mileage vehicle that was not in a collision is a cost-effective option. Visually inspect the flexible boot area for any signs of cracking. For sensors, a used OEM part is acceptable if it comes with a warranty and an exact part number match.
Donor-vehicle mileage cap: roughly under 75000 miles for the part to have meaningful remaining life.
Donor quality checklist:
- Match the part number exactly. SRS components are highly specific.
- For wiring, ensure the donor vehicle was not from a rust-belt state where wires become brittle.
- NEVER buy a used seat belt pretensioner that has been deployed. Reputable sellers only sell non-deployed units.
- Avoid any electronic sensor or module that shows signs of water damage or physical impact.
Decision logic:
- If The part is a pyrotechnic device (seat belt pretensioner or airbag) → Strongly favor a new OEM part or a professional repair service for your original unit. The history of a used pyrotechnic device is unknown and poses a significant safety risk.
- If The part is a wiring harness and the new OEM part is affordable (<$200) → Buy new to guarantee fresh, flexible wires that will last longer than a used part of unknown age.
- If The part is a side impact sensor and you have confirmed the sensor is the fault (not wiring) → A used OEM sensor from a reputable seller with a warranty is a reasonable choice to save money.
Warranty tradeoff: Used parts from salvage yards typically offer a 30-90 day warranty. New aftermarket parts often come with a 1-year to limited lifetime warranty. New OEM parts carry a 1-year/12,000-mile warranty.
Worst-case if a used part fails: $200-400 if a used sensor or harness fails after installation, requiring repeat labor costs plus the price of another part.
What Happens If You Wait — Timeline
- Immediate (0 ignition cycles): The SRS module detects the circuit fault during its startup self-test. The airbag warning light illuminates, and the entire supplemental restraint system (all airbags and pretensioners) is disabled as a fail-safe. (MPG impact: 0%% · Added cost: $0)
- 0 days - Next State Inspection: The vehicle is fundamentally unsafe to drive as no passive safety systems will deploy in a crash. The car automatically fails any state safety inspection, preventing registration renewal. (MPG impact: 0%% · Added cost: $200 - $800+ (The eventual cost of repair to pass inspection))
- 1-6+ months: If the cause is a deteriorating door harness, other wires begin to break. This leads to the failure of the power window, power locks, or speaker in that door. Continued flexing causes a broken wire to short against the chassis, potentially damaging the SRS control module. (MPG impact: 0%% · Added cost: $500 - $1100+ (Potential cost if the SRS module is damaged by a short circuit))
- Vehicle Resale: An active airbag light makes the vehicle extremely difficult to sell privately and drastically lowers its trade-in value. Buyers and dealers perceive a major safety risk and unknown, expensive repair costs. (MPG impact: 0%% · Added cost: $1500 - $4000+ (Diminished resale value due to the safety system fault))
Cost of Not Fixing It
- Immediate: The entire Supplemental Restraint System (airbags and seat belt pretensioners) is disabled. In a collision, no safety devices will deploy, drastically increasing the risk of severe injury or death for all occupants. (Added cost: N/A)
- Next State Inspection: The vehicle automatically fails its annual safety inspection in most states that require one, preventing legal registration renewal until the fault is repaired. (Added cost: $200 - $800+ (cost of the required repair))
- Vehicle Resale: An active airbag light significantly reduces the vehicle's resale value. Potential buyers will either walk away or demand a price reduction far exceeding the actual cost of repair due to the perceived safety risk. (Added cost: $1000 - $3000+ (diminished resale value))
Diagnosis Steps

- Read the Fault Codes and Suffix
Use a professional OBD-II scanner capable of reading SRS/SDM codes to confirm B0087 is active. Pay close attention to the two-digit suffix (e.g., B0087-04, B0087-3A). An '04' or '05' guarantees an open circuit (wiring), while a '39' confirms an internal sensor failure.
Tools: SRS-capable OBD-II Scanner (Beginner) - Perform a Visual Inspection of the Door Harness
Start with the most likely cause. Carefully inspect the wiring harness inside the flexible rubber boot in the driver's side rear door jamb. Peel the boot back and gently tug on each wire, looking for any that are broken, stretched, or have cracked insulation.
Tools: Flashlight, Trim tool (Beginner) - Inspect and Tighten the Sensor Connector
SAFETY FIRST: Disconnect the negative battery terminal and wait 15 minutes. Remove the rear door panel to access the side impact sensor. Unplug its connector and inspect for corrosion. For GM vehicles, use a small pick to gently tighten the female pins in the connector. Pro Tip: When replacing a GM door harness, remove the old plastic Connector Position Assurance (CPA) lock if it gets stuck inside the sensor port, or the new harness won't seat.
Tools: Trim removal tools, Socket set, Small pick, Flashlight (Intermediate) - Swap Components (Left/Right Sensors)
If the vehicle has an identical sensor on the right side, swap the left and right sensors. Clear the codes, operate the vehicle, and re-scan. If the fault code changes to B0086 (Right Rear Side Impact Sensor), the sensor is confirmed faulty. If the B0087 code returns, the problem is definitively in the left side wiring or connector.
Tools: Socket set, Trim removal tools (Intermediate) - Test Component Resistance
With the battery disconnected, measure the resistance across the component's terminals. A healthy seat belt pretensioner circuit reads between 2.0 and 3.0 ohms. A reading of OL (Open Line) indicates the component has failed. Side impact sensor resistance varies, but a special 2.2 ohm resistor can be used as a simulator to test the circuit; if the code disappears with the simulator installed, the sensor is faulty.
Tools: Multimeter, 2.2 Ohm Airbag System Resistor (optional) (Intermediate) - Advanced: Test Wiring Continuity and Shorts
With the battery disconnected and both the sensor and SDM unplugged, use a multimeter to test continuity. Measure resistance on both wires between the sensor connector and the SDM connector; the reading must be less than 1.0 ohm. Then, test for a short to ground by measuring resistance between each wire and a clean chassis ground; the reading must be OL (infinite).
Tools: Multimeter, Vehicle wiring diagram, Depinning tools (Advanced) - Advanced: Monitor Live Data with Scan Tool
Using a high-end bidirectional scan tool, navigate to the SRS/SDM module and view live data PIDs for the side impact sensors. Monitor the sensor's reported status and circuit resistance in real-time. Wiggling the door harness while watching the data pinpoints an intermittent connection without disassembling components.
Tools: Advanced Bidirectional Scan Tool (Advanced)
When This Code Triggers (Freeze-Frame Conditions)
- Fault Status: Active/Current (The SRS module runs a self-test at every key-on event. The fault is detected immediately upon startup if the circuit is open, shorted, or has high resistance.)
- System Voltage: 9-16 Volts (The code sets under normal operating voltage. Low battery voltage triggers unrelated SRS codes but is not a cause for a specific sensor circuit fault like B0087.)
- Ignition Cycles Since Fault: 0 (Because the fault is checked at every startup, the number of ignition cycles since the fault first occurred logs and increments until the code clears.)
- Component-Specific Data: Varies (e.g., 'Open Circuit') (Advanced scan tools view live data from the SRS module, showing the specific resistance value of the circuit or a status like 'Open,' 'Shorted to Ground,' or 'Incorrect Component ID.')
Related Codes
- B0086 — This is the identical code but for the RIGHT rear side sensor. If you swap the left and right sensors for diagnosis and the code changes to B0086, the sensor is bad. If B0087 returns, the fault is in the left side wiring.
- GM Suffix Codes (B0087-XX) — General Motors uses two-digit suffixes that are essential for diagnosis. B0087-02: Short to Ground. B0087-04 or B0087-05: Open Circuit / High Resistance (most common, indicates broken wire). B0087-39: Internal Electronic Failure (bad sensor). B0087-3A: Incorrect Component Installed (wrong part number). B0087-71: Invalid Serial Data Received (communication issue).
- B0081, B0083, B0084, B0085, B0088 — These are codes for other impact sensors or restraint system components. Seeing multiple sensor codes at once points to a central problem like a faulty SDM, a shared ground issue, or a vehicle-wide network problem.
- U1000, U0177, U0178 — These are communication (U-series) codes. If a U-code is present with B0087, it indicates the SRS module is failing to communicate with the sensor or other vehicle modules. This points toward a larger network problem, a wiring issue beyond just the sensor circuit, or a failed SDM. Diagnose the communication fault first.
Climate & Environmental Factors
- Cold Weather: Low temperatures cause wire insulation and the rubber door boot to become brittle and inflexible, significantly increasing the likelihood of wires breaking from the repeated stress of opening and closing the door. Cold also causes electrical connectors to contract, leading to intermittent open circuits.
- Humidity and Moisture: High humidity, water leaks, or road salt spray in winter leads to corrosion on the pins of SRS connectors. This corrosion increases resistance in the circuit, which the SDM detects as a fault, setting an 'Open Circuit / High Resistance' code.
How to Talk to a Mechanic About This Code
Say this: "I have an airbag light on and my scanner shows code B0087 for the left rear safety sensor. On my vehicle, this is commonly a broken wire in the door harness or a bad connector. I'd like to schedule a diagnostic, please start by inspecting the wiring in the door jamb before replacing any parts."
This signals you are an informed customer. It directs the technician to the most common and cheapest failure point first, discouraging them from immediately quoting an expensive sensor or control module replacement. It sets a collaborative tone and shows you've done your research.
Avoid saying:
- 'My airbag light is on, can you look at it?'
- 'Just fix whatever is wrong with the airbag.'
- 'I think I need a new airbag sensor.'
Questions to ask before authorizing the repair:
- Did you find the specific cause? Was it a broken wire, a bad pin in the connector, or the sensor itself?
- If it's a wire, can you show me the break before you repair it?
- If you are recommending a sensor, how did you rule out a wiring issue? Did you perform a continuity test or swap the sensor with the right side?
- What is the two-digit suffix for the code (e.g., -04, -39)? That will help us confirm the diagnosis.
- What is the warranty on this specific repair and the parts used?
Where to Take It: Dealer vs Independent vs Chain
- Dealer:
A safe but expensive choice. Use them if you suspect a software issue or if the problem is too complex for an independent shop.
Best for: Vehicles under warranty., Confirmed software issues or recalls., Complex electrical faults after an independent shop has failed to find the cause.
Downsides: Highest labor rates and parts costs., Defaults to replacing an entire harness or module when a simpler wire repair suffices. (Typical cost: +50% vs. baseline) - Independent Shop:
Best fit for most owners. An experienced independent technician diagnoses and repairs the common wiring-related causes of B0087 more cost-effectively than a dealer.
Best for: Out-of-warranty vehicles where cost is a factor., Diagnosing well-known pattern failures like broken door harness wires., Building a long-term relationship with a trusted mechanic.
Downsides: Diagnostic capabilities vary; ensure they have an SRS-capable scan tool and experience with electrical faults. (Typical cost: +0% vs. baseline) - Chain Shop:
Avoid for this code. SRS system repairs require specialized knowledge beyond the scope of most chain shops.
Best for: Simple, high-volume jobs like tires, brakes, and oil changes.
Downsides: Technician skill varies dramatically., Lacks the advanced diagnostic tools and training for complex SRS/electrical repairs., Unwilling to perform the detailed wiring or connector pin repairs this code often requires. (Typical cost: -10% vs. baseline)
When to Walk Away From the Repair
If the estimated repair cost for the B0087 code exceeds 40-50% of your car's private-party value, it's time to pause and evaluate your options. However, because an airbag light makes a car nearly impossible to sell and unsafe to drive, the incentive to fix it is much higher than for other codes.
- Car worth $5000, fix is $450: Fix it. This is a very reasonable cost to restore a critical safety feature and the car's resale value.
- Car worth $3000, fix is $1500: Borderline. This repair is 50% of the car's value. Get a second opinion to see if a cheaper repair (e.g., wire splice vs. new harness) is possible before deciding to sell as-is or scrap.
- Car worth $15000, fix is $700: Fix it. The repair cost is a small fraction of the vehicle's value and is essential for safety.
What Scan Tool You Need for This Code
Minimum: An OBD-II scanner that can read and clear Supplemental Restraint System (SRS/Airbag) codes.
A standard $20 engine code reader cannot communicate with the airbag control module. It shows 'No Codes Found' even with the airbag light on. You need a tool specifically advertised with SRS or Airbag system diagnostic capabilities.
Budget: Autel AutoLink ML629 (~$90) — Reads and clears codes for Engine, Transmission, ABS, and SRS on most vehicles. It retrieves the B0087 code and clears it after repair.
Mid-range: BlueDriver Bluetooth Pro (~$120) — Pairs with a smartphone app to read and clear SRS codes, view live data from the SRS module, and access a database of verified fixes for B0087 on your specific vehicle model.
Professional: Autel MaxiCOM MK808 / Foxwell NT809 (~$450-600) — Provides full bidirectional control to test components, views advanced manufacturer-specific data (like GM suffix codes), and offers more in-depth live data graphing to pinpoint intermittent wiring issues without disassembly.
Rent vs buy: Most auto parts stores like O'Reilly and AutoZone offer a loaner tool program, but typically only for basic engine code readers. Due to the liability and complexity, they rarely rent out SRS-capable scanners. For this code, you will likely need to buy a scanner or go to a shop.
How to Clear the Code After You Fix It
- Ensure all SRS components are securely reconnected.
- Reconnect the negative battery terminal.
- Use an SRS-capable OBD-II scan tool to access the Airbag/SRS/SDM module.
- Select the 'Clear Codes' or 'Erase Faults' function.
- Cycle the ignition off, then on, and confirm the airbag warning light turns off after its initial self-check.
Drive cycle (~5 minutes): An extensive drive cycle is not required for an SRS code. The Sensing and Diagnostic Module (SDM) performs a complete self-test of all components each time the ignition is turned to 'ON' or 'RUN'. If the repair was successful, the airbag light extinguishes on its own after the initial startup bulb check and will not return.
Readiness monitors affected: None. SRS/airbag system status does not affect emissions readiness monitors.
Watch out for:
- Disconnecting the battery will NOT clear a B0087 code; it is a hard fault stored in non-volatile memory.
- Using a standard engine-only OBD-II scanner will not work; it cannot communicate with the SRS module to clear the code.
- If the light returns immediately, the root cause was not fixed. The most common mistake is replacing the sensor when the actual fault is in the wiring.
Will This Fail Emissions / State Inspection?
No — by itself this code doesn't fail OBD inspection (but it can keep readiness monitors from setting, which causes a separate fail).
- California: An illuminated airbag light is considered a safety system failure and causes the vehicle to fail the safety portion of the inspection. It does not affect the emissions (smog) test itself, but you cannot complete registration without passing the safety check.
- New York: As of recent regulations, an illuminated airbag warning lamp is noted as an advisory during the safety inspection but is NOT a cause for rejection or failure.
- Texas: As of 2025, annual safety inspections have been eliminated for most non-commercial vehicles. An airbag light will not prevent you from registering your vehicle. However, emissions testing is still required in 17 populous counties, and you are still legally responsible for maintaining a safe vehicle.
Most Commonly Affected Vehicles

- Chevrolet Silverado 1500 (2014-2019) — Extremely prone to broken wires in the left rear door harness. This also causes the power lock or window on that door to fail. Pro Tip: The T30 Torx bolt holding the impact sensor is often reverse-threaded (righty-loosey).
- GMC Sierra 1500 (2014-2019) — Identical to the Silverado, this truck commonly suffers from broken wires in the door jamb harness. The impact sensor bolt is also typically reverse-threaded.
- Chevrolet Equinox (2010-2017) — Frequently experiences loose female connector pins at the left rear side impact sensor, causing an open circuit. The fix involves simply tightening the pins in the connector with a small pick.
- GMC Terrain (2010-2017) — Shares the same platform as the Equinox and is known for having poor pin connections at the impact sensor, leading to B0086 and B0087 codes.
- Ford Explorer (2014-2016) — Was subject to Customer Satisfaction Program 21B11 for a worn or damaged connection to the rear inflatable seat belt connector. This program expired on January 21, 2023.
- Ford F-150 (2009-2014) — On these models, airbag lights are commonly caused by faulty seat belt pretensioner connectors under the seats or corrosion in the main harness connectors located in the driver and passenger footwells.
- Subaru Outback / Legacy (2007-2009) — A unique cause for an airbag warning light on these models is cracked solder joints on the overhead console's passenger airbag status indicator. The SRS module monitors this indicator and interprets the open circuit as a system fault.
- Chevrolet Cruze (2011-2015) — This model is known to set B0086 and B0087 codes due to a poor connection at the rear impact sensor connector, which is fixed by tightening the connector's pins.
Manufacturer-Specific Notes
- General Motors (Chevrolet/GMC): On Silverado/Sierra trucks, B0087 is almost always broken wires in the door jamb. On Equinox/Terrain/Cruze, it's almost always spread pins in the sensor connector. The SDM sets the code if it doesn't get a sensor message for over 375 milliseconds or if the circuit current exceeds 23 mA for 5 milliseconds.
- General Motors (Chevrolet/GMC): Technician Pro Tip: The side impact sensor mounting bolt (T30) is often reverse-threaded. Also, when replacing a door harness, the plastic Connector Position Assurance (CPA) lock gets stuck in the old sensor, preventing the new harness from connecting.
- Ford: Ford issued Customer Satisfaction Program 21B11 for 2014-2016 Explorers to fix a bad connection at the 2nd-row inflatable seat belt. This program was not a recall and expired on January 21, 2023, so repairs are now owner-responsibility.
- Subaru: On 2007-2009 models like the Outback and Legacy, the airbag warning light is caused by cracked solder joints on the overhead passenger airbag indicator light assembly. The system monitors this bulb and sets a fault if it detects an open circuit.
- Various: On some vehicles with three rows of seating, B0087 refers to the 'Third-Row Center Seat-Belt Load-Limiter' and is controlled by the Body Control Module (BCM) instead of the SRS module.
Real Owner Stories
2014 Chevy Silverado with B0087-04 at 115K miles
The 'Service Airbag' message appeared on the dash. The owner also noticed the left rear power window had stopped working simultaneously.
What they tried:
- Initially suspected the sensor itself.
- After searching forums, learned about the common door harness issue.
- Pulled back the rubber boot in the door jamb and found two wires completely broken and several others with cracked insulation.
Outcome: Spliced the two broken wires and wrapped the others with electrical tape as a temporary fix. Cost was under $10 for wire and connectors. The airbag light went off and the power window started working again. The owner plans to replace the full harness ($80 part) for a long-term solution.
Lesson: If other electronics in the same door fail with the airbag light, the door harness is almost certainly the culprit. Always check for broken wires in the door jamb first on GM trucks, as it's the most common failure.
2011 Chevy Equinox with B0087
Airbag light came on after the owner cleaned the car's interior. A scan tool confirmed code B0087, pointing to the left rear impact sensor circuit.
What they tried:
- The owner first tried clearing the code, but it returned immediately.
- Following a popular online video, they removed the rear door panel to access the sensor.
- Instead of replacing the sensor, they disconnected it and used a small pick to gently bend the female pins in the electrical connector to make them tighter.
Outcome: After re-connecting the harness to the sensor, the code was cleared and did not return. The fix was free and only required basic tools to remove the door panel.
Lesson: On vehicles like the Equinox, Terrain, and Cruze, a poor connection at the sensor is a very common cause. Try re-tensioning the connector pins before spending money on a new sensor.
2015 Ford Explorer with B0087
Airbag light appeared intermittently at first, then became constant. The code pointed to a fault in the left rear restraint system.
What they tried:
- The owner took the vehicle to a dealer, suspecting a complex issue.
- The dealer diagnosed a fault in the second-row inflatable seat belt connector, a known issue.
- The vehicle was covered under Ford's Customer Satisfaction Program 21B11, which addressed this specific problem.
Outcome: The dealer repaired the faulty seat belt connector wiring at no charge under the Ford program. The program has since expired (Jan 2023), so this repair is now owner-responsibility.
Lesson: Always check for manufacturer-specific Technical Service Bulletins (TSBs) or special programs. On some vehicles, B0087 refers to a seat belt pretensioner or inflatable seat belt, not just a door impact sensor.
How to Prevent This Code From Triggering
- Lubricate the Door Harness Boot (Every 2-3 years) — The rubber boot in the door jamb becomes dry and stiff, increasing stress on the wires inside when the door opens and closes. Applying a silicone-based lubricant keeps the boot flexible, reducing the strain that leads to broken wires.
- Apply Dielectric Grease to Connectors (Sparingly) (When a connector is disconnected for any service) — Applying a very small amount of dielectric grease to the rubber seals of SRS connectors helps prevent moisture intrusion and corrosion. Do not apply it directly on the pins, as it is non-conductive and impedes the connection if over-applied.
- Secure Harnesses and Avoid Sharp Bends (During any interior or door panel maintenance) — Ensure all wiring harnesses are secured in their factory clips and routed away from sharp metal edges or moving parts. Over-tightened zip ties cut into wire insulation over time, leading to shorts.
- Perform Regular Visual Inspections (Annually) — Periodically check visible wiring, especially in door jambs and under seats, for signs of cracked insulation, corrosion, or strain. Catching wear and tear early prevents a complete wire break and a resulting B0087 code.
Frequently Asked Questions
Can I drive my car with code B0087?
No. The airbag system is completely disabled, meaning no airbags or seat belt pretensioners will deploy in an accident. This significantly increases the risk of serious injury or death.
What does the suffix on a B0087 code mean (e.g., B0087-04)?
The suffix tells you the specific type of fault. For example, B0087-04 means 'Open Circuit/High Resistance,' pointing directly to a wiring problem. B0087-39 means 'Internal Electronic Failure,' indicating the sensor itself is dead.
I replaced the sensor, but the B0087 code came back. What now?
If a new sensor doesn't fix it, the problem is in the wiring or connector. Check for broken wires in the door jamb or spread pins in the sensor connector. Perform a continuity test on the wires from the sensor to the SRS module to pinpoint the break.
My power door lock and window also stopped working. Is this related?
Yes, this is a classic symptom on vehicles like the Chevy Silverado. The wires for the impact sensor, window motor, and door lock actuator all run through the same door jamb harness. When multiple components in one door fail at once, it guarantees the harness is damaged.
How much does it cost to fix B0087?
A simple wiring repair at a shop typically costs $150-$300. Replacing a full door wiring harness ranges from $320-$570 for parts and labor. If a seat belt pretensioner needs replacement, expect to pay between $400 and $800.
How do I know if the problem is the sensor or the wiring?
The suffix code is the first clue, with an 'Open Circuit' code pointing to wiring. The most reliable DIY method is to swap the sensor with the passenger side. If the code moves to the other side (B0086), the sensor is bad; if B0087 returns, the wiring is the problem.
Can I just clear the code by disconnecting the battery?
No. Disconnecting the battery will not fix the underlying electrical fault or clear the permanent code. The SRS module performs a self-test every time the vehicle starts, and the warning light will immediately return.
Is code B0087 part of a recall?
Generally, no. However, Ford issued a Customer Satisfaction Program (21B11) for a similar issue on 2014-2016 Explorers. This provided a free repair for a limited time but has since expired.
Do I need to reprogram anything after the repair?
If you only repair wiring or replace a sensor with an identical OEM part, no programming is needed. The code clears with an SRS-capable scan tool. However, replacing the main Airbag Control Module (SDM) requires dealer programming to match your vehicle's VIN.
What is a Connector Position Assurance (CPA) lock?
A CPA is a small plastic piece on an electrical connector that slides into place after the connector is seated. It acts as a secondary lock to prevent the connector from vibrating loose. They are critical in safety systems like airbags and must be fully engaged.
Key Takeaways
- Code B0087 disables your entire airbag system, meaning no airbags or pretensioners will deploy in a crash until repaired.
- On 2014-2019 GM trucks, inspect the driver's side rear door jamb harness first; broken wires here are the number one cause of this code.
- For GM SUVs and sedans like the Equinox or Cruze, fix the code for free by using a small pick to tighten the spread female pins inside the sensor's electrical connector.
- Always disconnect the negative battery terminal and wait 15 minutes before touching any yellow SRS connectors to prevent accidental airbag deployment.
- Read the two-digit suffix on your scan tool (like B0087-04); an '04' guarantees a broken wire, while a '39' confirms a dead sensor.
Helpful Videos

The information in this article is provided for general reference and educational purposes only. Vehicle specifications, procedures, and part compatibility can vary by production date, trim level, and region. Always consult your vehicle's factory service manual and verify part numbers before purchasing or performing repairs. Safety-critical components such as airbags, seat belts, and braking systems should be installed by a qualified professional.
- 🎬 Helpful Videos
- What Does B0087 Mean?
- Can I Drive With B0087?
- Common Causes
- Symptoms
- Diagnostic Flowchart
- Common Fixes & Costs
- Used vs. New Parts: Buying Guide
- What Happens If You Wait — Timeline
- Cost of Not Fixing It
- Diagnosis Steps
- When This Code Triggers (Freeze-Frame Conditions)
- Related Codes
- Climate & Environmental Factors
- How to Talk to a Mechanic About This Code
- Where to Take It: Dealer vs Independent vs Chain
- When to Walk Away From the Repair
- What Scan Tool You Need for This Code
- How to Clear the Code After You Fix It
- Will This Fail Emissions / State Inspection?
- Most Commonly Affected Vehicles
- Manufacturer-Specific Notes
- Real Owner Stories
- 2014 Chevy Silverado with B0087-04 at 115K miles
- 2011 Chevy Equinox with B0087
- 2015 Ford Explorer with B0087
- How to Prevent This Code From Triggering
- Frequently Asked Questions
- Can I drive my car with code B0087?
- What does the suffix on a B0087 code mean (e.g., B0087-04)?
- I replaced the sensor, but the B0087 code came back. What now?
- My power door lock and window also stopped working. Is this related?
- How much does it cost to fix B0087?
- How do I know if the problem is the sensor or the wiring?
- Can I just clear the code by disconnecting the battery?
- Is code B0087 part of a recall?
- Do I need to reprogram anything after the repair?
- What is a Connector Position Assurance (CPA) lock?
- Key Takeaways
- 🎟️ Get 5% Off