

B0033 on 2007-2013 Cadillac Escalade EXT: Seat Belt Pretensioner Fault Causes and Fixes
This code indicates a fault in the second-row left seat belt pretensioner circuit. The most common cause is a poor connection under the seat, often fixed by inspecting and securing the yellow connector and its small plastic Connector Position Assurance (CPA) retainer, as noted in GM Technical Service Bulletin #08-09-41-002H. If the wiring and connector are confirmed to be good, the seat belt pretensioner assembly itself may need replacement.
- B0033 means there's an electrical fault in the second-row driver's side seat belt pretensioner circuit.
- Before buying any parts, carefully inspect the yellow connector under the second-row left seat for a loose connection or a broken plastic retainer clip (CPA), as this is the most common fix.
- This is a critical safety issue. The airbag system may not work correctly in a crash until this fault is repaired and the code is cleared.
- Due to the risk of accidental deployment, it is strongly recommended that diagnosis and repair of the SIR system be performed by a qualified professional.
What's Unique About the 2007-2013 Cadillac ESCALADE EXT
On this generation of Cadillac Escalade and other GM trucks (GMT900 platform), intermittent airbag lights are a well-documented issue. The primary culprit is often not the expensive safety component itself, but rather the electrical connectors used throughout the SIR system. GM released a specific Technical Service Bulletin (TSB #08-09-41-002H 🎬 Watch: How to fix the common under-seat connector issue.) that addresses poor connections at various airbag and pretensioner connectors, which can become loose or damaged over time, triggering codes like B0033. The design of the under-seat area makes these connectors susceptible to being kicked by passengers or disturbed by items stored under the seat.
Diagnostic Flowchart
Tap your situation to follow the diagnostic path that matches what you're seeing on this vehicle.
Symptoms You May Notice
- The most common symptom is the airbag warning light illuminated on the instrument panel.
- A "Service Airbag System" or "Service Safety Restraint" message may appear on the driver information center (DIC).
- The affected seat belt pretensioner will not deploy in an accident.
- The airbag system will fail its self-check upon starting the vehicle, leaving the warning light on.
- Replacing the SDM (airbag computer) before thoroughly checking the wiring and connector under the seat. This is an expensive and usually unnecessary first step.
- Replacing the clock spring. The clock spring is related to the driver's airbag and steering wheel controls, not the second-row seat belts.
Most Likely Causes
- Loose or Damaged Connector Under Second-Row Left Seat 🔴 High Probability As documented in GM TSB #08-09-41-002H, the Connector Position Assurance (CPA) retainer can become loose, damaged, or may not be fully seated, leading to an intermittent connection. Items stored under the seat or passengers' feet can easily disturb the yellow SIR connector and its wiring.
How to confirm: With the SIR system properly disabled, visually inspect the yellow connector under the second-row left seat. Check if the connector is fully seated and if the small plastic CPA retainer is secure. The CPA must be fully seated for the internal shorting bars to disengage, allowing the circuit to function. Wiggling the connector while monitoring resistance with a professional scan tool can confirm an intermittent connection.
Typical fix: Reseat the connector and the CPA retainer. If the CPA is broken, it must be replaced. If the connector or terminals are corroded or damaged, they will need to be repaired or replaced using a specific SIR terminal repair kit (J-38125). Applying dielectric grease is sometimes recommended to prevent future corrosion.
Est. part cost: $5-$20 for a new CPA retainer or pigtail connector. - Failed Second-Row Left Seat Belt Pretensioner 🟡 Medium Probability The pretensioner contains a small pyrotechnic charge (squib) and an internal resistor. This component can fail electrically over time, causing its resistance to go out of the range expected by the SDM (1.1 to 3.9 ohms).
How to confirm: After confirming the wiring and connector are good, the next step is to suspect the pretensioner. A professional scan tool can read the resistance value of the deployment loop; a value that is too high (open circuit) or too low (short circuit) points to a failed pretensioner. Direct resistance measurement with a multimeter is NOT recommended as it can trigger deployment.
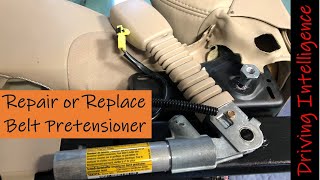
Typical fix: Replace the entire second-row left seat belt assembly, which includes the pretensioner. This part is a hazardous material 🎬 Learn about repairing vs. replacing SRS system components. and requires special handling and must be a new part, not one from a salvage vehicle.
Est. part cost: $200-$350 for an OEM part. - Damaged Wiring Harness ⚪ Low Probability The wiring that runs under the carpet and seat can be pinched, chafed, or cut, especially if previous interior work has been done or if the seat has been repeatedly moved over a foreign object.
How to confirm: Perform a continuity and resistance test on the wires between the SDM and the seat belt pretensioner connector. Check for shorts to ground or power. This should only be done with the component and SDM disconnected.
Typical fix: Repair the damaged section of the wiring harness using approved SIR system repair methods. The terminals have special gold plating to ensure low-energy circuit integrity, and generic terminals should not be used.
Est. part cost: $10-$50 for wiring repair supplies.
Rare But Worth Checking
- Faulty Sensing and Diagnostic Module (SDM): This is the airbag control module. It is a rare failure point for a single circuit fault. All other possibilities, especially wiring and the component itself, should be exhausted before condemning the SDM. On GMT900 trucks, the SDM is located under the driver's seat and can be susceptible to corrosion from water intrusion if the carpet padding becomes saturated, as noted in GM Special Coverage bulletin 09184B. The primary ground for the SDM is G103, located on the cowl above the brake booster. Replacement requires programming to the vehicle.
Diagnosis Steps
- CAUTION: The Supplemental Inflatable Restraint (SIR) system must be disabled before beginning diagnosis. This involves disconnecting the negative battery cable and waiting for at least 2 minutes for the backup power supply in the SDM to discharge. Failure to do so can result in component deployment and serious injury.
- Scan the SDM for the exact B0033 fault code and note its status (current or history) and any accompanying symptom bytes (e.g., :04 for open circuit, :0D for high resistance, :0E for low resistance).
- Visually inspect the yellow connector and wiring harness under the second-row left seat for any obvious damage, pinching, or signs of being disconnected.
- Verify the connector is fully seated and that the Connector Position Assurance (CPA) retainer is in place and secure, per TSB #08-09-41-002H.
- If the connection looks good, disconnect the connector (after disabling the SIR system) and inspect the terminals for corrosion, contamination, or damage. The terminals are gold-plated and require special care.
- If no visible issues are found, a technician will use a professional scan tool (like a GM GDS2 or Tech2) to monitor the deployment loop resistance values in real-time while wiggling the harness to check for intermittent opens or shorts. The value should be stable and between 1.1 and 3.9 ohms.
- If wiring and connectors are confirmed to be good, the seat belt pretensioner assembly is the most likely failed component.
- As a final, and least likely step, the SDM itself would be tested, checking for internal faults and proper communication on the CAN bus. Verify the integrity of the SDM ground at location G103 on the cowl.
Parts You'll Likely Need
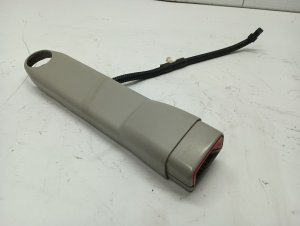
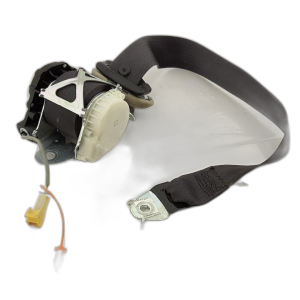
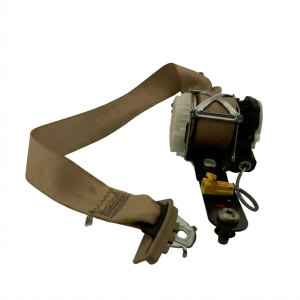
- Second Row Left Seat Belt Assembly with Pretensioner
(OEM #19260320 (Ebony interior color))— This is the component the code directly refers to. If wiring and connectors are confirmed to be good, the internal fault (improper resistance) lies within this assembly.
Trusted brands: ACDelco, GM Genuine Parts
OEM price range: $200-$350
Aftermarket price range: $150-$250 - Connector Position Assurance (CPA) Retainer
(OEM #88988974 or 15317832 (Verify connector type))— This small plastic clip is a common failure point identified in GM service bulletin #08-09-41-002H and can cause the intermittent connection that triggers the code. It is often broken or lost during prior repairs.
Trusted brands: ACDelco, GM Genuine Parts, Delphi
OEM price range: $5-$15
Technical Service Bulletins (TSBs) & Recalls
- 08-09-41-002H: Intermittent AIR BAG Indicator/Lamp Illuminated with DTC(s) B0012, B0013, B0015, B0016, B0019, B0020, B0022, B0023, B0026, B0033, B0040, B0042 or B0044 Set (Inspect and Replace Connector Position Assurance (CPA) Retainer).
Platform-Specific Known Issues
- GM Technical Service Bulletin #08-09-41-002H directly addresses an intermittent airbag light with DTC B0033 (among others) on 2007-2014 Cadillac Escalade models. The bulletin states the cause may be a loose, missing, or damaged Connector Position Assurance (CPA) retainer at an SIR connector, and provides instructions for inspection and replacement.
- Owners frequently report that simply locating the yellow connector under the second-row seat, disconnecting it, and reconnecting it securely solves the problem, suggesting a widespread issue with connector seating from the factory or from passenger interference.
Mechanic-Grade Diagnostic Values
- Seat Belt Pretensioner Deployment Loop Resistance — expected: 1.1 - 3.9 Ohms. Failure: A value less than 1.1 ohms or greater than 3.9 ohms for 120ms will set the DTC.
Hidden / Shadow Codes Worth Checking
- B0033 01: Second Row Left Deployment Loop Short to Battery (see via A professional scan tool like the GM GDS2 or Tech2 can read these two-digit symptom bytes (sub-faults).)
- B0033 02: Second Row Left Deployment Loop Short to Ground (see via A professional scan tool like the GM GDS2 or Tech2 can read these two-digit symptom bytes (sub-faults).)
- B0033 04: Second Row Left Deployment Loop Open Circuit (see via A professional scan tool like the GM GDS2 or Tech2 can read these two-digit symptom bytes (sub-faults).)
- B0033 0D: Second Row Left Deployment Loop Resistance Above Threshold (see via A professional scan tool like the GM GDS2 or Tech2 can read these two-digit symptom bytes (sub-faults).)
- B0033 0E: Second Row Left Deployment Loop Resistance Below Threshold (see via A professional scan tool like the GM GDS2 or Tech2 can read these two-digit symptom bytes (sub-faults).)
Scan Tool Commands That Help
- GM GDS2 / Tech2: Diagnostic Data Display (Live Data) — To monitor the real-time resistance of the 'Second Row Left Pretensioner Deployment Loop' circuit. Wiggling the harness while watching this value can help pinpoint an intermittent open or short.
- GM GDS2 / Tech2: Clear DTCs — After a repair has been completed, this function is used to clear the B0033 code. The airbag light should then stay off after an ignition cycle if the repair was successful.
Wiring & Ground Locations
- G103 — Located at the left rear of the engine compartment on the cowl, above the brake booster.. This is a primary ground point for the Inflatable Restraint Sensing and Diagnostic Module (SDM). A poor connection here can cause various and unpredictable SRS system faults.
- G303 — On the left side B-pillar, located behind the trim panel.. This is a major chassis ground point in the immediate vicinity of the second-row left seat. While not exclusive to the SRS system, poor integrity of this ground could potentially affect the pretensioner circuit.
- Pretensioner Connector — Under the second-row left seat, typically a yellow connector.. This is the main connection point for the component identified by the fault code. It is the most common point of failure due to being disturbed, and it contains the Connector Position Assurance (CPA) clip mentioned in TSB #08-09-41-002H.
Model Year Variations Within This Range
- 2007-2013: The factory diagnostic software may differ. Newer models in this range (approx. 2013) will use the GDS2 (Global Diagnostic System 2) software, while earlier models use Tech2Win, a PC-based simulator for the older Tech2 handheld scanner. Functionality is similar, but the interface and connection process are different.
Helpful Videos
We Have This Part in Stock


The information in this article is provided for general reference and educational purposes only. Vehicle specifications, procedures, and part compatibility can vary by production date, trim level, and region. Always consult your vehicle's factory service manual and verify part numbers before purchasing or performing repairs. Safety-critical components such as airbags, seat belts, and braking systems should be installed by a qualified professional.
- Cadillac ESCALADE EXT:
- 🎬 Helpful Videos
- 🛍️ Shop This Part
- What's Unique About the 2007-2013 Cadillac ESCALADE EXT
- Diagnostic Flowchart
- Symptoms You May Notice
- Most Likely Causes
- Rare But Worth Checking
- Diagnosis Steps
- Parts You'll Likely Need
- Technical Service Bulletins (TSBs) & Recalls
- Platform-Specific Known Issues
- Mechanic-Grade Diagnostic Values
- Hidden / Shadow Codes Worth Checking
- Scan Tool Commands That Help
- Wiring & Ground Locations
- Model Year Variations Within This Range
- 🎟️ Get 5% Off