

B0020 on 2008-2014 Cadillac CTS: Airbag Light Causes and Fixes
This code indicates a fault in the driver-side airbag circuit. The most common cause on this specific vehicle is a poor connection, often due to a faulty Connector Position Assurance (CPA) retainer, as noted in GM Technical Service Bulletin #08-09-41-002H. Inspecting and securing airbag connectors, especially under the driver's seat, is the first step.
- B0020 means the driver's airbag is disabled. This is a critical safety issue that needs to be addressed promptly.
- The most common cause on a 2008-2014 CTS is a poor connection, not a failed part. Check the yellow connectors under the driver's seat and at the steering column first.
- A GM Technical Service Bulletin (TSB) specifically points to faulty plastic clips (CPA retainers) on the airbag connectors as a known problem.
- Do not attempt to repair the airbag system without first disconnecting the battery and waiting at least 10 minutes for the system to discharge.
- While a DIY fix is possible if it's just a loose connector, diagnosing complex wiring faults or replacing parts like the clock spring is best left to a professional due to the safety risks.
What's Unique About the 2008-2014 Cadillac CTS
For the second-generation Cadillac CTS and a wide range of other GM vehicles from this era, intermittent airbag lights are a well-documented issue. GM released a specific Technical Service Bulletin (TSB #08-09-41-002H) that includes code B0020, pointing directly to faulty Connector Position Assurance (CPA) retainers as a primary cause. These small plastic clips can become loose, damaged, or go missing, leading to a poor connection at a critical airbag system harness (often the yellow connectors) and triggering the fault code. This makes checking connectors under the driver's seat and at the steering column a more probable first step than on other vehicles where the clock spring might be the immediate suspect.
Diagnostic Flowchart
Tap your situation to follow the diagnostic path that matches what you're seeing on this vehicle.
Symptoms You May Notice
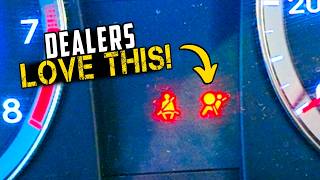
- Airbag warning light is continuously illuminated on the instrument cluster.
- "Service Air Bag" message displayed on the Driver Information Center (DIC).
- Immediately replacing the clock spring without first checking the easier-to-access connectors under the seat or at the steering column base, which is the more common failure point according to TSBs and owner forums.
- Replacing the driver's airbag module itself, which is an expensive part, before thoroughly testing the wiring and connectors that are the more frequent point of failure.
- Clearing the code without fixing the underlying issue. The code will almost always return on the next ignition cycle if the fault condition still exists.
Most Likely Causes
- Loose, Damaged, or Missing Connector Position Assurance (CPA) Retainer 🔴 High Probability This is a known issue identified by GM in TSB #08-09-41-002H. The CPA clips on the yellow airbag harness connectors can fail, leading to intermittent or poor connections. This TSB applies to a very large number of GM vehicles from the era, including the CTS.
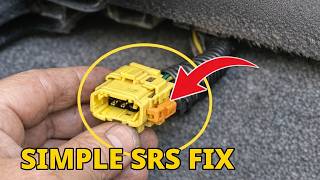
How to confirm: Visually inspect the yellow airbag connectors, particularly the large one under the driver's seat and at the base of the steering column. Check if the CPA retainer (often a small, different colored plastic clip, sometimes blue or red) is fully seated, broken, or missing. The connector and CPA should both make a tactile click when seated.
Typical fix: Secure or replace the Connector Position Assurance (CPA) retainer. Ensure the electrical connector is fully seated before locking the CPA in place. In some cases, owners have had success simply unplugging, cleaning with contact cleaner, and replugging the connector. A zip tie may be used as a temporary measure to hold a loose connector together, but replacing the CPA is the correct fix.
Est. part cost: $5-$20 - Poor Connection or Damaged Wiring Under Driver's Seat 🟡 Medium Probability Movement of the power seat can stress the wiring harness over time, leading to chafed wires or loose connector pins. Debris or items stored under the seat can also damage the harness or dislodge the connector. Forum users on CadillacForums and other platforms frequently cite this as the cause of their airbag light.
How to confirm: With the battery disconnected and the SRS system disarmed, unplug and inspect the large yellow connector under the driver's seat. Look for corrosion, spread/damaged pins, or chafed/broken wires. Wiggle the harness while checking for continuity with a multimeter (if you have the skill and proper diagrams). Often, just visually inspecting the wires where they enter the connector reveals a break.
Typical fix: Clean the connector terminals with electrical contact cleaner. If pins are spread, they may need to be carefully re-tensioned or the connector pigtail replaced. Repair any damaged wires using approved methods (crimp connectors are preferred over solder for this application to avoid creating a new stress point). Dorman and ACDelco offer replacement pigtails.
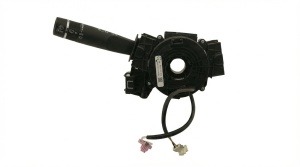
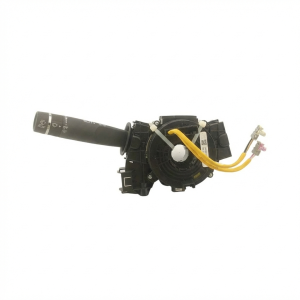
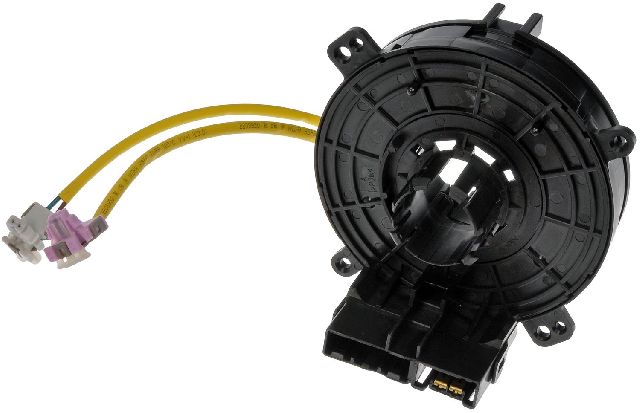
Est. part cost: $15-$50 for a connector pigtail - Faulty Clock Spring (Steering Wheel Coil) ⚪ Low Probability The clock spring contains a coiled ribbon of wires that allows the steering wheel airbag, horn, and controls to stay connected while the wheel turns. Over time, this ribbon can fatigue and break, causing an open circuit. While less common than connector issues for this specific code, it is a known failure point on most modern vehicles.
How to confirm: This is typically diagnosed after confirming all other connectors and wiring are intact. A scan tool that can read live SRS data may show resistance changing erratically or going to 'open' as the steering wheel is turned from lock to lock. A continuity test on the clock spring itself is the definitive check, but requires removal.
Typical fix: Replace the clock spring assembly in the steering column. This requires removing the steering wheel and airbag module. An OEM part number for some 2014 CTS models is 22866484.
Est. part cost: $50-$250
Rare But Worth Checking
- Faulty Driver Airbag Inflator: It's uncommon for the airbag module itself to fail, but it can happen. The internal resistance of the deployment squib can fall out of specification. This is usually the last part to be replaced after all wiring and connection issues have been ruled out. A professional would use a special SRS load tool (like the J 38715-A) to substitute the airbag and confirm the fault is in the bag itself 🎬 See this simple and effective way to test airbag systems. before ordering a replacement.
- Faulty Sensing and Diagnostic Module (SDM): Extremely rare. The SDM is the central computer for the airbag system. A failure here would likely present with multiple other codes, a loss of communication with the module, or other bizarre electrical symptoms. It should only be replaced after every other possibility has been exhausted.
Diagnosis Steps
- SAFETY FIRST: Disconnect the negative battery terminal and wait at least 15 minutes for the system's backup power to discharge before working on any yellow-harnessed airbag components. Never use a standard multimeter to probe airbag circuits directly as it can induce a current and cause deployment.
- Scan the SRS module with a capable OBD-II scanner to confirm B0020 is present and note any other codes. A basic code reader will not read SRS codes.
- Visually inspect the yellow airbag connectors under the driver's seat and at the base of the steering column. Look for any obvious damage, and specifically check the condition and seating of the Connector Position Assurance (CPA) clips as per TSB #08-09-41-002H.
- If a connector seems suspect, disconnect it (with the battery already disconnected) and inspect the pins for corrosion, damage, or being spread apart. Clean with electrical contact cleaner if necessary.
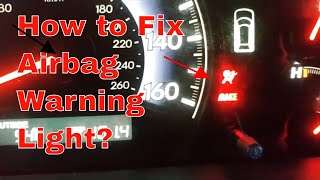
- Firmly reconnect the connector, listen for a click, and ensure the CPA clip is securely locked in place. 🎬 Watch: A pro's DIY guide to fixing your airbag light. Some owners report success by simply unplugging and replugging the connector.
- If the issue persists, the next step is to test the continuity of the wiring between the SDM, the clock spring, and the airbag itself. This requires a vehicle-specific wiring diagram and a multimeter.
- A professional can use an SRS simulator or load tool (e.g., J 38715-A) to safely substitute the airbag and determine if the fault lies in the wiring/connectors or the airbag module itself.
- If all wiring and connectors are confirmed to be good, the fault may lie with the clock spring or, rarely, the airbag inflator or SDM.
Parts You'll Likely Need
- Airbag Connector Position Assurance (CPA) Retainer
(OEM #88988974)— This is the most likely cause of the problem according to GM's own technical service bulletin. It's a tiny, inexpensive part that prevents the main connector from backing out.
Trusted brands: ACDelco, GM Genuine
OEM price range: $5-$15
Aftermarket price range: $5-$10 - Airbag Connector Pigtail
(OEM #e.g., Dorman 645-622, ACDelco PT2590)— If the connector itself or the terminals within are damaged from stress or debris, replacing the pigtail is the correct repair. This often happens to the connector under the driver's seat.
Trusted brands: ACDelco, Dorman, Standard Motor Products
OEM price range: $25-$50
Aftermarket price range: $15-$40 - Clock Spring (Steering Wheel Coil)
(OEM #22866484)— If wiring and connector issues are ruled out, the internal ribbon cable of the clock spring is the next most likely failure point that would cause an open or high resistance in the driver's airbag circuit.
Trusted brands: ACDelco, GM Genuine, Dorman
OEM price range: $150-$250
Aftermarket price range: $50-$120
Related Codes That Often Appear With This One
- B0019 — This code is for the Driver Airbag Stage 1 control. Since B0020 is for Stage 2, they are part of the same dual-stage airbag and a wiring issue in a shared connector or harness could affect both circuits, triggering both codes.
- B0012, B0013, B0015, B0016, etc. — The TSB #08-09-41-002H lists B0020 along with a dozen other airbag codes (B0012, B0013, B0015, B0016, B0019, B0022, B0023, B0026, B0033, B0040, B0042, B0044). Finding any of these codes together points strongly toward the common issue of a faulty CPA retainer causing a poor connection somewhere in the SRS system.
Technical Service Bulletins (TSBs) & Recalls
- 08-09-41-002H: Addresses intermittent AIR BAG indicator illumination with DTC B0020 (among many others) due to issues with the Connector Position Assurance (CPA) retainer. This is the most critical document for this issue.
Platform-Specific Known Issues
- The primary vehicle-specific issue is the one documented in TSB #08-09-41-002H, where a loose, missing, or damaged Connector Position Assurance (CPA) retainer at an SIR module or harness connector can cause an intermittent airbag light and set code B0020.
- Owners frequently report that the yellow connector under the driver's seat is the culprit, becoming loose or damaged from seat movement or items stored under the seat.
Mechanic-Grade Diagnostic Values
- Driver Airbag Deployment Loop Resistance (Live Scan Tool Data) — expected: 1.1 to 3.9 ohms. Failure: A reading below 1.1 ohms (short) or above 3.9 ohms (open/high resistance) for 120ms will set the code. A reading of ~65 ohms can indicate an open circuit.
- Airbag Component Resistance (Multimeter, Component Disconnected) — expected: ~2.2 to 3.0 ohms. Failure: A reading of infinity or mega-ohms (MΩ) indicates an open circuit within the component (e.g., inflator or pretensioner).
- Continuity of Control Circuit Wiring — expected: Less than 1.0 ohm. Failure: A reading greater than 1.0 ohm indicates high resistance or an open in the harness between the SDM and the component connector.
- High Control Circuit to Ground (Key ON, SDM disconnected) — expected: Less than 1 Volt. Failure: Voltage greater than 1V indicates a short to voltage in the control circuit.
Hidden / Shadow Codes Worth Checking
- B0020 04: Indicates an Open Circuit in the Driver Airbag Stage 2 deployment loop. This is more specific than the base code and points directly to a broken wire, unplugged connector, or failed component like a clock spring. (see via GM Tech2 or GDS2 scan tool.)
- B0020 0D: Indicates Resistance Above Threshold in the Driver Airbag Stage 2 deployment loop. This often points to a poor connection with corrosion or a partially failed component. (see via GM Tech2 or GDS2 scan tool.)
- B0020 0E: Indicates Resistance Below Threshold in the Driver Airbag Stage 2 deployment loop. This points to a short circuit in the wiring. (see via GM Tech2 or GDS2 scan tool.)
- B0020 02: Indicates a Short to Ground in the Driver Airbag Stage 2 deployment loop. (see via GM Tech2 or GDS2 scan tool.)
Scan Tool Commands That Help
- GM Tech2 / GDS2: Read DTC Information — Use this to view the specific B0020 symptom code (e.g., 04, 0D, 0E) which provides critical direction for diagnosis (open, high resistance, short).
- GM Tech2 / GDS2: Clear All DTCs — After a physical repair is completed, SRS codes are 'hard faults' and must be manually cleared. They will not go away on their own even if the fault is fixed.
- GM Tech2 / GDS2: Data Display > SIR > Deployment Loop Resistance — Use this to view the live resistance of the airbag circuit. Wiggling wires or turning the steering wheel while watching this data can help pinpoint intermittent opens or shorts.
Wiring & Ground Locations
- G200 — Located in the left (driver's side) kick panel area.. This is a major interior ground point for multiple modules, including the Body Control Module (BCM). A poor ground here can cause a variety of strange electrical issues and communication faults between modules like the BCM and SDM.
- Sensing and Diagnostic Module (SDM) — Typically located under the center console, between the front seats, or under one of the front seats.. This is the control unit for the entire airbag system. All diagnostic tests for wiring continuity will originate or terminate at the SDM's main connector.
- Underseat Connector — A large, bright yellow connector located under the driver's seat.. This is the most common failure point. It connects the body harness to the seat harness, which includes wiring for the side airbag and seat belt pretensioner. It is prone to being disturbed or damaged.
- X211 (Example from other GM) — On some GM vehicles, this is the instrument panel harness to body harness inline connector.. This represents a potential hidden failure point. While the under-seat connector is more common, a fault could exist at other inline connectors in the dashboard, which are harder to access.
Real Owner Repair Stories
- YouTube channel 'mechanictechniks' (2010 Cadillac CTS) — Airbag light was on. Scan tool showed a passenger side airbag code (B0021-0D, high resistance), which is the equivalent fault on the opposite side.
❌ Tried (didn't work) Initial diagnosis pointed to a bad connection.
✅ What actually fixed it The problem was fixed by simply accessing the yellow connector under the passenger seat, disconnecting it, applying electrical lubricant, and reconnecting it securely. The fault code was then cleared with a scan tool. - YouTube channel 'Driving Intelligence' (2003-2007 Cadillac CTS (First Gen, but diagnostic principle is identical)) — Service Airbag message with codes B0065 (Pretensioner Loop Open) and B0066.
❌ Tried (didn't work) The owner first needed to rule out the wiring harness and SDM.
✅ What actually fixed it The owner tested the resistance of the seat belt pretensioner and found it was an open circuit (reading in mega-ohms). A known-good part from a junkyard measured 2.6 ohms. Replacing the seat belt buckle assembly (which contains the pretensioner) and clearing the codes fixed the issue. This demonstrates the definitive test for a suspected bad SRS component.
Model Year Variations Within This Range
- 2008-2013: The factory-level diagnostic tool for these years is the GM Tech 2 handheld scanner.
- 2013-2014: GM began phasing in the MDI (Multiple Diagnostic Interface) with GDS2 (Global Diagnostic System 2) laptop-based software around 2013. By 2014, GDS2 was the standard. While a Tech 2 may have some functionality, full diagnostics on these later models requires the newer system.
- 2014: The 2014 model year was a transition year. The all-new third-generation CTS sedan was introduced, based on a completely different architecture. However, the second-generation CTS coupe and wagon were also sold as 2014 models. It is critical to distinguish which vehicle is being worked on, as parts and procedures are not interchangeable.
Helpful Videos



Used OEM Parts in Stock
New Aftermarket Parts Available


The information in this article is provided for general reference and educational purposes only. Vehicle specifications, procedures, and part compatibility can vary by production date, trim level, and region. Always consult your vehicle's factory service manual and verify part numbers before purchasing or performing repairs. Safety-critical components such as airbags, seat belts, and braking systems should be installed by a qualified professional.
- Cadillac CTS:
- 🎬 Helpful Videos
- 🛍️ Shop This Part
- What's Unique About the 2008-2014 Cadillac CTS
- Diagnostic Flowchart
- Symptoms You May Notice
- Most Likely Causes
- Rare But Worth Checking
- Diagnosis Steps
- Parts You'll Likely Need
- Related Codes That Often Appear With This One
- Technical Service Bulletins (TSBs) & Recalls
- Platform-Specific Known Issues
- Mechanic-Grade Diagnostic Values
- Hidden / Shadow Codes Worth Checking
- Scan Tool Commands That Help
- Wiring & Ground Locations
- Real Owner Repair Stories
- Model Year Variations Within This Range
- 🎟️ Get 5% Off