

B0013 on 2007-2014 Chevrolet Tahoe: Airbag Light Causes and Fixes
The B0013 code on a 2007-2014 Tahoe usually indicates a poor connection in an airbag circuit, often due to a faulty Connector Position Assurance (CPA) retainer as noted in a GM Technical Service Bulletin. Inspecting and replacing this small plastic clip on the yellow airbag connectors, or checking for broken wires under the driver's seat, are the most common fixes.
- B0013 means there's an electrical problem in the driver's airbag circuit, which will disable it.
- Before buying any parts, inspect the small plastic clips (CPA retainers) on the yellow airbag connectors, as a broken one is the most likely cause per a GM service bulletin.
- Also check the wiring under the driver's seat for breaks, as this is another common weak point on the Tahoe.
- This is a critical safety issue. If you are not comfortable working with the airbag system, professional service is strongly recommended.
What's Unique About the 2007-2014 Chevrolet TAHOE
The GMT900 platform, which includes the 2007-2014 Tahoe, is widely known for issues with its Supplemental Inflatable Restraint (SIR) system connectors. GM issued Technical Service Bulletin #08-09-41-002H covering these vehicles and dozens of other GM models, pointing directly to problems with Connector Position Assurance (CPA) retainers causing intermittent airbag faults. This makes connector inspection a primary diagnostic step on these trucks, often ahead of suspecting part failures like the clock spring or airbag module itself. Furthermore, broken wires under the power-adjustable driver's seat are a very common real-world failure point on this platform.
Diagnostic Flowchart
Tap your situation to follow the diagnostic path that matches what you're seeing on this vehicle.
Symptoms You May Notice
- Airbag warning light is continuously illuminated on the instrument cluster.
- "Service Air Bag" message displayed on the Driver Information Center (DIC).
- Replacing the entire driver's airbag module when only the connector's CPA clip was broken or loose.
- Replacing the clock spring before thoroughly inspecting the more common and cheaper-to-fix wiring and connectors under the seat and at the airbag itself.
- Replacing the clock spring when the actual issue was poor terminal tension in the connector that plugs into it.
Most Likely Causes
- Loose, Damaged, or Missing Connector Position Assurance (CPA) Retainer 🔴 High Probability This is a well-documented issue on the GMT900 platform, as specified in TSB #08-09-41-002H. The small plastic CPA clips can become brittle and break, or simply not be seated correctly, leading to a poor connection at the airbag module or other SIR connectors.
How to confirm: After disabling the SIR system, visually inspect the yellow airbag connectors, particularly at the steering wheel airbag and under the seats. Check if the small CPA retainer clips are present, fully seated, and not broken. The connector body and the CPA may seat independently; both must click into place.
Typical fix: Replace the broken or missing CPA retainer. The part is often available as a separate component or as part of a connector pigtail kit. Ensure the new CPA is fully seated after the main connector is plugged in.
Est. part cost: $5-$20 - Damaged Wiring or Poor Terminal Tension 🟡 Medium Probability Wiring under the driver's seat for the seat position sensor is a known weak point that can stretch and break from repeated seat movement. Additionally, wiring in the steering column can fatigue. Another GM bulletin (PI1474) suggests poor terminal tension at the steering wheel airbag coil connector can also be a cause.
How to confirm: Inspect wiring harnesses under the driver's seat and at the steering column for chafing, pinching, or breaks. A YouTube video by 'Wrench Sense with Nate Johnson' shows this exact wire for the seat position sensor broken clean off. 🎬 Watch: This video shows the common broken seat wire fix. If codes B0012 and B0013 appear, poor terminal tension in the clock spring's 4-wire plug can be checked by carefully cleaning and slightly bending the contacts for a tighter fit.
Typical fix: Repair the broken wire with a splice or replace the connector pigtail. If the clock spring connector has poor tension, it may be possible to re-tension the pins, otherwise the connector or clock spring may need replacement.
Est. part cost: $15-$150 - Faulty Clock Spring (Steering Wheel Inflatable Restraint Module Coil) ⚪ Low Probability The clock spring contains a ribbon cable that allows electrical contact for the steering wheel airbag and controls while the wheel turns. This cable can wear out and break internally over many years of use. Be aware that some owners have reported receiving defective aftermarket clock springs, making OEM parts a safer, albeit more expensive, choice.
How to confirm: If connector and wiring checks pass, and the code points specifically to a driver-side loop, the clock spring is the next logical suspect. Diagnosis often involves testing continuity through the clock spring circuits with proper tools (not a standard ohmmeter).
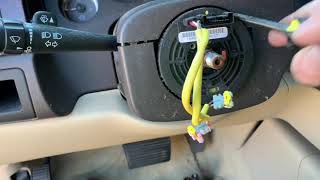
Typical fix: Replace the clock spring assembly. This requires removing the steering wheel. 🎬 See this walkthrough for removing the wheel and clock spring.
Est. part cost: $70-$250
Rare But Worth Checking
- Electrical Interference from Aftermarket Accessories: A GM informational document (PIT5564A) has noted that some aftermarket phone chargers and other 12V accessories can create electrical noise, causing fluctuating resistance readings in the airbag circuits and falsely triggering codes like B0013. This is a simple first check before beginning invasive diagnostics.
- Faulty Driver's Airbag Module: Less commonly, the inflator module within the airbag itself can develop an internal fault, causing its resistance to go out of specification. This is typically diagnosed after all wiring and connector issues have been ruled out.
- Faulty Sensing and Diagnostic Module (SDM): The airbag control module itself can fail, but this is rare. It should only be considered after exhausting all other possibilities, as it is an expensive component and requires programming to the vehicle.
Diagnosis Steps
- CAUTION: Before any physical inspection, you MUST disable the SIR system. Typically, this involves disconnecting the vehicle's negative battery terminal for at least 15-60 minutes to allow system capacitors to discharge. Failure to do so can result in accidental airbag deployment and serious injury.
- As a preliminary step, unplug any aftermarket phone chargers or other accessories from the 12V power outlets to rule out electrical interference.
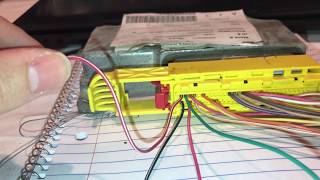
- Scan the SRS module with a professional-grade scan tool capable of reading B-codes to confirm B0013 is the active code. Note any symptom bytes like 04, 0D, or 0E, which indicate open circuit or high/low resistance. 🎬 Watch: A professional guide to diagnosing B0012 and B0013 codes.
- Visually inspect the yellow airbag connectors under the driver's seat and behind the steering wheel airbag. Look for any obvious damage, corrosion, or disconnected plugs.
- Specifically check the Connector Position Assurance (CPA) retainers on these connectors, as per TSB #08-09-41-002H. Ensure they are present, intact, and fully locked. A loose or broken CPA is a primary suspect.
- Thoroughly inspect the wiring harness under the driver's seat for any stretched, chafed, or broken wires, a common failure point on these trucks due to seat movement.
- If no external wiring or connector issues are found, the problem may lie within the steering column's clock spring or the airbag module itself. Check for terminal tension at the clock spring connector before replacing the part.
- After any repair, reconnect the battery and use a scan tool to clear the DTCs. Verify the airbag light does not return.
Parts You'll Likely Need
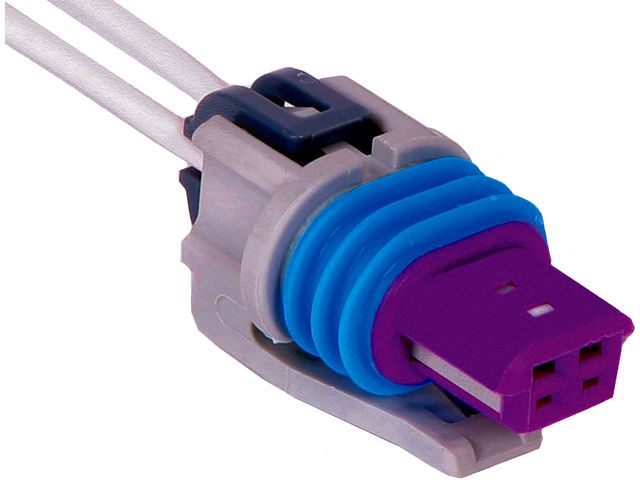
- Airbag Wiring Harness Connector Retainer (CPA)
(OEM #88988974)— This is the most common failure point identified in GM's own service bulletin for the B0013 code on this vehicle. The plastic becomes brittle and breaks.
Trusted brands: ACDelco, Dorman
OEM price range: $3-$10
Aftermarket price range: $2-$8 - Airbag Connector Pigtail — If the connector itself is damaged or the wires are broken at the plug (especially under the driver's seat), a new pigtail is needed to splice into the harness.
Trusted brands: ACDelco, Dorman
OEM price range: $25-$50
Aftermarket price range: $15-$35 - Clock Spring (SIR Coil) — If the fault is internal to the steering column wiring, the entire clock spring assembly must be replaced. Be cautious with non-OEM parts, as some owners have reported them being defective out of the box.
Trusted brands: ACDelco, Standard Motor Products, Dorman
OEM price range: $150-$250
Aftermarket price range: $70-$150
Related Codes That Often Appear With This One
- B0012 — B0012 refers to the 'Driver Frontal Deployment Loop Stage 1'. Since both Stage 1 and Stage 2 (B0013) circuits run through the same connectors and clock spring, a fault in the shared wiring path can trigger both codes simultaneously.
- B0021 — This code relates to the 'Passenger Seat Side Air Bag Deployment Loop'. While a different circuit, forum users report that general under-seat connector and wiring issues on the GMT900 platform can cause a variety of airbag codes, and checking these connectors is a common fix for multiple codes.
Technical Service Bulletins (TSBs) & Recalls
- #08-09-41-002H: Diagnostic Information for Supplemental Inflatable Restraint (SIR) System, Intermittent AIR BAG Indicator/Lamp Illuminated with DTC(s) B0012, B0013... Set (Inspect and Replace Connector Position Assurance (CPA) Retainer).
- PI1474: Mentions that poor terminal tension in the steering wheel airbag coil connector can cause B0012 or B0013.
- PIT5564A: An informational bulletin noting that electrical interference from aftermarket 12V accessories can cause false airbag codes.
Platform-Specific Known Issues
- TSB for Connector Position Assurance (CPA) Retainer: TSB #08-09-41-002H explicitly calls out intermittent airbag lights with code B0013 being caused by a faulty Connector Position Assurance (CPA) retainer on various SIR connectors. This is the first place a technician should look.
Mechanic-Grade Diagnostic Values
- Driver Frontal Deployment Loop (Stage 2) Resistance — expected: Between 1.7 and 5.1 ohms. Some GM documents specify a tighter range of 1.74 – 3.41 ohms for similar systems.. Failure: A reading less than ~1.7 ohms sets a low resistance code (symptom byte 0E). A reading greater than ~5.1 ohms sets a high resistance code (symptom byte 0D). An infinite reading indicates an open circuit (symptom byte 04).
- Deployment Loop High/Low Circuit Voltage to Ground — expected: Less than 1 volt with ignition ON.. Failure: A reading greater than 1 volt indicates a short to voltage in that circuit.
Hidden / Shadow Codes Worth Checking
- B0013 01: Driver Frontal Deployment Loop Stage 2 Short to Battery (see via A professional SRS-capable scan tool like a GM Tech2 or GDS2 is required.)
- B0013 02: Driver Frontal Deployment Loop Stage 2 Short to Ground (see via A professional SRS-capable scan tool like a GM Tech2 or GDS2 is required.)
- B0013 04: Driver Frontal Deployment Loop Stage 2 Open Circuit (see via A professional SRS-capable scan tool like a GM Tech2 or GDS2 is required.)
- B0013 0D: Driver Frontal Deployment Loop Stage 2 Resistance Above Threshold (see via A professional SRS-capable scan tool like a GM Tech2 or GDS2 is required.)
- B0013 0E: Driver Frontal Deployment Loop Stage 2 Resistance Below Threshold (see via A professional SRS-capable scan tool like a GM Tech2 or GDS2 is required.)
Scan Tool Commands That Help
- GDS2 (Global Diagnostic System 2): Data Display: Deployment Loop Resistance Data — To live-monitor the resistance of a specific airbag deployment loop. This is extremely useful for finding intermittent open/high resistance faults by wiggling harnesses or moving seats while watching the data. The specific path is: Module Diagnostics > K36 Restraints Control Module > Data Display > Deployment Loop 1-14 Resistance Data.
- GDS2 / Tech2: Clear DTCs — After a repair is completed, the fault codes must be manually cleared from the Sensing and Diagnostic Module (SDM). Airbag codes are 'latched' and will not clear on their own even if the fault is resolved.
- GDS2 / Tech2: SDM Setup / Programming — If the Sensing and Diagnostic Module (SDM) itself is replaced, it must be programmed to the vehicle's VIN and specific configuration.
Wiring & Ground Locations
- G103 — Located on the cowl in the engine compartment, generally above the brake booster.. This is a primary ground point for the Sensing and Diagnostic Module (SDM), Body Control Module (BCM), and the Data Link Connector (DLC). A poor connection here can cause various erratic electrical issues, including false airbag codes.
- G303 / G304 — Located at the base of the driver's side 'B' pillar (G303) and passenger's side 'B' pillar (G304).. These are major interior ground points for components under and around the front seats. A loose or corroded ground here could affect the seat position sensor or side airbag sensor circuits that share harnesses with the main airbag system.
- Clock Spring Connector (X3) — The connector on the steering column side that the clock spring plugs into.. GM has identified that poor terminal tension in this specific connector can cause high resistance and trigger B0012/B0013 codes. This should be checked before replacing the clock spring itself.
Real Owner Repair Stories
- YouTube channel 'Wrench Sense with Nate Johnson' (2007-2014 Chevrolet Tahoe / GMC Yukon) — "Service Air Bag" message on the instrument cluster.
❌ Tried (didn't work) The video focuses on the direct cause, but this repair is typically performed after initial checks of connectors and codes.
✅ What actually fixed it A wire for the driver's side seat position sensor, located in the harness under the driver's seat, had broken from repeated seat movement. The fix was to repair the broken wire with a butt connector and re-secure the harness to prevent future stress. - YouTube channel 'south side boy style' (2011 Chevrolet Equinox (different model, but same code logic)) — Airbag light with code B0013 0D (Driver Steering Wheel Airbag Deployment Loop Stage 2 High Resistance).
❌ Tried (didn't work) The owner noted watching other videos where messing with wires and putting the original airbag back in supposedly fixed the issue, but this did not work in his case. The code returned immediately with the original airbag.
✅ What actually fixed it Replacing the driver's steering wheel airbag module with a different (used) one. The code cleared immediately upon installing the replacement airbag, indicating an internal fault within the original airbag module itself. No programming was required for the replacement airbag.
When the Usual Fixes Don't Work
- While wiring and connector issues are the most common culprits for B0013, there are confirmed cases where the root cause is an internal failure of the driver's airbag module itself. In one documented repair on a similar GM vehicle, after verifying wiring was intact, the code only cleared after the entire airbag assembly was replaced. This confirms that while less common, the airbag module can be the point of failure and should not be ruled out if all wiring and connection checks pass.
OEM Part Supersession History
88988974→88988974— No supersession found. This part number appears to be stable.
Heads up: This is the small yellow or orange Connector Position Assurance (CPA) clip referenced in TSB #08-09-41-002H. It is widely available as a genuine GM part.
Model Year Variations Within This Range
- 2007-2013 vs 2013-2014: The factory diagnostic software transitioned during this period. Earlier models primarily use the Tech2 handheld scanner (or its PC-based version, Tech2Win). Later models (from 2013/2014 onward) use the PC-based GDS2 (Global Diagnostic System 2) software. While both can read the code, the user interface and specific data paths may differ.
- All years using GDS2: GM has issued updates to the GDS2 software that are required to correctly read resistance values for certain deployment loops. Using an outdated version of GDS2 may show incorrect resistance data, leading to a misdiagnosis.
Helpful Videos

We Have This Part in Stock

The information in this article is provided for general reference and educational purposes only. Vehicle specifications, procedures, and part compatibility can vary by production date, trim level, and region. Always consult your vehicle's factory service manual and verify part numbers before purchasing or performing repairs. Safety-critical components such as airbags, seat belts, and braking systems should be installed by a qualified professional.
- Chevrolet TAHOE:
- 🎬 Helpful Videos
- 🛍️ Shop This Part
- What's Unique About the 2007-2014 Chevrolet TAHOE
- Diagnostic Flowchart
- Symptoms You May Notice
- Most Likely Causes
- Rare But Worth Checking
- Diagnosis Steps
- Parts You'll Likely Need
- Related Codes That Often Appear With This One
- Technical Service Bulletins (TSBs) & Recalls
- Platform-Specific Known Issues
- Mechanic-Grade Diagnostic Values
- Hidden / Shadow Codes Worth Checking
- Scan Tool Commands That Help
- Wiring & Ground Locations
- Real Owner Repair Stories
- When the Usual Fixes Don't Work
- OEM Part Supersession History
- Model Year Variations Within This Range
- 🎟️ Get 5% Off