

B0012 on 2005-2010 Pontiac G6: Airbag Light Causes and Fixes
The B0012 code on a 2005-2010 Pontiac G6 almost always points to a poor electrical connection in the driver's side airbag circuit, not a failed airbag. The most common fix is inspecting and securing the yellow airbag connectors, particularly the Connector Position Assurance (CPA) retainers, as noted in GM Technical Service Bulletin #08-09-41-002H. This is a low-cost repair if you only need to replace the small plastic CPA clips, which can be found under part number 88988974.
- B0012 on your Pontiac G6 means the driver's airbag is OFF. Treat this as a critical safety issue.
- Before buying any parts, inspect the yellow airbag connectors at the steering column. The problem is very often a small, inexpensive plastic clip (CPA retainer) as documented in GM TSB #08-09-41-002H.
- If the airbag light flickers when you turn the wheel, the clock spring is the most likely culprit.
- This is a shared problem across the GM Epsilon platform, affecting the Chevy Malibu and Saturn Aura in the same way.
What's Unique About the 2005-2010 Pontiac G6
The Pontiac G6 is built on the GM Epsilon platform, which it shares with the Chevrolet Malibu (2004-2012) and Saturn Aura (2007-2010), among others. These platform-mates are also known to suffer from the exact same B0012 causes. The widespread nature of this issue prompted GM to release Technical Service Bulletin (TSB) #08-09-41-002H, which directly addresses intermittent airbag lights caused by faulty electrical connectors. The problem is frequently traced to loose, missing, or broken Connector Position Assurance (CPA) retainers on the yellow airbag connectors, leading to high resistance or an open circuit.
Diagnostic Flowchart
Tap your situation to follow the diagnostic path that matches what you're seeing on this vehicle.
Symptoms You May Notice
- Airbag warning light is illuminated on the instrument cluster.
- "Service Airbag" message appears on the Driver Information Center (DIC).
- Replacing the entire driver's airbag module without first thoroughly inspecting the connectors and wiring.
- Replacing the clock spring when the actual fault is a simple loose CPA clip on a connector, which is a much cheaper and easier fix.
Most Likely Causes
- Loose, Damaged, or Missing Connector Position Assurance (CPA) Retainer 🔴 High Probability This is a well-documented issue across many GM platforms of this era, as cited in TSB #08-09-41-002H. The small plastic CPA clips on the yellow airbag connectors can become brittle and break or may not be seated correctly, leading to a poor connection and increased resistance.
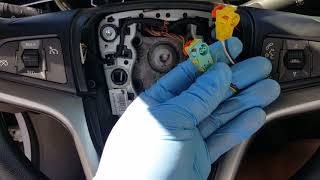
How to confirm: After disabling the SIR system, visually inspect the yellow connectors for the driver's airbag circuit (often under the dash or at the steering column). Check if the CPA retainer (a small, often orange or green plastic clip) is present, fully seated, and not broken. A broken retainer will fail to maintain proper contact pressure.
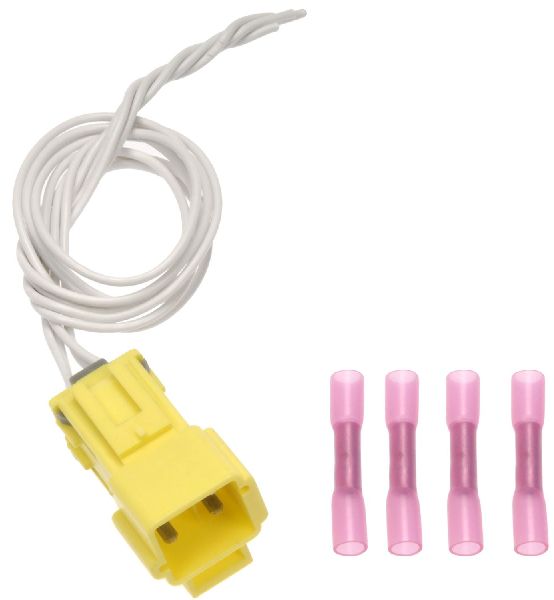
Typical fix: Reseat the connector and the CPA. If the CPA is broken, it must be replaced. The GM part number for this retainer is 88988974. In some cases, the entire connector pigtail may need replacement if the terminals are damaged.
Est. part cost: $5-$20 - Poor Terminal Tension or Corrosion in Connectors 🟡 Medium Probability Over time, the metal terminals within the plastic connectors can lose tension or develop corrosion, causing high resistance. This is especially common in connectors that are frequently disturbed or located in the steering column. GM has issued bulletins like PI1474 that detail how to test for poor terminal tension.
How to confirm: Inspect the connector terminals for any signs of corrosion, spread-open pins, or damage. A scan tool that can read live SRS data may show fluctuating resistance when the wiring is wiggled. A normal resistance reading for the loop is typically between 2.1 and 4.4 ohms. 🎬 See how to diagnose B0012 codes on a GM platform.
Typical fix: Clean the terminals with electrical contact cleaner. If terminal tension is poor, carefully use a terminal pick tool to tighten them. In some cases, the connector or terminal pins must be replaced using a specific SIR terminal repair kit (GM tool J-38125). Applying dielectric grease can help prevent future corrosion.
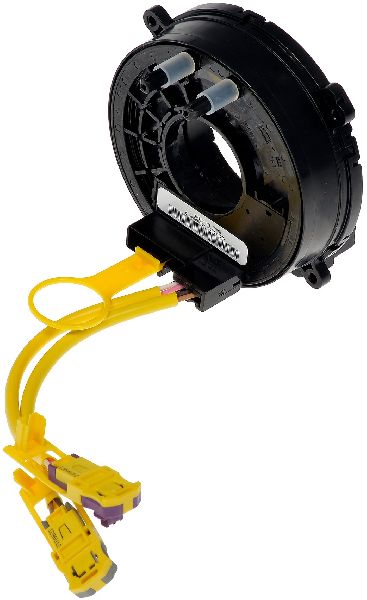
Est. part cost: $10-$50 - Faulty Clock Spring (SIR Coil) 🟡 Medium Probability The clock spring is a coil of wires inside the steering column that allows the steering wheel to turn while maintaining electrical contact for the airbag and steering wheel controls. The internal wires can break from repeated flexing over many years, causing an open circuit or high resistance.
How to confirm: If the airbag light comes on intermittently when turning the steering wheel, the clock spring is a likely suspect. A continuity test of the clock spring circuits while rotating it can confirm an internal break. A scan tool may show resistance values for the driver's loop spiking or going to OL (Open Loop) when the wheel is turned.
Typical fix: Replace the clock spring assembly. This requires removing the steering wheel. The OEM part number is 15908974 for some model years, which was later superseded by 25966963.
Est. part cost: $50-$150
Rare But Worth Checking
- Damaged Wiring Harness: Previous repairs, aftermarket accessory installation, or rodent damage can lead to chafed or broken wires in the airbag circuit. A separate TSB (#09-09-41-004A) notes that on some related models, the SIR wiring harness inside the steering wheel could chafe on a sharp edge of the horn plate, causing a short to ground.
- Faulty Driver's Airbag Module: While less common than wiring issues, the airbag module (squib) itself can fail internally. This is usually diagnosed after all wiring and connection issues have been ruled out. A resistance test of the module itself (with proper safety precautions) can confirm failure.
- Faulty Sensing and Diagnostic Module (SDM): Failure of the main airbag computer is rare but possible. This is typically the last component to be suspected and replaced.
- EMI from Aftermarket Accessories: In some GM vehicles, TSB PIT5564C was issued because poorly shielded aftermarket devices (like USB chargers) plugged into 12V outlets can create electrical interference (EMI), causing the SDM to falsely set B0012. Unplugging all accessories can be a simple diagnostic step.
Diagnosis Steps
- SAFETY FIRST: Disconnect the negative battery terminal and wait at least 10-15 minutes for the system's backup power to discharge before working on any airbag components.
- Scan for Codes: Use a scan tool capable of reading SRS/airbag codes to confirm B0012 is present and note any symptom bytes (e.g., 04 for open circuit, 0D for high resistance).
- Inspect Connectors per TSB #08-09-41-002H: Locate the yellow airbag connectors related to the driver's side circuit. This includes the main connector at the base of the steering column and the connectors on the airbag module itself. Visually inspect for loose connections and check the integrity of the CPA retainers.
- Check Resistance: Using a scan tool with live data, observe the resistance of the driver's deployment loop 1. The normal range is typically 2.1-4.4 ohms. Wiggle the wiring harness and turn the steering wheel to see if the resistance fluctuates, which would indicate a poor connection or failing clock spring.
- Test Clock Spring: If the light is intermittent with steering wheel movement, the clock spring is suspect. After disconnecting the airbag and clock spring connectors, use a multimeter to test the circuits through the clock spring for continuity and resistance while turning it from lock to lock.
- Inspect Wiring: Visually inspect the wiring harness for any signs of chafing, pinching, or damage, particularly where it passes through the steering column or near sharp metal edges.
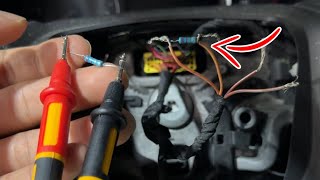
- Isolate the Fault: If resistance is high, use a suitable airbag simulator or resistor to bypass components one by one (airbag module, then clock spring) to see when the resistance returns to normal, thereby isolating the faulty part. 🎬 Watch: How to test and bypass the steering wheel airbag.
- Clear Codes: After any repair, reconnect the battery and use the scan tool to clear the SRS codes. Verify that the airbag light stays off after cycling the ignition and driving.
Parts You'll Likely Need
- Connector Position Assurance (CPA) Retainer
(OEM #88988974)— This small plastic clip is the most frequent point of failure according to GM's own service bulletin for this exact issue. It becomes brittle and breaks, causing a loose connection.
Trusted brands: ACDelco (GM Genuine), Dorman
OEM price range: $5-$15
Aftermarket price range: $5-$10 - Clock Spring
(OEM #15908974)— This is the second most common cause, failing due to wear and tear from the steering wheel turning. It's often the culprit if the airbag light flickers when turning.
Trusted brands: ACDelco, Standard Motor Products, Dorman
OEM price range: $100-$180
Aftermarket price range: $50-$120 - Air Bag Module Connector Pigtail
(OEM #13580115 (example service part))— If the terminals inside the connector are corroded or have lost tension, the entire connector pigtail may need to be spliced in. TSB PI1474 references this repair for similar issues.
Trusted brands: ACDelco, Standard Motor Products (e.g., S1341)
OEM price range: $30-$60
Aftermarket price range: $20-$40
Related Codes That Often Appear With This One
- B0013 — This code relates to the second stage of the driver's side airbag deployment loop. Both B0012 and B0013 often appear together as they share common connectors and wiring paths, such as the clock spring and the main connector at the base of the steering column.
Technical Service Bulletins (TSBs) & Recalls
- 08-09-41-002H: Addresses intermittent airbag lights with DTC B0012 (and others) set. Recommends inspecting and replacing the Connector Position Assurance (CPA) retainer on SIR system connectors. This TSB applies to a very wide range of GM vehicles from 2005-2014, including the Pontiac G6.
- PI1474: While for a different model year, this bulletin details the procedure for diagnosing and repairing poor terminal tension in the steering wheel airbag coil connector, which is a relevant cause for B0012. It provides a service connector part number (13580115) for when replacement is needed.
Platform-Specific Known Issues
- A widespread issue documented in TSB #08-09-41-002H points to intermittent airbag lights caused by faulty Connector Position Assurance (CPA) retainers on SIR connectors. The fix is to inspect and replace the retainer if it is loose, damaged, or missing.
- Forum users on sites like GMTNation have documented fixing a B0012-0D (high resistance) code by simply reseating connectors, which caused the resistance reading on their scan tool to drop from ~4.6 ohms back to a normal ~2.9 ohms.
Mechanic-Grade Diagnostic Values
- Driver's Airbag Deployment Loop Resistance (Live Data) — expected: 2.1 to 4.4 ohms. Failure: A reading below 1.7 ohms (symptom byte 0E) or above 4.4 ohms (symptom byte 0D or 04). The reading should be stable when wiggling wires or turning the steering wheel.
- Driver's Airbag Module (Squib) Internal Resistance — expected: 1.5 to 2.5 ohms. Failure: A reading outside this range. This test should only be performed with the module disconnected from the vehicle and with an approved ohmmeter, as direct measurement can be hazardous.
Hidden / Shadow Codes Worth Checking
- B0012 02: Driver Deployment Loop Stage 1 Short to Ground. (see via A professional scan tool like a GM Tech 2 or equivalent that can read SRS symptom bytes.)
- B0012 04: Driver Deployment Loop Stage 1 Open Circuit / High Resistance. This is the most common symptom byte for this issue. (see via A professional scan tool like a GM Tech 2 or equivalent that can read SRS symptom bytes.)
- B0012 0D: Driver Deployment Loop Stage 1 Resistance Above Threshold. Functionally similar to 04, indicating high resistance. (see via A professional scan tool like a GM Tech 2 or equivalent that can read SRS symptom bytes.)
- B0012 0E: Driver Deployment Loop Stage 1 Resistance Below Threshold. This indicates a short circuit within the loop. (see via A professional scan tool like a GM Tech 2 or equivalent that can read SRS symptom bytes.)
Scan Tool Commands That Help
- GM Tech 2 / GDS2: View Failure Records — After retrieving the DTC, accessing the 'Failure Records' within the SIR module menu can provide historical context, such as how many ignition cycles ago the code was set, which helps in diagnosing intermittent faults.
- GM Tech 2 / GDS2: Clear SIR Codes — This function is required after any repair is completed. Unlike engine codes, SRS codes often cannot be cleared by a generic OBD-II reader or by disconnecting the battery; they must be cleared with a capable scan tool.
Wiring & Ground Locations
- Sensing and Diagnostic Module (SDM) — Under the center console, bolted to the floor pan, forward of the shifter assembly.. This is the computer that monitors the airbag circuits and sets code B0012. All wiring for the driver's airbag loop ultimately terminates here.
- Steering Wheel Module Coil Connector — A yellow connector at the base of the steering column, connecting the clock spring to the main body harness.. This is a primary point of failure due to loose connections or poor terminal tension. It is a key inspection point mentioned in GM service bulletins.
- Driver Airbag Module Connectors — Two yellow connectors directly on the back of the driver's airbag module, inside the steering wheel.. These are the locations where the CPA retainers (P/N 88988974) are most likely to break or be missing, causing the code.
- G201 / G203 — G201 is under the center console near the front support bracket. G203 is on the left side of the instrument panel structure.. These are major instrument panel grounds. While not a direct cause, a poor ground at these locations can cause erratic behavior in various modules, including the SDM.
Real Owner Repair Stories
- Chevrolet Forum user (Chevy Malibu (platform mate)) — Airbag light on, initially with code B0012-04 (open circuit).
❌ Tried (didn't work) Clearing codes initially.
✅ What actually fixed it The user first replaced the airbag coil (clock spring), which changed the code to B0012-0E (low resistance). The final fix was discovering a poor connection at the 4-wire plug that connects to the clock spring. The user cleaned the contacts and slightly bent the copper contacts on the connector to ensure a tighter fit, which resolved all codes. - GMTNation Forum user (2012 GMC Yukon (similar GM SIR system)) — Intermittent "Service Airbag" light with code B0012-0D (high resistance).
❌ Tried (didn't work) Visual inspection of airbag connectors inside the steering wheel., Continuity tests of wiring from the module to the wheel, which all checked out fine., Checking front impact sensors.
✅ What actually fixed it The user noted the airbag recall had been performed previously. The final confirmed fix from another user in the thread with the same code was to thoroughly clean and reseat all accessible SIR connectors, suggesting a borderline connection was the root cause.
When the Usual Fixes Don't Work
- While replacing the clock spring is a common recommendation for B0012, there are multiple owner-documented cases where this did not solve the problem. In one instance on a platform-mate, after a new clock spring was installed, the code persisted. The ultimate solution was to replace the pigtail connector that plugs into the clock spring, as the terminals within it had lost tension. This highlights the importance of diagnosing poor connections at every point in the circuit, not just assuming the largest component (the clock spring) is the failure point.
OEM Part Supersession History
15908974→25966963— Part has been updated or replaced by the manufacturer.
Heads up: While 25966963 is a listed replacement, always verify the correct part number with a VIN through a GM dealer, as variations exist based on steering wheel controls and other options.
Model Year Variations Within This Range
- 2009.5-2010: The G6 received a mid-cycle refresh for the 2009.5 model year, which included a revised center console, new radio head units, and different HVAC controls. While the core airbag system remained the same, any service performed in the center of the dashboard on these later models carries a risk of disturbing the SDM or its wiring, which is located under the console.
Helpful Videos

We Have This Part in Stock


The information in this article is provided for general reference and educational purposes only. Vehicle specifications, procedures, and part compatibility can vary by production date, trim level, and region. Always consult your vehicle's factory service manual and verify part numbers before purchasing or performing repairs. Safety-critical components such as airbags, seat belts, and braking systems should be installed by a qualified professional.
- Pontiac G6:
- 🎬 Helpful Videos
- 🛍️ Shop This Part
- What's Unique About the 2005-2010 Pontiac G6
- Diagnostic Flowchart
- Symptoms You May Notice
- Most Likely Causes
- Rare But Worth Checking
- Diagnosis Steps
- Parts You'll Likely Need
- Related Codes That Often Appear With This One
- Technical Service Bulletins (TSBs) & Recalls
- Platform-Specific Known Issues
- Mechanic-Grade Diagnostic Values
- Hidden / Shadow Codes Worth Checking
- Scan Tool Commands That Help
- Wiring & Ground Locations
- Real Owner Repair Stories
- When the Usual Fixes Don't Work
- OEM Part Supersession History
- Model Year Variations Within This Range
- 🎟️ Get 5% Off