

1982-1985 Celica Front Lower Control Arm: Diagnosing Clunks and Steering Wander
This guide covers common failure symptoms, replacement costs, and what to look for when buying a used front lower control arm for your RWD Toyota Celica.
- The most common failure symptoms are clunking noises over bumps and the vehicle pulling to one side.
- When buying a used arm, carefully inspect the ball joint for looseness and the rubber bushings for cracks or deterioration.
- A professional wheel alignment is mandatory immediately after replacement to prevent rapid tire wear.
- Final torque on the frame-side bushing bolts must be applied with the car's full weight on the suspension to avoid premature bushing failure.
Symptoms of a Failing Front Lower Control Arm 🎬 Watch: Common symptoms of a failing control arm

A failing control arm rarely fails silently. The most common culprits are worn-out rubber bushings or a failing ball joint, both of which create noticeable symptoms. Listen and feel for these signs while driving.
Noises: Clunking, Popping, and Creaking
The most common symptom is a distinct clunking or knocking sound from the front suspension. This noise is most apparent when driving over bumps, potholes, or even speed bumps at low speed. The sound is caused by metal-to-metal contact as the worn bushing or loose ball joint allows the control arm to slam against its mounting points or the frame. You might also hear creaking or squeaking noises, especially when turning or going over bumps, which can indicate a dry, worn-out ball joint or deteriorating rubber bushings.
Steering and Handling Issues
A worn control arm can make your steering feel loose, vague, or unresponsive. You may notice your Celica wandering or pulling to one side, requiring you to make constant small corrections to keep it driving straight. This happens because the worn components can no longer hold the wheel in the correct alignment. In some cases, you might feel excessive vibrations through the steering wheel, especially as you accelerate or at higher speeds.
Visual Signs and Tire Wear
A visual inspection can often confirm a problem. Look at the rubber bushings where the control arm mounts to the frame. They should be intact; if they are cracked, torn, swollen, or look deteriorated, they are bad. Another key indicator is uneven tire wear. A bad lower control arm often causes the inside edge of the front tires to wear out much faster than the rest of the tread. This is a direct result of the wheel alignment being thrown off by the worn parts.
Buying a Used 1982-1985 Celica Control Arm: What to Inspect

For a classic vehicle like the A60 Celica, new OEM parts are often discontinued and can be very expensive if found. A high-quality, inspected used OEM control arm is often a better choice than a cheap, new aftermarket part due to superior materials and precise factory geometry. Here’s what to look for:
- Inspect the Ball Joint: The ball joint is the most critical wear item. The rubber boot should be fully intact with no rips, cracks, or signs of leaking grease. Grab the ball joint stud and try to move it around in its socket. There should be no discernible play or looseness. If it moves easily or you feel a clunk, the joint is worn and the arm should be rejected.
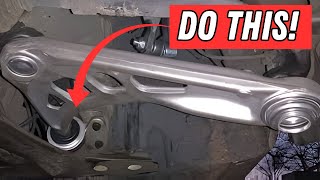
- Check the Bushings: Closely examine the two rubber bushings where the arm mounts to the car's frame. The rubber should be firm and free of major cracks, dry rot, or tearing. Oil contamination can cause bushings to swell and degrade, so look for any that are puffy or feel mushy.
- Examine the Arm Itself: While the steel arm is robust, check for heavy corrosion, especially around the welds and where the ball joint is pressed in. Ensure the arm is straight and not bent or twisted from a past accident. A bent arm will make aligning the vehicle impossible.
Pro Tip: When buying used, it's always best to replace control arms in pairs (left and right). If one has failed due to age and mileage, the other is likely not far behind. Replacing both at the same time ensures balanced handling and saves you from doing the same job twice.
Known Issues, Recalls, and TSBs
For the 1982-1985 Toyota Celica, there are no known recalls or Technical Service Bulletins (TSBs) issued by the NHTSA specifically for the front lower control arms. The primary issues are simply related to wear and tear on the bushings and ball joints over several decades of use.
One recall was issued for some 1982 models equipped with cruise control, related to a faulty computer circuit board that could cause sudden acceleration, but this is unrelated to the suspension.
Compatibility Warning: These control arms are for Rear-Wheel Drive (RWD) models of the Celica only. Always verify fitment for your specific vehicle. The initial vetted data also suggests checking the production date for 1982 models, which may indicate a mid-year change in part design. Double-check part numbers before purchasing.
Cost Breakdown: New vs. Used 🎬 Watch: Control arm replacement cost breakdown
Replacing a lower control arm involves both parts and labor costs. Since new OEM arms for this generation are largely discontinued, the market consists of aftermarket, used OEM, and potentially remanufactured options. An alignment is mandatory after replacement.
| Part/Service | Estimated Cost | Notes |
|---|---|---|
| New OEM | $120 - $280+ (per side) | Very difficult to find; often discontinued. Prices reflect new-old-stock if available. |
| New Aftermarket | $50 - $90 (per side) | Readily available from brands like Dorman. Quality can vary. |
| Used OEM | $40 - $100 (per side) | A good value if inspected carefully for wear on bushings and ball joints. |
| Shop Labor | $150 - $400 (per side) | Typically 1.5 to 3 hours of labor per side. |
| Wheel Alignment | $100 - $165 | Not optional. Required to prevent tire wear and ensure proper handling. |
Replacement Overview & Torque Specs 🎬 See this Toyota Celica lower control arm replacement walkthrough

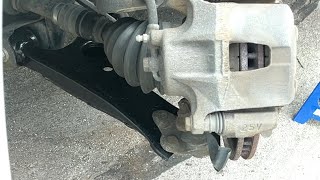
Replacing the lower control arm is a feasible DIY job for someone with mechanical experience and the right tools, including a good socket set, a breaker bar, a torque wrench, and a ball joint separator (pickle fork).
General Steps:
- Safely raise and support the front of the vehicle on jack stands.
- Remove the front wheel.
- Remove the cotter pin and castle nut from the lower ball joint stud where it connects to the steering knuckle.
- Use a ball joint separator to pop the ball joint stud out of the knuckle.
- Unbolt the two mounting bolts that hold the control arm to the vehicle's frame. These may be very tight or seized.
- Remove the old control arm assembly.
- Install the new control arm. Loosely tighten the frame bolts.
- Connect the new ball joint to the steering knuckle and torque the castle nut to specification. Install a new cotter pin.
- Reinstall the wheel and lower the vehicle so its full weight is on the suspension.
- Crucial Step: With the vehicle on the ground, apply the final torque to the control arm's frame mounting bolts. This prevents pre-loading and premature failure of the new rubber bushings.
- Get a professional wheel alignment performed immediately.
Torque Specifications
Finding exact factory specs for this specific model is difficult. However, general torque values for similar Toyota vehicles and aftermarket guides provide a reliable range. Always consult a factory service manual if possible.
| Fastener | Torque Spec (Approximate) | Notes |
|---|---|---|
| Control Arm to Frame Bolts (19mm) | 116 ft-lbs | Torque with vehicle weight on suspension. |
| Ball Joint to Knuckle Bolts (17mm) | 66 ft-lbs | Refers to bolt-on style ball joints. |
| Ball Joint Castle Nut | 80-120 ft-lbs | General specification. Tighten to the lower end of the range, then continue only until the cotter pin hole lines up. |
Frequently Asked Questions (FAQ)
Can I just replace the bushings or ball joint instead of the whole arm?
Yes, on these control arms, the ball joints and bushings are technically serviceable. However, it requires a hydraulic shop press to remove the old components and install the new ones. Given the low cost of a complete used OEM or new aftermarket arm that includes these parts pre-installed, replacing the entire assembly is almost always easier and more cost-effective.
Is a wheel alignment really necessary after replacing a control arm?
Yes, absolutely. The control arm is a primary component that dictates your wheel alignment angles (camber and caster). Replacing it will alter these settings. Skipping the alignment will cause poor handling, pulling to one side, and rapid, uneven tire wear.
What's the difference between the '48068' and '48069' part numbers?
These prefixes denote the side of the vehicle. For Toyota parts of this era, '48068' typically refers to the Right (RH) or passenger side, while '48069' refers to the Left (LH) or driver side.
What other parts should I consider replacing at the same time?
While the control arm is out, it's a good time to inspect the sway bar end links, as they are inexpensive and often wear out at the same rate. Also, inspect the outer tie rod ends for any play. If your struts and shocks are old, this job provides easy access to replace them as well.
Helpful Videos

Technical Specifications
OEM Part Numbers: 48068-19105 (Right) 48068-19125 (Right) 48068-29065 (Right) 48068-29125 (Right) 48069-19085 (Left) 48069-19105 (Left) 48069-29065 (Left) 48069-29125 (Left)
Fits Rear-Wheel Drive (RWD) models. The assembly includes a pre-installed ball joint and two frame-mount bushings.

The information in this article is provided for general reference and educational purposes only. Vehicle specifications, procedures, and part compatibility can vary by production date, trim level, and region. Always consult your vehicle's factory service manual and verify part numbers before purchasing or performing repairs. Safety-critical components such as airbags, seat belts, and braking systems should be installed by a qualified professional.
- Toyota Celica:
- 🎬 Helpful Videos
- Symptoms of a Failing Front Lower Control Arm
- Noises: Clunking, Popping, and Creaking
- Steering and Handling Issues
- Visual Signs and Tire Wear
- Buying a Used 1982-1985 Celica Control Arm: What to Inspect
- Known Issues, Recalls, and TSBs
- Cost Breakdown: New vs. Used
- Replacement Overview & Torque Specs
- General Steps:
- Torque Specifications
- Frequently Asked Questions (FAQ)
- 🎟️ Get 5% Off