

2022-2025 Eclipse Cross Liftgate Trim: Part Numbers, Rattles, and Replacement
Your complete guide to identifying, inspecting, and replacing the interior upper liftgate trim panels on the 2022-2025 Mitsubishi Eclipse Cross.
- The most critical issue is part number confusion: 7224A373XA (Left) and 7224A374XA (Right) are the correct upper liftgate trims; 7646A650 is a cargo floor pad and is not the correct part.
- When buying a used panel, the condition of the plastic mounting clips on the back is more important than minor cosmetic scuffs on the front.
- The most common failure symptom is a rattling noise, which is easily fixed by replacing the panel or its clips.
- Replacement is a simple DIY job, requiring only a plastic trim removal tool and about 15-30 minutes.
Identifying the Correct Liftgate Trim
One of the most common points of confusion when ordering this part is distinguishing between the upper liftgate trim and other nearby panels. The main interior panels covering the inside of the liftgate are distinct from the cargo area floor or scuff plates.
Specifically, part number 7646A650 is often mistaken for a liftgate trim piece. This part is actually a Cargo Floor Pad, a separate component located on the floor of the cargo area, not on the liftgate itself.
The correct parts for the upper interior liftgate trim are:
- Left (Driver's) Side Upper Trim: 7224A373XA
- Right (Passenger's) Side Upper Trim: 7224A374XA
These panels cover the upper sections of the liftgate interior. Other related parts include the lower main trim panel and the pull handle (part number 7224A377XA), which is a separate component.
Symptoms of a Failing Liftgate Trim
Since this is a cosmetic panel, "failure" typically relates to physical damage or noise rather than mechanical breakdown.
- Rattling or Buzzing Noises: This is the most common symptom. It's usually caused by broken or loose mounting clips, allowing the plastic panel to vibrate against the metal liftgate structure, especially when driving over bumps or closing the hatch. While general rattling can come from suspension components, a buzz or rattle localized to the rear hatch points to loose trim.
- Visible Damage: Cracks, deep scratches, or scuffs are common, often caused by shifting cargo hitting the panel. Over time, sun exposure can also cause the plastic to become brittle and discolored.
- Poor Fit or Gaps: If a panel has been removed previously for another repair (like work on the rear wiper or camera), it may not have been reinstalled correctly. This can leave unsightly gaps or cause the panel to feel loose to the touch.
Pro Tip: To diagnose a rattle, lightly tap on the trim panels with the liftgate closed. A loose panel will often make a distinct buzzing or hollow sound, confirming it's the source of the noise.
Known Issues, TSBs, and Recalls
As of mid-2026, there are no specific recalls or Technical Service Bulletins (TSBs) from Mitsubishi for the liftgate trim panels on the 2022-2025 Eclipse Cross. These parts are simple, non-mechanical components and are not considered safety items.
However, it's worth noting that other recalls may require the removal of these trim panels to access affected components, such as the rearview camera or liftgate latch. For example, a recall (25V369) was issued for the infotainment unit software on some 2022-2024 models, which could affect the rearview camera display. If a technician performs such a repair, there is always a risk of breaking the trim panel's delicate mounting clips upon removal.
Buying a Used 2022-2025 Eclipse Cross Liftgate Trim
Because aftermarket options for specific interior trim pieces are virtually nonexistent, a used OEM panel is an excellent, cost-effective alternative to a new part from the dealer. Here’s what to look for when buying used.
1. Inspect All Mounting Points (Most Important!)
The single most critical factor is the condition of the mounting clips and tabs. These small plastic tabs are what hold the panel securely to the liftgate. If even one is broken, the panel can rattle. Carefully inspect the back of the trim piece:
- Check for broken or missing clips: The panel uses several metal and plastic clips that pop into holes in the liftgate frame. Ensure they are all present and not cracked.
- Look for stress marks: Check the plastic around each mounting hole for thin, white lines. This indicates the plastic has been stressed and is close to breaking.
2. Verify Part Numbers and Side
Double-check that you are buying the correct part for your needs. Remember, the left and right side panels have different part numbers (7224A373XA for left, 7224A374XA for right). Do not confuse these with the cargo floor pad (7646A650).
3. Check for Cracks and Cosmetic Damage
Thoroughly inspect the front and back of the panel for any cracks, especially around the edges or screw holes. While minor scuffs can be acceptable, a crack will only get worse over time. Ensure the color and texture match your vehicle's interior, as trim colors can vary slightly between model years or trim levels.
Cost Comparison
Prices for liftgate trim can vary, but buying used OEM offers significant savings over a new part from the dealership.
| Part Type | Estimated Cost |
|---|---|
| New OEM | $20 - $40 per side |
| New Aftermarket | Not Generally Available |
| Used OEM | $10 - $25 per side |
| Shop Labor | $50 - $100 |
Replacement Guide
Replacing the upper liftgate trim is a straightforward job that most DIYers can complete with basic tools.
- Difficulty: 1/5 (Easy)
- Estimated Time: 15-30 minutes
- Tools Needed: Plastic trim removal tool kit, possibly a Phillips head screwdriver.
Step-by-Step Process
- Open the Liftgate: Fully open the rear hatch to get clear access to the interior panels.
- Find a Starting Point: Begin at a corner or edge of the panel you wish to remove. Gently insert a plastic pry tool between the trim panel and the metal frame of the liftgate.
- Release the Clips: Carefully pry the panel away from the liftgate. You will hear popping sounds as the clips release. Work your way around the panel, releasing one clip at a time to avoid bending or breaking the plastic. Use minimal force.
- Remove the Panel: Once all clips are disengaged, the panel should come off easily.
- Install the New Panel: Align the clips on the new panel with the corresponding holes in the liftgate. Firmly press the panel into place until you hear each clip snap securely. Start in one corner and work your way across.
Warning: Always use plastic trim removal tools. Using a metal screwdriver will scratch the plastic panels and damage the paint on the liftgate.
Frequently Asked Questions (FAQ)
What is the difference between part 7224A373XA and 7646A650?
Part 7224A373XA is the upper left interior trim panel for the liftgate itself. Part 7646A650 is the cargo floor pad, which sits on the floor of the trunk area and is not attached to the liftgate.
Can I fix a rattling liftgate trim myself?
Yes, this is a very common and easy DIY fix. The rattle is almost always caused by a broken clip. You can either replace the entire panel with a good used one or, if the mounting point on the panel is intact, simply replace the small clip itself.
Is a cracked or loose liftgate trim a safety issue?
No, a damaged interior trim panel is not a safety concern and will not affect the vehicle's operation. It is purely a cosmetic and noise issue.
Why are the mounting clips so important on a used trim piece?
The clips are the only thing holding the panel on. A new-looking panel with broken mounting tabs is useless, as it will not sit flush and will rattle. The condition of the mounting points is more important than minor cosmetic scuffs.
Technical Specifications
OEM Part Numbers: 7224A373XA (Upper Left Trim) 7224A373ZZ (Superseded or alternate color for Left Trim) 7224A374XA (Upper Right Trim) 7646A650 (Incorrect Part - Cargo Floor Pad) 7224A377XA (Related Part - Pull Handle)
Material: Molded Plastic
We Have This Part in Stock
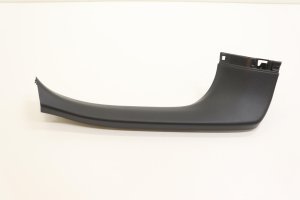

The information in this article is provided for general reference and educational purposes only. Vehicle specifications, procedures, and part compatibility can vary by production date, trim level, and region. Always consult your vehicle's factory service manual and verify part numbers before purchasing or performing repairs. Safety-critical components such as airbags, seat belts, and braking systems should be installed by a qualified professional.
- MITSUBISHI ECLIPSE CROSS:
- 🛍️ Shop This Part
- Identifying the Correct Liftgate Trim
- Symptoms of a Failing Liftgate Trim
- Known Issues, TSBs, and Recalls
- Buying a Used 2022-2025 Eclipse Cross Liftgate Trim
- 1. Inspect All Mounting Points (Most Important!)
- 2. Verify Part Numbers and Side
- 3. Check for Cracks and Cosmetic Damage
- Cost Comparison
- Replacement Guide
- Step-by-Step Process
- Frequently Asked Questions (FAQ)
- 🎟️ Get 5% Off