

2018-2024 Buick Enclave Liftgate Trim: A Fix for Power Hatch Problems and Rattles
This guide details the crucial link between your Enclave's interior liftgate panels and common power hatch failures, plus how to replace them.
- Power liftgate failure is often caused by a faulty connector behind the trim (TSB #21-NA-123), not a bad motor.
- When buying a used panel, the integrity of the rear mounting clips and tabs is the most critical factor to check.
- Replacement is a simple DIY job, but a plastic trim removal tool is essential to avoid damage.
- This is a multi-part assembly; confirm you are buying the correct piece (e.g., upper left, upper right, lower) for your needs.
Is Your Power Liftgate Acting Up? Check Behind the Trim First!
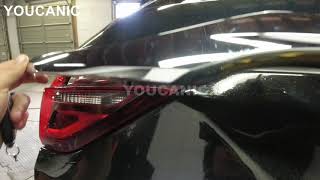
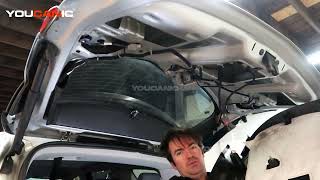
For owners of the 2018-2024 Buick Enclave, one of the most common and frustrating issues is a power liftgate that suddenly stops working. The gate might open only a few inches and then stop, or it may refuse to close with the power button. Before you spend hundreds on a new liftgate motor or actuator, 🎬 Watch: How to replace the trunk actuator you need to know about a known issue hiding right behind these interior trim panels.
Pro Tip: General Motors issued Technical Service Bulletin (TSB) #21-NA-123 (an update to #20-NA-232) that identifies the root cause of many power liftgate failures. The problem is often caused by bent or misaligned electrical pins inside the liftgate object sensor connector, which is located behind the upper interior trim panels. The fix is to simply inspect and straighten the pins, which can save you from a costly and unnecessary part replacement.
Because accessing this connector requires removing the trim, understanding these panels is the first step in diagnosing a very common Enclave problem.
Symptoms of Failure
While the trim panels themselves are simple plastic pieces, their 'failure' can manifest in several ways, some more obvious than others.
1. Power Liftgate Malfunctions (Indirect Symptom)
As detailed in TSB #21-NA-123, a primary symptom that leads to interacting with these panels is a faulty power liftgate. Specific behaviors include:
- Liftgate opens only a small amount (e.g., under 15 inches) and then stops.
- Liftgate will not close using the power button on the hatch, key fob, or interior switch.
- A diagnostic scan may show trouble code B153F in the Power Liftgate Module.
This is caused by a poor connection in the object sensor, which is a safety feature. When the connection is lost, the system stops the liftgate as a precaution. The repair involves removing the upper trim panels to access and fix the connector.
2. Audible Rattles, Buzzing, or Creaks
This is the most common direct symptom of a loose or damaged trim panel. The noise is caused by the plastic panel vibrating against the metal liftgate structure or by broken retaining clips allowing for movement. These sounds are most noticeable when driving over bumps or on rough roads.
3. Visible Damage or Poor Fitment
Scratches, gouges, and cracks are common from loading and unloading cargo. Over time, clips can break from repeated removals for service or from impacts, causing the panels to look misaligned or have visible gaps between them.
Buying a Used Lid Gate Moulding: What to Check
Since aftermarket options for these specific interior panels are virtually nonexistent, a used OEM panel is the best choice for a cost-effective repair. However, a thorough inspection is critical to ensure you get a good part.
Warning: The condition of the back side of the panel is more important than minor cosmetic scratches on the front. A panel with broken mounting points will never install securely and is likely to rattle.
Key Inspection Points:
- Inspect All Mounting Tabs and Clip Sockets: This is the most important check. Carefully examine the entire perimeter on the back of the panel. Look for small plastic tabs and the square holes where the push-clips sit. Reject any panel with cracked or broken mounting points, as it will not be held tightly against the liftgate.
- Verify the Exact Panel and Side: The liftgate trim is a multi-piece set. Confirm you are buying the correct piece (upper, lower, left, or right). Part numbers 84368214 (Left) and 84368216 (Right) are common for the upper side panels. Always compare photos from the seller to the existing part on your vehicle.
- Check for Cracks and Stress Marks: Besides the mounting tabs, look for hairline cracks on the panel itself, especially around corners or where it curves. Flex the panel slightly to reveal any hidden damage.
- Confirm Color and Texture: While most Enclave interiors are similar, there can be slight variations in color (e.g., Jet Black, Dark Galvanized) and texture between trim levels and model years. Match the color description and photos as closely as possible to your vehicle's interior.
Replacement Overview
Replacing a liftgate interior trim panel is a straightforward task suitable for most DIY mechanics. The process primarily involves carefully prying the old panel off and snapping the new one into place.
- Difficulty: 2/5
- Estimated Time: 0.5 - 1.0 hours
- Tools Needed: Plastic trim removal tool kit, possibly a 7mm socket or Torx driver for associated components like the pull handle.
General Steps:
- Open the liftgate.
- If removing the lower panel, you may first need to remove a screw inside the pull handle cup or access cover.
- Using a plastic trim removal tool, start at a corner and gently pry the panel away from the liftgate. You will hear the metal clips pop as they release.
- Work your way around the perimeter of the panel until all clips are disengaged.
- If the panel has any electrical components, like a light or switch, carefully disconnect the wiring harness before fully removing it.
- To install the new panel, align the clips with the holes in the liftgate and press firmly around the edges until it snaps securely into place.
| Part Type | Estimated Cost |
|---|---|
| New OEM | $30 - $60 per individual panel |
| New Aftermarket | Not commonly available |
| Used OEM | $20 - $50 per individual panel |
| Shop Labor (Panel R&R only) | $100 - $150 |
OEM Part Numbers and Variants
The liftgate trim consists of several distinct parts. The most commonly replaced are the upper side panels. Be aware that part numbers can be superseded, so always verify fitment with the seller.
| Part Number | Description | Position |
|---|---|---|
| 84368214 (replaces 23375413) | Panel Assembly, Lift Gate Upper Side Trim | Left (Driver Side) |
| 84368216 (replaces 23375416) | Panel Assembly, Lift Gate Upper Side Trim | Right (Passenger Side) |
| 84368218 | Panel Assembly, Lift Gate Upper Trim Finish | Upper Center |
| 84677044 | Panel Assembly, Lift Gate Lower Trim Finish | Lower |
Note: The initial data included part number 23467751, which is for a Spare Wheel Carrier Support and is not part of the liftgate trim assembly.
Frequently Asked Questions (FAQ)
Why did my Enclave's power liftgate stop working?
Before suspecting a bad motor, check for the issue described in GM TSB #21-NA-123. Bent or misaligned pins in a connector behind the upper liftgate trim are a very common cause. This is often a simple fix that only requires removing the trim to access and straighten the connector pins.
Is it hard to remove the liftgate trim myself?
No, it is generally an easy DIY job. The key is to use a plastic trim removal tool set to avoid scratching the panel or breaking the plastic mounting points. The panels are held on by metal clips that pop out with gentle prying pressure.
My liftgate is rattling. What's the cause?
A rattle from the rear hatch is often a loose interior trim panel. This is usually caused by one or more broken or dislodged retaining clips. You can try to isolate the noise by pressing on different areas of the trim while driving (with a helper) or by tapping on the panels with your hand. The fix is to remove the panel and replace any broken clips or, if the panel's mounting points are broken, replace the panel itself.
🎬 See this quick guide to fixing liftgate rattlesAre there any recalls for the 2018-2024 Enclave liftgate trim?
No, as of mid-2026, there are no safety recalls for the interior trim panels on the 2018-2024 Buick Enclave. There are recalls for other vehicle systems, and a liftgate strut recall existed for the previous generation (pre-2018), but not for this generation's trim.
Helpful Videos

Technical Specifications
OEM Part Numbers: 84368214 84368216 84368218 84374626 84374627 84396094 84677044
Molded plastic construction. Held in place by metal retaining clips.
We Have This Part in Stock

The information in this article is provided for general reference and educational purposes only. Vehicle specifications, procedures, and part compatibility can vary by production date, trim level, and region. Always consult your vehicle's factory service manual and verify part numbers before purchasing or performing repairs. Safety-critical components such as airbags, seat belts, and braking systems should be installed by a qualified professional.
- Buick Enclave:
- 🎬 Helpful Videos
- 🛍️ Shop This Part
- Is Your Power Liftgate Acting Up? Check Behind the Trim First!
- Symptoms of Failure
- 1. Power Liftgate Malfunctions (Indirect Symptom)
- 2. Audible Rattles, Buzzing, or Creaks
- 3. Visible Damage or Poor Fitment
- Buying a Used Lid Gate Moulding: What to Check
- Key Inspection Points:
- Replacement Overview
- General Steps:
- OEM Part Numbers and Variants
- Frequently Asked Questions (FAQ)
- 🎟️ Get 5% Off