

2023-2025 Genesis G80 Electrified Kick Panel & Sill Plate Guide
A complete reference for identifying damage, checking compatibility, and replacing the interior kick panel and door sill plate on your all-electric G80.
- Compatibility is critical: This part must be for the ELECTRIFIED G80 model and is for vehicles with standard, non-illuminated sills only.
- When buying used, the integrity of the rear mounting clips is the most important factor to inspect; broken clips will cause rattles.
- Replacement is a very simple DIY job that requires only a plastic trim tool and takes about 15 minutes.
- There are no aftermarket versions available, making used OEM parts the best value alternative to new dealer parts.
Primary Function of the G80 Electrified Kick Panel
The kick panel, referred to in Genesis parts catalogs as the "Cowl Side Trim" or "Front Sill Plate," is the plastic trim piece located in the interior footwell, just in front of the door and below the dashboard. Its primary job is to protect the vehicle's body and the numerous wiring harnesses that are routed through this area. It provides a finished look to the interior by covering the metal bodywork and the edge of the carpet. In a modern luxury vehicle like the Electrified G80, this area houses essential wiring, and the kick panel prevents this wiring from being accidentally kicked, snagged, or damaged during entry and exit.
Symptoms of a Damaged Kick Panel
Failure of a kick panel is almost always due to physical damage rather than mechanical breakdown. Since it has no moving parts or electrical function (on the standard model), symptoms are straightforward and visual.
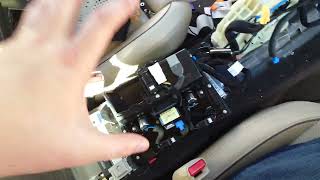
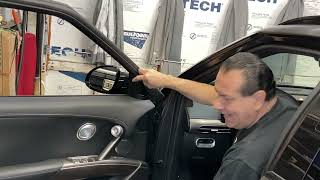
- Rattling Noises: A rattling or buzzing sound from the footwell area, especially when driving over rough roads or closing the door, is a common symptom. This is typically caused by broken mounting clips on the back of the panel, preventing it from sitting securely against the vehicle's body. 🎬 Watch: How to fix car trim and rattle noises
- Poor Fit or Gaps: A damaged kick panel may not sit flush with the surrounding trim. You might see visible gaps between the panel and the A-pillar trim or the door sill. It may feel loose to the touch.
- Visible Cracks or Scuffs: The most obvious symptom is visible damage. Scuffs, deep scratches, and cracks are common from shoes hitting the panel over time. While minor scuffs are cosmetic, a crack can compromise the panel's structural integrity and lead to rattling.
Known Issues, Recalls, and Service Bulletins
As of mid-2026, there are no specific recalls or Technical Service Bulletins (TSBs) issued by Genesis or the National Highway Traffic Safety Administration (NHTSA) for the kick panels on the 2023-2025 Genesis Electrified G80. While recalls exist for other components on this vehicle, such as seat belt pretensioners and instrument panel software, none apply to this interior trim piece.
Important Note: A TSB for older G80 models (TSB #22-01-010G) addresses issues with ambient mood lighting. This is relevant because it highlights the existence of an optional illuminated door sill feature. 🎬 See this video of the Genesis interior lighting The standard kick panel is NOT compatible with vehicles that have this feature, as the wiring and mounting are different.
Buying a Used 2023-2025 G80 Electrified Kick Panel
Because aftermarket options for this specific trim piece are virtually nonexistent, a used OEM panel is the most cost-effective alternative to buying new from a dealer. When purchasing a recycled part, careful inspection is key.
Crucial Compatibility Checks
Warning: Before purchasing, you must verify two things. Failure to do so will result in a part that does not fit or work correctly.
- Vehicle Model: This part is for the ELECTRIFIED G80 model only. Panels from gasoline-powered G80 models may look similar but can have different mounting points and are not guaranteed to fit.
- Illumination Option: This is a standard, non-illuminated door sill cover. If your G80 is equipped with the optional illuminated door sills, this part is not a compatible replacement. Verify your vehicle's features before ordering.
Physical Inspection Guide
When you have the used part in hand, follow these inspection steps:
- Inspect the Back First: The condition of the mounting clips and tabs on the back of the panel is more important than minor surface scuffs. Flip the panel over and check that every clip and plastic tab is present and free of cracks. Even one broken tab can cause a persistent rattle.
- Check for Stress Marks: Look for thin white lines in the plastic, especially around the corners and mounting points. These are stress marks that indicate the panel has been bent or improperly removed, and it may be brittle and prone to cracking.
- Verify Color and Finish: Genesis offered these panels in different colors, such as black and gray. Ensure the color matches your vehicle's interior. Place it next to another interior trim piece if possible to confirm the color and texture are correct.
- Examine the Front Surface: Check for deep gouges or cracks. Minor scuffs can often be cleaned or minimized, but deep scratches are permanent.
Cost Comparison: New vs. Used
Replacing a damaged kick panel is relatively inexpensive, especially if you opt for a used OEM part and perform the installation yourself.
| Part Source | Estimated Cost |
|---|---|
| New OEM (Dealer) | $55 - $70 |
| New Aftermarket | Not Available |
| Used OEM | $25 - $50 |
| Shop Labor | $65 - $105 |
Replacement Guide
Difficulty and Time
- Difficulty: 1/5 (Very Easy)
- Estimated Time: 10-15 minutes
- DIY Feasible: Yes
Tools Needed
- Plastic Trim Removal Tool Kit
Step-by-Step Instructions
Pro Tip: The panel is held in place by hidden metal spring clips and plastic tabs. Never use a metal screwdriver to pry the panel off, as it will scratch or crack the panel and the surrounding trim.
- Remove the Door Sill Plate (if separate): The long, flat trim piece that runs along the bottom of the door opening may need to be removed first. Gently insert a plastic trim tool under its edge and pry upwards to release the clips. Work your way down the length of the plate.
- Locate the Edge of the Kick Panel: Find the seam where the kick panel meets the A-pillar trim and the weatherstripping.
- Pry to Release the Clips: Carefully insert your plastic trim tool into the seam and gently pry outwards. You will feel the clips pop as they release. Start at one edge and work your way around the panel.
- Remove the Old Panel: Once all clips are released, the panel should pull straight out.
- Install the New Panel: Align the clips on the new panel with the corresponding holes in the vehicle's body.
- Secure the Panel: Give the panel a firm push with the palm of your hand over each clip location. You will hear a distinct "snap" as each clip engages. Ensure all edges are flush and the panel is secure.
- Reinstall the Door Sill Plate: Align its clips and press it back into place.
Frequently Asked Questions (FAQ)
Is the kick panel the same for the driver and passenger side?
No, they are not interchangeable. The driver's side (left) and passenger's side (right) panels are mirror images of each other and have unique part numbers.
Will a kick panel from a regular gasoline G80 fit my Electrified G80?
No. While they appear similar, there may be subtle differences in mounting points or shape. It is critical to source a part specifically listed for the 2023-2025 Electrified G80 to ensure proper fitment.
Can I use this standard kick panel to replace my broken illuminated door sill?
No. The illuminated door sills are a separate, optional feature with different wiring and mounting. This standard panel is not a replacement or a downgrade path for that system.
My kick panel is just scuffed. Can it be repaired?
For minor scuffs and scratches, you can often improve the appearance with a quality interior plastic cleaner and a microfiber towel. For deeper scratches, a plastic texture repair kit can sometimes be used, but replacing the panel with a good-condition used part is often easier and more effective.
Helpful Videos

Technical Specifications
OEM Part Numbers: 85870-T1000-NNB (Left Side, Black) 85870-T1000-MYT (Left Side, Gray)
Material: Molded ABS Plastic
We Have This Part in Stock


The information in this article is provided for general reference and educational purposes only. Vehicle specifications, procedures, and part compatibility can vary by production date, trim level, and region. Always consult your vehicle's factory service manual and verify part numbers before purchasing or performing repairs. Safety-critical components such as airbags, seat belts, and braking systems should be installed by a qualified professional.
- GENESIS ELECTRIFIED G80:
- 🎬 Helpful Videos
- 🛍️ Shop This Part
- Primary Function of the G80 Electrified Kick Panel
- Symptoms of a Damaged Kick Panel
- Known Issues, Recalls, and Service Bulletins
- Buying a Used 2023-2025 G80 Electrified Kick Panel
- Crucial Compatibility Checks
- Physical Inspection Guide
- Cost Comparison: New vs. Used
- Replacement Guide
- Difficulty and Time
- Tools Needed
- Step-by-Step Instructions
- Frequently Asked Questions (FAQ)
- 🎟️ Get 5% Off