

2016-2024 MINI Clubman Headlight Switch Trim Panel: A Guide to Failures and Correct Fitment
This guide details the common failures, replacement costs, and critical compatibility checks for the driver-side interior trim panel that houses the headlight switch in the F54 MINI Clubman.
- The most critical step is to visually match the button configuration of the replacement switch to your original. Fitment depends on options like auto headlights and fog lights.
- Failure is typically electrical within the integrated switch, causing lights to malfunction, rather than a problem with the trim panel itself.
- There are no direct aftermarket replacements; the choice is between a new OEM part or a significantly more affordable used OEM part.
- Replacement is a simple DIY task, requiring only basic trim removal tools and about 30 minutes.
Symptoms of a Failing Trim Panel or Headlight Switch
Failures related to this part can be either electrical, affecting the lighting system, or physical, affecting the panel itself. Because the switch is the most complex component, electrical issues are more common.
Electrical Failure Symptoms (Headlight Switch)
- Inconsistent Light Operation: You may find that the headlights, fog lights, or parking lights work intermittently or not at all. This can include being unable to switch between low and high beams.
- Lights Stuck On or Off: The switch can fail in a way that leaves the headlights or other lights permanently on, draining the battery, or prevents them from turning on at all, which is a major safety hazard.
- Flickering Headlights: While this can also be caused by bulbs or wiring, a faulty switch can create a poor connection, leading to flickering lights.
- Warning Lights: A failure in the lighting control module may trigger a warning message or symbol on the instrument cluster.
- Blown Fuses: A short circuit within the switch itself can cause related fuses to blow repeatedly.
Physical Failure Symptoms (Trim Panel)
- Rattling or Buzzing Noises: Broken mounting clips or a loose fit can cause the panel to vibrate and create noise while driving.
- Cosmetic Damage: Scratches, scuffs, or cracks on the panel surface from normal wear and tear or accidental impact.
- Broken Switch Buttons: The physical buttons or rotary dial on the switch can break, making it impossible to select lighting modes.
Warning: Any failure that prevents you from controlling your vehicle's headlights makes the car unsafe to drive in low-light conditions or inclement weather.
Buying a Used 2016-2024 Clubman Headlight Trim Panel
Purchasing a used OEM trim panel is the most cost-effective way to get a quality replacement. Since aftermarket versions of this specific, complex part are not available, your main choices are a new part from a dealer or a recycled OEM part. Here’s what to look for when buying used.
THE MOST IMPORTANT CHECK: Match Your Switch Configuration!
MINI produced several versions of the headlight switch for the F54 Clubman, depending on the car's factory-installed options. Installing the wrong switch will result in certain features not working.
Before you buy, you must remove your existing panel and compare the button configuration on your original switch to the one you plan to purchase. Look for the presence or absence of buttons for:
- Automatic Headlights (AUTO setting on the dial)
- Front Fog Lights (button with a symbol of a lamp shining left with wavy lines)
- Rear Fog Lights (button with a symbol of a lamp shining right with a wavy line)
The part number alone is not always enough, as multiple part numbers have been used and superseded. A visual match of the buttons is the only way to guarantee compatibility. Ask the seller for clear, well-lit photos of the switch face if you are buying online.
Physical Inspection Checklist
- Check All Mounting Tabs: Turn the panel over and inspect the back. Ensure all plastic mounting clips and tabs are intact and not cracked or broken. These are essential for a secure, rattle-free fit.
- Inspect the Wiring Connector: Look at the electrical connector on the back of the switch. Make sure it is not cracked, and that none of the pins inside are bent, corroded, or pushed in.
- Examine for Cosmetic Damage: Check the front face for deep scratches, peeling, or discoloration that may be worse than your original part. Pay special attention to the area around the rotary knob and buttons.
- Test Button Feel: If possible, press the buttons and turn the knob. They should move smoothly and provide a tactile click without sticking.
Known Issues, TSBs, and Recalls
As of mid-2024, there are no specific recalls or widespread Technical Service Bulletins (TSBs) from MINI related to the failure of this specific interior trim panel or its integrated headlight switch for the 2016-2024 Clubman. Failures appear to be isolated incidents due to normal wear or electrical faults rather than a systemic design flaw. Forum discussions by owners of the F54 Clubman do not indicate this is a common problem area.
Replacement Guide & Difficulty
Replacing the driver-side lower dash trim panel is a straightforward DIY job that requires basic tools and patience.
- Difficulty: 2 out of 5
- Estimated Time: 20-30 minutes
- Tools Needed: Plastic trim removal tools, possibly a small flathead screwdriver.
Basic Steps
- Remove Side Dash Panel: Open the driver's door. Using a plastic trim tool, carefully pry off the side panel of the dashboard to expose the edge of the headlight trim panel.
- Unclip the Trim Panel: Starting from the side, use your trim tool to gently pry the headlight trim panel away from the dashboard. It is held in by several retaining clips. Work your way around the panel until it is free.
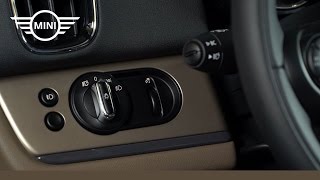
- Disconnect Electrical Connector: Reach behind the panel and locate the electrical connector plugged into the back of the headlight switch. Press the release tab on the connector and pull it straight out. 🎬 See how to replace a headlight switch step-by-step
- Install the New Panel: Plug the electrical connector into the new panel until it clicks. Align the new panel's clips with the slots in the dashboard and press firmly until it snaps securely into place.
- Test and Reassemble: Turn on the vehicle and test all functions of the headlight switch. Once confirmed, snap the side dash panel back into place.
Pro Tip: Using plastic trim removal tools is highly recommended to avoid scratching or marring the dashboard and trim panel surfaces.
Cost Comparison
The integrated nature of the switch and panel makes new OEM parts relatively expensive. A used OEM part offers significant savings.
| Part Type | Estimated Cost |
|---|---|
| New OEM | $190 - $250 |
| New Aftermarket | Not Available |
| Used OEM | $60 - $100 |
| Shop Labor | $50 - $120 |
Frequently Asked Questions (FAQ)
Can I upgrade to a switch with more options, like fog lights?
No, this is generally not possible. The vehicle's body control module (BCM) is programmed for the options it was built with. Simply swapping the switch will not add functionality, and the new switch may not work at all. You must match the switch to your car's original features.
My lights are flickering. Is it definitely the switch?
Not necessarily. While a faulty switch is a possible cause, flickering can also be caused by failing bulbs, a weak battery, a failing alternator, or a bad ground connection. It's wise to check these other, more common issues first before replacing the entire switch panel.
Why are there so many different part numbers for this switch?
Manufacturers often update parts over a vehicle's production run. A new part number can signify a change in supplier, a minor revision to the internal electronics, or a consolidation of several older parts into one new replacement. For this part, the different numbers also correspond to the different button configurations for various vehicle options.
Do I need to disconnect the battery to replace this part?
While the replacement is a simple plug-and-play procedure, it is always a good safety practice to disconnect the negative terminal of the battery before working on any electrical components in your vehicle. This prevents accidental short circuits.
Helpful Videos

Technical Specifications
OEM Part Numbers: 61315A25471 5A2547001 61319865845 61319390255 61319301806 61316824879
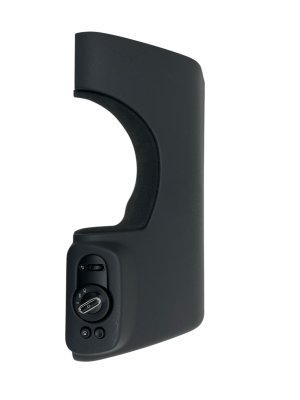
Integrated lighting control module with rotary dial and push-buttons. Connects via a single multi-pin electrical connector.
We Have This Part in Stock


The information in this article is provided for general reference and educational purposes only. Vehicle specifications, procedures, and part compatibility can vary by production date, trim level, and region. Always consult your vehicle's factory service manual and verify part numbers before purchasing or performing repairs. Safety-critical components such as airbags, seat belts, and braking systems should be installed by a qualified professional.
- MINI Cooper Clubman:
- 🎬 Helpful Videos
- 🛍️ Shop This Part
- Symptoms of a Failing Trim Panel or Headlight Switch
- Electrical Failure Symptoms (Headlight Switch)
- Physical Failure Symptoms (Trim Panel)
- Buying a Used 2016-2024 Clubman Headlight Trim Panel
- THE MOST IMPORTANT CHECK: Match Your Switch Configuration!
- Physical Inspection Checklist
- Known Issues, TSBs, and Recalls
- Replacement Guide & Difficulty
- Basic Steps
- Cost Comparison
- Frequently Asked Questions (FAQ)
- 🎟️ Get 5% Off