

2001-2004 Dodge Dakota Auto-Dimming Mirror: Leaks, Failures, and Replacement
Learn to diagnose, replace, and find a quality used auto-dimming mirror for your Dakota, and what to do when it starts leaking.
- The most common failure is a leaking electrochromic fluid cell, which appears as a bubble and can drip a caustic fluid that damages interior trim.
- This auto-dimming mirror (OEM #4805572AE) is not interchangeable with the base manual mirror without adding new wiring.
- Replacement is a very simple DIY job requiring only a Torx driver, taking less than 15 minutes.
- Due to the high cost of new OEM parts and lack of aftermarket options, a quality used OEM mirror or a mail-in repair service are the most cost-effective solutions.
Symptoms of a Failing Auto-Dimming Mirror
When the auto-dimming mirror in a 2001-2004 Dodge Dakota begins to fail, the signs are usually obvious. Understanding these symptoms can help you decide whether to repair or replace the unit.
"Lava Lamp" Bubble or Discoloration
The most common failure is the breakdown of the electrochromic gel inside the glass. This creates a large, distinct bubble or a separated, two-toned appearance that looks like a lava lamp. This is a permanent failure of the dimming cell, and the mirror will no longer dim correctly.
Fluid Leakage
Warning: If you see a bubble forming, plan to remove the mirror from the vehicle as soon as possible. The fluid inside the mirror is caustic and can leak out from the bottom of the housing. This oily substance can drip onto your center console, shifter, and dashboard, causing permanent stains and damage to the plastic trim.
Failure to Dim or No Power
Sometimes the mirror simply stops working. It may fail to dim when headlights appear behind you, or it may lose power entirely (the small power indicator light will not turn on). This can be caused by a failure in the mirror's internal circuit board, a blown fuse, or a problem with the wiring leading to the mirror.
Known Issues, Recalls, and Service Bulletins
As of this writing, there are no specific recalls or Technical Service Bulletins (TSBs) from Dodge or the NHTSA for the auto-dimming interior rear-view mirror on the 2001-2004 Dodge Dakota. The most prevalent known issue is the failure and subsequent leakage of the electrochromic dimming cell, as described by owners in numerous forums. While there are recalls for the 2001-2003 Dakota related to wiring harnesses, these are for issues caused by the clutch pedal and are not directly related to the mirror itself.
Variants and Compatibility
For the 2001-2004 Dodge Dakota, there were two main types of interior rear-view mirrors:
- Standard Manual Mirror: A basic mirror with a small tab on the bottom to manually flip between day and night positions. It has no electrical wiring.
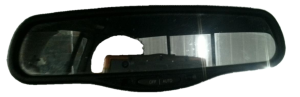
- Auto-Dimming (Electrochromic) Mirror: An optional, upgraded mirror that dims automatically. It has a power button, a visible light sensor on the front, and an electrical connector on the back.
Compatibility Warning: The auto-dimming mirror, OEM part number 4805572AE, is not a direct replacement for the standard manual mirror. To install an auto-dimming mirror in a truck that was not originally equipped with one, you would need to run a dedicated power and ground wire, a task best left for those comfortable with automotive wiring.
Buying a Used 2001-2004 Dakota Auto-Dimming Mirror
Given the high cost of a new OEM mirror and the lack of common aftermarket alternatives, a quality used OEM mirror is often the most practical choice. Here’s what to look for.
Inspection Checklist
- Check for Leaks: Inspect the glass for any signs of the "lava lamp" bubble or discoloration. Check the bottom edge of the plastic housing for any oily residue, which indicates a past or present leak.
- Examine the Glass: Look for deep scratches or cracks. Ensure the mirror is clear and not hazy.
- Inspect the Mount: Check that the mounting base where it slides onto the windshield button is intact and not cracked or damaged.
- Check the Connector: Ensure the electrical connector and pins on the back of the mirror are clean, straight, and free of corrosion.
Why Used OEM is a Good Choice
For this part, a used OEM mirror is often superior to new aftermarket options, which are not widely available for this specific auto-dimming function anyway. A good-condition used OEM mirror guarantees perfect fitment and function, provided it passes the inspection checklist. It offers the same performance as a new one at a fraction of the price.
Step-by-Step Replacement Guide
Replacing the interior rear-view mirror is a simple DIY task that usually takes less than 15 minutes.
Tools Needed
- Torx bit set (a T-20 is common for this task, but sizes can vary)
- Small flathead screwdriver or trim tool (optional)
Removal and Installation
- Disconnect the Electrical Connector: If there is a plastic trim cover over the mirror base, gently pry it off. Carefully unplug the wiring harness from the back of the mirror. There may be a small tab you need to depress to release the plug.
- Loosen the Set Screw: Look at the bottom of the mirror's metal base where it meets the windshield. You will find a small Torx screw. Loosen this screw a few turns; you do not need to remove it completely.
- Slide the Mirror Off: With the screw loosened, firmly slide the entire mirror assembly upward, parallel to the glass, to release it from the metal button glued to the windshield.
- Install the New Mirror: Slide the replacement mirror down onto the windshield button until it's fully seated.
- Tighten the Set Screw: While holding the mirror in place, tighten the Torx set screw until it is snug. Do not overtighten.
- Reconnect and Test: Plug the electrical connector back in. Turn the ignition to the 'On' position and press the power button on the mirror to ensure the indicator light comes on.
Cost Comparison
The cost to replace a failing auto-dimming mirror can vary significantly based on the path you choose.
| Part Type | Estimated Cost |
|---|---|
| New OEM (Mopar 4805572AE) | $375 - $565 |
| New Aftermarket | Not commonly available |
| Used OEM | $50 - $125 |
| Remanufactured (Repair Service) | $119 - $149 (plus shipping) |
| Shop Labor | $75 - $150 |
Frequently Asked Questions (FAQ)
What is the black liquid leaking from my mirror?
That is the electrochromic fluid from inside the auto-dimming glass cell. It has broken down and is leaking. This fluid is corrosive and can permanently stain or damage plastic interior parts. It is highly recommended to remove the mirror from the vehicle immediately to prevent costly damage to your dashboard or console.
Can I just replace the glass in my mirror?
You cannot replace just the glass yourself, as it is a sealed unit containing the electrochromic gel. However, there are mail-in repair services that specialize in rebuilding these mirrors. They will replace the failed internal glass cell with a new one and send it back to you, which is often cheaper than buying a new OEM mirror.
Why won't my mirror dim anymore?
This could be several things. First, check that the power button is on (usually indicated by a green LED). If it is, check the vehicle's fuse box for a blown fuse. If the fuse is good, the problem could be a loose connection, a break in the wire leading to the mirror, or a failure of the mirror's internal electronics.
Can I upgrade my manual mirror to an auto-dimming one?
Yes, but it is not a simple plug-and-play swap. A vehicle with a standard mirror does not have the necessary wiring. You would need to run a new circuit with power and ground to the mirror location. This is a feasible project for someone experienced with automotive electrical work but may be challenging for a beginner.
Helpful Videos
Technical Specifications
OEM Part Numbers: 4805572AE 4805572AD 4805572AC 4805572AB 4805572AA
Electrochromic (auto-dimming) with power and sensor inputs. Attaches to a standard button on the windshield. Electrical connection via a multi-pin plug.
We Have This Part in Stock

The information in this article is provided for general reference and educational purposes only. Vehicle specifications, procedures, and part compatibility can vary by production date, trim level, and region. Always consult your vehicle's factory service manual and verify part numbers before purchasing or performing repairs. Safety-critical components such as airbags, seat belts, and braking systems should be installed by a qualified professional.
- Dodge Dakota:
- 🎬 Helpful Videos
- 🛍️ Shop This Part
- Symptoms of a Failing Auto-Dimming Mirror
- "Lava Lamp" Bubble or Discoloration
- Fluid Leakage
- Failure to Dim or No Power
- Known Issues, Recalls, and Service Bulletins
- Variants and Compatibility
- Buying a Used 2001-2004 Dakota Auto-Dimming Mirror
- Inspection Checklist
- Why Used OEM is a Good Choice
- Step-by-Step Replacement Guide
- Tools Needed
- Removal and Installation
- Cost Comparison
- Frequently Asked Questions (FAQ)
- 🎟️ Get 5% Off