

Tesla Model S, 3, X, & Y Rear Interior Trim Guide: Fixing Rattles, Broken Clips, and Loose Panels (2012-2026)
Your guide to identifying, inspecting, and replacing the various trunk and C-pillar panels that cause common noises and fitment issues across the Tesla lineup.
- The most common failure of any rear interior panel is rattling caused by broken plastic clips; this is often a simple and inexpensive fix.
- A critical recall (NHTSA 21V98A) exists for 2017-2020 Model 3s for a trunk wiring harness that can fray and disable the rearview camera; trim removal is required for this repair.
- These panels are NOT interchangeable across Model S, 3, X, and Y. Always verify part numbers for your specific model, year, and configuration (e.g., Model Y 7-seater).
- When buying a used panel, the condition of the mounting tabs on the back is more important than minor cosmetic scuffs on the front.
The Truth About Tesla's Rear Interior Panels

If you're searching for a single "Interior Rear Body Panel" that fits a Model S, Model 3, Model X, and Model Y, you won't find one. These vehicles do not share interior trim parts. Instead, this guide covers the family of related rear trim components common to all these models, as they all suffer from similar issues: rattles, broken clips, and poor fitment. Understanding these common problems is key to a successful diagnosis and repair, regardless of which Tesla you own.
Symptoms of Failure: A Symphony of Squeaks and Rattles

Failure of a rear interior panel is almost never mechanical. The symptoms are nearly always audible or visible, making diagnosis relatively straightforward.
- Rattling or Buzzing Noises: This is the most common complaint. A high-frequency buzz or rattle, especially over rough roads, often points to a loose panel where a clip has broken or lost tension. Owners sometimes describe it as a sound like "maracas" or plastic clicking against metal.
- Visible Gaps or Poor Alignment: You may notice a panel is not sitting flush with an adjacent piece of trim. This is a clear sign that the mounting clips are broken, bent, or were not seated correctly during a previous repair.
- Loose Panels: The panel may feel loose or move when you press on it. This is common for pillar trim that can be knocked loose when entering or exiting the vehicle.
- Scuffs and Scratches: The trunk sill or scuff plate is particularly prone to cosmetic damage from loading and unloading cargo. While this doesn't affect function, it can be an eyesore.
- Discoloration: Some owners have reported interior panels, particularly on the doors, developing a discoloration that cannot be cleaned off, requiring panel replacement.
A Guide to Common Rear Trim Panels

While designs vary, these are the main rear panels and their specific issues.
Trunk Lid Liner / Upper Garnish
This is the large trim piece attached to the inside of the trunk lid or liftgate. It houses the trunk release switch and sometimes lighting. Its main issue is related to the wiring that runs underneath it. Removal is necessary to access the trunk latch mechanism or, critically, 🎬 See this walkthrough for removing the liner on powered trunks. the rearview camera wiring.
Trunk Sill / Scuff Plate
This plastic or metal-accented trim sits at the bottom of the trunk opening. Its job is to protect the painted body from scratches. It's held in by clips and is one of the easiest pieces to replace. Scuffing is its primary failure mode. Many aftermarket companies sell stainless steel or plastic protectors that cover the OEM sill to prevent this damage.
Trunk Side Panels
These are the large, often carpeted panels that form the sides of the trunk. They can house speakers, lights, 12V power outlets, and seat release switches. On the Tesla Model Y, specific versions of this panel exist for 5-seat and 7-seat configurations, with the latter including buttons to fold the third-row seats. Rattles can sometimes be traced to items behind these panels.
C-Pillar / D-Pillar Panels
These are the upper trim panels that run alongside the rear window (C-pillar on sedans) or the side cargo windows (D-pillar on SUVs). They are a known source of rattles, particularly on the Model X, where service technicians often have to replace clips to resolve noises. Accessing the bolts for these panels may require removing lower trim pieces first.
Known Issues, Recalls, and Model-Specific Problems

Model 3 (2017–2020): Rearview Camera Wiring Recall (NHTSA ID 21V98A)
Important Recall: On 2017-2020 Model 3s, the wiring harness for the rearview camera can become worn or damaged from the repeated opening and closing of the trunk. This can cause the rearview camera feed to fail, increasing the risk of an accident when reversing. Tesla Service will inspect the harness, install a guide protector to reduce strain, and replace the harness if necessary, free of charge. If you are buying a used model from this period, verify this recall has been completed.
🎬 Watch: See the actual wiring failure that triggered this recall.Model 3 'Highland' (2024+) and Model Y 'Juniper' (2025+)
The refreshed Model 3 (known as 'Highland') and the upcoming Model Y refresh ('Juniper') feature redesigned interior and exterior components. Rear trim panels from these newer vehicles are not backward compatible with earlier 2017-2023 Model 3 or 2020-2024 Model Y vehicles.
Model X: C-Pillar and Liftgate Rattles
Model X owners frequently report rattles originating from the rear of the cabin. Common culprits include the lower C-pillar trim panels and the large rear liftgate itself. Sometimes, simply adjusting the rubber bump stops on the liftgate can increase pressure and stop creaking noises.
Buying a Used Rear Interior Trim Panel: What to Check
Buying a used OEM panel is often the most cost-effective way to replace a damaged piece. Since these parts are largely cosmetic, a used one in good condition is just as good as new. Here's what to inspect:
- Check Every Mounting Tab: This is the most critical inspection. Flip the panel over and look at all the plastic tabs and clip receptacles. They should be intact and free of stress marks or cracks. A panel with even one broken main tab may not sit flush or could start rattling.
- Look for Cracks, Not Scuffs: Minor scuffs, especially on trunk panels, are normal wear and tear. However, look closely for actual cracks in the plastic, which can worsen over time and are not easily repaired.
- Verify the Part Number and Color: Tesla has used slightly different shades of black, white, and cream for its interiors over the years. Always verify the part number or have the donor vehicle's VIN to ensure a perfect match. This is especially important for the Model Y side panels, which have different part numbers for 5-seat and 7-seat versions.
- Ask About Clips: Ask the seller if the original clips are included. Most of the time, it's best to assume you will need to buy a new bag of clips, as they are designed as one-time-use parts and often break on removal.
Installation Guide: The 15-Minute Rattle Fix

Replacing most rear trim panels is a beginner-friendly job.
- Get a Trim Removal Tool Kit: Do not use a screwdriver. A cheap set of plastic pry tools is essential to avoid scratching your panels or paint.
- Identify the Starting Point: Gently pull back the rubber weatherstripping around the panel to get a better view. Find a corner or edge where you can safely insert your pry tool.
- Release the Clips: Work your way around the panel, gently prying to release the clips. You will hear them pop. Apply steady pressure. If a clip is stubborn, try to move to the next one and come back to it.
- Disconnect Wiring: Before fully removing the panel, check for any attached wiring for lights or switches. Carefully disconnect these.
- Install New Clips: It is highly recommended to install fresh clips onto your new or used panel before installation. They are inexpensive and ensure a tight, rattle-free fit.
- Align and Secure: Reconnect any wiring, then carefully align the panel. Line up the clips with their corresponding holes in the body and give the panel a firm push to snap it into place. You should hear a satisfying click as each clip engages.
Cost to Replace Tesla Rear Trim Panels
| Part Type | Estimated Cost |
|---|---|
| New OEM Panel | $150 - $500+ (Varies widely by panel, dealer-only) |
| New Aftermarket Panel | $50 - $250 (Mostly cosmetic overlays or sill protectors, not full panels) |
| Used OEM Panel | $50 - $200 (Excellent value, inspect clips carefully) |
| Replacement Clips (Bag of 10-20) | $10 - $25 |
| Shop Labor | $75 - $150 (Typically less than one hour of labor) |
Frequently Asked Questions (FAQ)
Can I fix a rattling panel without replacing it?
Yes, often you can. The first step is to remove the panel and identify the cause. If it's a broken clip, simply replacing the clip may solve it. If the clips are intact, the rattle may be caused by the panel vibrating against the metal body. Applying felt or foam tape to the contact points on the back of the panel is a common and effective fix used by owners and even service centers.
Is a loose interior panel covered by Tesla's warranty?
Generally, yes. If your vehicle is still under the basic limited warranty, rattles and trim fitment issues are typically covered. Tesla Mobile Service can often perform these repairs at your home or office, sometimes by simply replacing a broken clip.
What is part number 1126118-00-B? The prompt said it was a rear panel.
Part number 1126118-00-B is not an interior body panel. It is the black, zippered storage bag for the Tesla Gen 2 Mobile Connector charging cable. This is a common point of confusion, as part catalogs can sometimes group accessories and vehicle parts incorrectly.
Why do the clips break so easily?
Automotive interior clips are generally designed for quick assembly at the factory and are not intended for repeated removal and installation. They are made of hard plastic that becomes brittle over time with exposure to temperature changes. It is standard practice in auto body and trim repair to replace most clips during reassembly to ensure a secure fit.
Technical Specifications & Part Numbers
Pro Tip: Part numbers for clips are often the most useful thing to have. A bag of the correct clips can solve most fitment and rattle issues for a few dollars.
| Part | Common Part Numbers | Vehicle Fitment |
|---|---|---|
| Interior Trim Clips (Blue) | 1014969-00-A | Model S, Model X (Pillars, Trunk Panels) |
| Interior Trim Clip (Heart Flex) | 1025401-00-A | Model S, Model X (Door Panels) |
| Trunk Lid Trim (Lower) | 1733499-20-F | Model 3 'Highland' (2024+) |
| Trunk Garnish Trim | 1132812-00-A | Model 3 (2017-2023) |
| Trunk Side Trim (LH) | 1493076-98-B, 1781387 | Model Y |
| Trunk Side Trim (RH) | 1493079-00-B, 1781396 | Model Y |
| Mobile Connector Bag | 1126118-00-B | Accessory, Not a Vehicle Part |
Helpful Videos

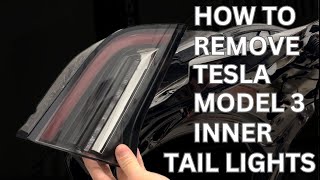
Technical Specifications
OEM Part Numbers: 1014969-00-A 1025401-00-A 1132812-00-A 1733499-20-F 1493076-98-B 1493079-00-B 1126118-00-B
Panels are typically made of ABS plastic, sometimes with an integrated carpeted surface. They are secured to the vehicle body with single-use plastic clips.

The information in this article is provided for general reference and educational purposes only. Vehicle specifications, procedures, and part compatibility can vary by production date, trim level, and region. Always consult your vehicle's factory service manual and verify part numbers before purchasing or performing repairs. Safety-critical components such as airbags, seat belts, and braking systems should be installed by a qualified professional.
- Tesla Model 3:
- Tesla Model S:
- Tesla Model X:
- Tesla Model Y:
- 🎬 Helpful Videos
- The Truth About Tesla's Rear Interior Panels
- Symptoms of Failure: A Symphony of Squeaks and Rattles
- A Guide to Common Rear Trim Panels
- Trunk Lid Liner / Upper Garnish
- Trunk Sill / Scuff Plate
- Trunk Side Panels
- C-Pillar / D-Pillar Panels
- Known Issues, Recalls, and Model-Specific Problems
- Model 3 (2017–2020): Rearview Camera Wiring Recall (NHTSA ID 21V98A)
- Model 3 'Highland' (2024+) and Model Y 'Juniper' (2025+)
- Model X: C-Pillar and Liftgate Rattles
- Buying a Used Rear Interior Trim Panel: What to Check
- Installation Guide: The 15-Minute Rattle Fix
- Cost to Replace Tesla Rear Trim Panels
- Frequently Asked Questions (FAQ)
- Technical Specifications & Part Numbers
- 🎟️ Get 5% Off