

2017-2020 Jaguar XE Trunk Quarter Trim: A Guide to Rattles, Part Numbers, and Replacement
Your definitive guide to identifying, inspecting, and replacing the interior rear quarter trim panels in your 2017-2020 Jaguar XE.
- The most critical step before buying is to visually confirm you are ordering the correct side (Left/Driver or Right/Passenger), as part number descriptions are frequently wrong in online listings.
- The most common failure is broken mounting clips on the back of the panel, which leads to persistent rattles and buzzing noises.
- When inspecting a used panel, prioritize the condition of the mounting clips over minor cosmetic scuffs on the surface.
- A relevant recall (H445) for the rearview camera wiring on 2019-2020 models requires removing these panels, offering a good opportunity to inspect the harness.
Symptoms of a Failing Interior Quarter Panel Trim
Failure of this panel is almost always related to physical damage or noise, not mechanical breakdown. The symptoms are usually minor annoyances but can point to underlying issues.
1. Rattling, Buzzing, or Creaking Noises
By far the most common issue is noise coming from the trunk area. These sounds are often caused by the large plastic panel vibrating against the car's metal body or other trim pieces. This is a frequent complaint among Jaguar owners of this era. The root cause is typically broken or loose mounting clips on the back of the panel, which can no longer hold it securely. Temperature changes can also cause the plastic to expand or contract, leading to new noises.
2. Visible Damage
Loading and unloading heavy or sharp-edged cargo can easily damage the trim panel. Common signs of damage include:
- Deep scratches or gouges in the plastic.
- Cracks, especially around stress points like cargo net hooks.
- Stains or discoloration on the carpeted surface from spills.
- Warping or distortion, which can be caused by sun exposure or heat.
3. Poor Fit and Gaps
A panel that is not sitting flush with adjacent trim pieces is a clear sign of a problem. You may notice uneven gaps or see the edge of the panel popping out. This indicates that the mounting tabs on the back are broken or that the panel was not reinstalled correctly after a previous repair.
Pro Tip: A loose trunk trim panel can sometimes be a clue that other work has been performed, such as a repair to the tail lights or the rearview camera wiring. Check for signs of previous removal, like pry marks on the edges of the panel.
Buying a Used 2017-2020 Jaguar XE Quarter Trim Panel
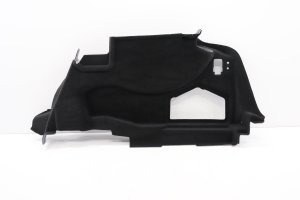
Since new aftermarket versions of this panel are not available, your choice is between a costly new OEM part and a recycled OEM part. A used OEM panel can offer significant savings, perfect color and material match, and original factory fitment, provided you inspect it carefully.
Warning: Critical Part Number and Side Verification: There is widespread confusion in online listings for these parts. While standard industry practice designates part numbers ending in '22' as left-hand (driver side) and '23' as right-hand (passenger side), many sellers list them in reverse. DO NOT rely on the part number alone. Always verify with the seller and by comparing photos that the panel you are buying is for the specific side you need.
Physical Inspection Checklist
When buying a used panel, the condition of the mounting points is more important than minor cosmetic flaws.
- Inspect All Mounting Tabs: Flip the panel over and check every single plastic tab and clip receiver. These are the most critical points. If more than one or two are cracked or broken, the panel will not sit securely and will likely rattle.
- Check for Cracks: Flex the panel slightly and look for hairline cracks in the main body of the part. Pay close attention to the areas around any openings, like for cargo hooks or lights.
- Examine the Surface: Check the carpeted face for major stains, tears, or chemical damage that won't come out with cleaning. Minor scuffs are normal for a used trunk part, but deep gouges are permanent.
- Look for Warping: Lay the panel on a flat surface to ensure it hasn't been warped by heat or improper storage. A warped panel will never fit correctly.
Known Issues, Recalls, and Technical Service Bulletins (TSBs)
While there are no recalls for the trim panel itself, a notable recall for the 2019-2020 Jaguar XE requires its removal for the fix, making it highly relevant.
Recall H445 / NHTSA 23V-501: Rearview Camera Failure
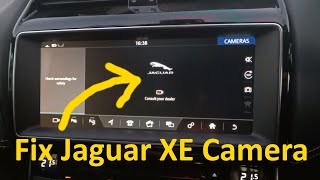
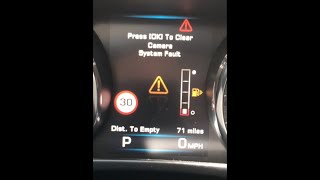
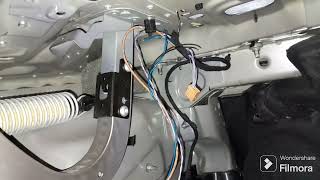
Jaguar issued a recall for some 2019-2020 XE models because wiring in the trunk could become damaged, causing the rearview camera image to fail. 🎬 See: Diagnosing a Jaguar XE camera system fault The repair procedure involves inspecting, and if necessary, repairing the camera wiring harness that runs behind the trunk trim panels. The retaining clips are also replaced to ensure proper routing. If you are removing your panel, it is an excellent time to inspect this harness for any signs of chafing or stress.
🎬 Watch: How to fix the rear camera wiring harnessStep-by-Step Replacement Guide (Difficulty: 2/5)
Replacing the interior quarter trim panel is a straightforward DIY job that requires basic tools and about 30-60 minutes per side. The process is similar to removing a door panel.
Tools Needed:
- Non-marring plastic trim removal tool kit
- Socket set or Torx driver (for cargo hooks)
- Small flathead screwdriver (for popping covers)
Removal Steps:
- Empty the Trunk: Remove the floor panel and any personal items.
- Remove Fasteners: Look for any visible screws or plastic retaining clips. These are often hidden inside cargo hooks or behind small plastic covers. Unscrew any cargo hooks or tie-downs attached to the panel.
- Remove Adjacent Trim: You may need to first pop loose the rear trunk sill plate (the plastic piece covering the trunk latch) to free the bottom edge of the side panel.
- Pry the Panel Loose: Starting from a lower edge, use a plastic trim tool to gently pry the panel away from the body. You will hear the plastic clips pop as they release. Work your way around the panel until all clips are free.
- Disconnect Electronics: If your panel has a trunk light or a 12V power outlet, carefully reach behind the panel and disconnect the electrical connectors before fully removing it. These connectors usually have a small tab you must press to release them.
Installation Steps:
- Connect Electronics: Before positioning the new panel, connect the wiring for the light or power outlet.
- Align the Clips: Carefully align the plastic clips on the back of the new panel with the corresponding holes in the vehicle's body. Start by seating the top edge first.
- Secure the Panel: Once aligned, give the panel a firm tap with the palm of your hand directly over each clip location to snap it into place. You should hear a solid click as each one engages.
- Reinstall Fasteners: Re-install any screws, cargo hooks, and adjacent trim pieces that you removed.
Cost Comparison for Jaguar XE Quarter Trim Panel
| Part Type | Estimated Cost (Per Side) | Notes |
|---|---|---|
| New OEM | $300 - $500 | Sourced from a Jaguar dealership. Ensures perfect condition but is the most expensive option. |
| Used OEM | $100 - $200 | A recycled original part. Offers the best value. Prices vary based on condition and seller. |
| New Aftermarket | Not Available | Aftermarket manufacturers typically do not produce this type of cosmetic interior panel. |
| Shop Labor | $100 - $200 | Typically about one hour of labor at an independent shop or body shop. |
Frequently Asked Questions (FAQ)
Do I need special tools to replace the trunk trim panel?
No, but a set of plastic non-marring trim removal tools is highly recommended. Using a screwdriver can easily scratch or gouge the plastic panels. Other than that, you may only need a basic socket or Torx set for the cargo hooks.
Can I fix a rattling panel without replacing it?
Yes, often you can. If the panel is rattling because of loose clips, you can try removing the panel and applying felt or foam tape to the contact points on the back of the panel or on the car's body. This dampens vibrations and can eliminate many common noises.
How do I know which side to order?
In the US market, the Left side is the Driver's side, and the Right side is the Passenger's side. As noted in the warning above, part number descriptions in online listings are often incorrect for this specific part. The safest method is to look at a picture of the part and compare its shape to the one in your vehicle.
Will a panel from a different year XE fit my car?
Yes, a panel from any 2017, 2018, 2019, or 2020 Jaguar XE should fit. There were no major changes to the trunk design during this period. However, ensure the color (e.g., black, grey) matches your car's interior.
Helpful Videos

Technical Specifications
OEM Part Numbers: GX73-45422-AE8PVJ GX73-45423-AE8PVJ LX7345422AC LX7345423AC8PVJ
Material: Molded plastic with carpeted surface. Location: Trunk/Cargo Area, Left or Right side.
We Have This Part in Stock

The information in this article is provided for general reference and educational purposes only. Vehicle specifications, procedures, and part compatibility can vary by production date, trim level, and region. Always consult your vehicle's factory service manual and verify part numbers before purchasing or performing repairs. Safety-critical components such as airbags, seat belts, and braking systems should be installed by a qualified professional.
- Jaguar XE:
- 🎬 Helpful Videos
- 🛍️ Shop This Part
- Symptoms of a Failing Interior Quarter Panel Trim
- 1. Rattling, Buzzing, or Creaking Noises
- 2. Visible Damage
- 3. Poor Fit and Gaps
- Buying a Used 2017-2020 Jaguar XE Quarter Trim Panel
- Physical Inspection Checklist
- Known Issues, Recalls, and Technical Service Bulletins (TSBs)
- Recall H445 / NHTSA 23V-501: Rearview Camera Failure
- Step-by-Step Replacement Guide (Difficulty: 2/5)
- Tools Needed:
- Removal Steps:
- Installation Steps:
- Cost Comparison for Jaguar XE Quarter Trim Panel
- Frequently Asked Questions (FAQ)
- 🎟️ Get 5% Off