

2018 Chrysler Challenger Interior Quarter Panel Trim: Fixing Rattles and Damage
This guide covers the common issues, replacement costs, and important buying considerations for the interior rear side panels in your 2018 Challenger.
- The most common issue with these panels is rattling, which can often be fixed with foam tape without needing a full replacement.
- Before buying a used panel, you must verify it is compatible with your car's audio system (speaker grille) and color.
- The single most important inspection on a used panel is checking for broken mounting clips on the back; broken clips will lead to a poor fit and more rattles.
- Replacement is a DIY-friendly job but requires removing the rear seats and being careful with plastic clips.
Symptoms of a Failing Interior Quarter Panel Trim
Since this is a cosmetic and structural trim piece, failure symptoms are almost always visible or audible.
- Rattling or Buzzing Noises: This is the most common complaint. Noises from the rear of the cabin, especially over bumps or when playing music with bass, often originate from a loose quarter panel trim. This is usually caused by broken or weakened mounting clips.
- Visible Damage: Scratches, scuffs, and gouges are common from loading and unloading items, or from contact with the seat belt buckle. Over time, sun exposure can cause the panel to fade or, in extreme cases, become brittle and crack.
- Poor Fit or Gaps: A panel that is separating from the C-pillar (the pillar behind the side window) or the floor is a clear sign that mounting clips have failed or the panel itself has been warped or damaged. This can create unsightly gaps and increase interior noise.
- Speaker Issues: If the panel is loose, it can cause the rear speaker to vibrate improperly, leading to distorted audio, buzzing, or rattling that is synchronized with music.
Known Issues for 2018 Chrysler Challenger
While there are no specific recalls or Technical Service Bulletins (TSBs) for the 2018 Challenger's interior quarter panels, forums and owner discussions highlight a few common points of frustration.
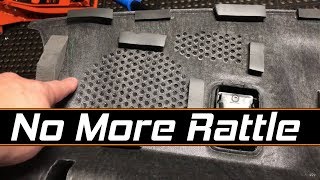
- Rear Deck and Trim Rattles: Rattles from the rear of the car are a frequent topic for Challenger owners. While sometimes blamed on the rear package shelf (deck), the quarter trim panels are also a common source. The fix often involves applying foam weatherstripping or felt tape to contact points to dampen vibrations. 🎬 Watch this quick guide to fixing rear deck rattles.
- General Interior Trim Quality: Some owners have noted issues with various interior panels, including door panels and dash components, warping or separating. While more common on door panels, the underlying cause is often related to adhesive failing over time due to heat cycles.
Safety Recall Note: While not related to the trim panel itself, several safety recalls exist for the 2018 Challenger. These include issues with the Powertrain Control Module (PCM) software related to cruise control and potential side airbag inflator ruptures. It is always recommended to check your vehicle's VIN on the NHTSA website for any open recalls.
Buying a Used Interior Quarter Panel Trim Panel
A used OEM panel is often the best choice for fit and quality, but careful inspection is key. Here’s what to look for:
- Inspect All Mounting Points: This is the most critical check. Flip the panel over and carefully examine every plastic tab, clip receiver, and mounting hole. These are fragile and easily broken during removal. A panel with broken tabs will never fit securely and will almost certainly rattle.
- Verify Speaker Compatibility: Challengers were available with different audio systems (e.g., base, Alpine, Harman Kardon). The quarter trim panel will have different speaker grille designs and mounting provisions for each. Compare the speaker grille on the used panel to your original one. Do not assume you can easily modify a panel for a different speaker.
- Check for Physical Damage: Look for deep scratches, cracks, or signs of heat warping. Pay close attention to the armrest area and the top edge that meets the window, as these are high-wear areas. Minor scuffs can often be cleaned or repaired, but cracks compromise the panel's structure.
- Confirm the Color and Material: The interior trim color is coded, often with a three-character code like 'DX9' for black. Ensure the color and texture (e.g., standard plastic vs. premium upholstered insert) match your vehicle's interior to avoid a mismatched look.
Pro Tip: When buying online, insist on clear photos of the back of the panel to verify the condition of the mounting clips. An honest seller will be happy to provide them. A listing without these photos is a red flag.
Cost Comparison
| Part Type | Estimated Price Range (per side) |
|---|---|
| New OEM | $450 - $750+ |
| New Aftermarket | Not commonly available |
| Used OEM | $150 - $350 |
| Shop Labor for Installation | $150 - $300 |
Replacement Overview
Replacing the interior quarter panel is a manageable DIY project for those comfortable with interior work. It does not require specialized tools, but it is time-consuming and requires patience to avoid breaking clips.
Difficulty: 3 out of 5
Estimated Time: 1.5 - 2.5 hours per side
Basic Steps:
- Remove Rear Seat: The rear seat bottom cushion must be removed first, followed by the rear seat back.
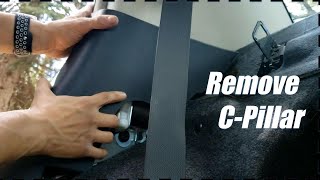
- Remove Adjacent Trim: The door sill plate and C-pillar trim (the upper trim piece) will likely need to be loosened or removed to access the quarter panel.
- Disconnect Electronics: If your panel has a speaker, carefully disconnect the wiring harness.
- Unfasten the Panel: Remove any visible screws, which are often hidden behind small covers or other trim pieces. Then, using a plastic trim removal tool, carefully pry the panel away from the body to release the hidden plastic clips. Work slowly and methodically around the perimeter of the panel.
- Installation: Installation is the reverse of removal. Align all clips carefully before pushing the panel into place. A firm tap with the palm of your hand should seat each clip. Reconnect any wiring and reinstall the surrounding trim and rear seat.
Frequently Asked Questions (FAQ)
My quarter panel is rattling. Do I need to replace it?
Not necessarily. In many cases, rattles can be fixed by removing the panel and applying foam or felt tape to the plastic clips and any contact points where the panel might rub against the car's metal body or other trim pieces. This dampens the vibration and is a common fix used by both DIYers and professionals.
Can I repair scratches on my trim panel?
Minor, light scratches on the plastic can sometimes be minimized with interior detailer products or specialized plastic scratch removers. Deep gouges are difficult to fix perfectly, but some plastic repair kits can fill the scratch. However, matching the texture and color can be challenging. For significant damage, replacement is often the best option.
Is the driver's side panel the same as the passenger's side?
No, the left (driver side) and right (passenger side) panels are mirror images of each other and are not interchangeable. They have unique part numbers.
What tools are needed for replacement?
You will typically need a basic socket set (10mm is common), a set of plastic trim removal tools (to prevent scratching), and possibly a Phillips head screwdriver. A T50 Torx bit may be required for the seat belt anchor if it needs to be moved.
🎬 See this step-by-step quarter panel removal walkthrough.Helpful Videos

Technical Specifications
OEM Part Numbers: 1ZA07DX9AB
Variations exist based on color (e.g., Black - DX9) and audio system speaker grille configuration.
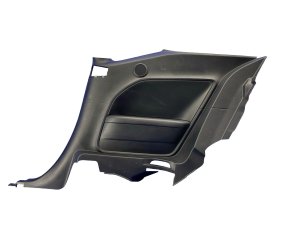
We Have This Part in Stock



The information in this article is provided for general reference and educational purposes only. Vehicle specifications, procedures, and part compatibility can vary by production date, trim level, and region. Always consult your vehicle's factory service manual and verify part numbers before purchasing or performing repairs. Safety-critical components such as airbags, seat belts, and braking systems should be installed by a qualified professional.
- Chrysler Challenger: