

2017-2024 Audi A4, S4, A5, S5 & RS5 Dashboard Ambient Light Failure and Replacement
A complete guide to diagnosing, replacing, and sourcing the dashboard ambient light strip for your B9 platform Audi.
- Failure is typically isolated to the light strip itself or its wiring, not the entire vehicle's lighting system.
- Replacement is moderately difficult, requiring careful removal of dashboard trim panels to avoid cosmetic damage.
- A used OEM part is a cost-effective solution, but you must verify the part number is an exact match for your vehicle's configuration.
- Software glitches can cause lighting issues; try an MMI reset before assuming a hardware failure.
Symptoms of Dashboard Ambient Light Failure

When the dashboard ambient light begins to fail on your Audi A4, S4, A5, S5, or RS5, the symptoms are usually cosmetic but can be frustrating. Here are the most common signs:
- Partial or Complete Light Outage: The most obvious symptom is when the dashboard light strip stops working entirely, or only a section of it illuminates. Often, the lights in the doors or center console will continue to work correctly.
- Flickering or Pulsing: The light may flicker, pulse, or behave erratically. Some owners report this happens most often at dusk or dawn, possibly related to the vehicle's ambient light sensor.
- Incorrect Colors: The light strip may get stuck on a single color and refuse to change, or it may display a different color than what is selected in the MMI.
- MMI Control Issues: In the MMI settings, you may find that the options to control the dashboard or "Line" lighting are grayed out or unresponsive, even though other lighting zones can still be adjusted.
- Associated Electrical Faults: In some cases, a fault in the lighting circuit can accompany other electrical problems in the same area. For example, a failing door ambient light has been seen alongside a non-functional window switch on the same door.
- Fault Codes: A diagnostic scan with a tool like VCDS or OBDeleven may reveal fault codes related to the central electronics module (J519) or specific to the ambient lighting circuit, indicating a communication error or open circuit.
Buying a Used Dashboard Ambient Light

A used OEM ambient light assembly is an excellent, cost-effective alternative to an expensive new part. Because this is primarily an electronic and cosmetic part, a visual inspection is critical. Here’s what to check before you buy:
- Verify the Part Number: The most critical step. Audi uses many variations of interior parts. Ensure the OEM part number on the used unit (e.g., 8W0947094) is an exact match for the one you are replacing. A part from a different trim level or year might not be compatible with your car's MMI system.
- Inspect the Light Pipe/Strip: Carefully examine the clear or frosted plastic light strip. Look for any cracks, deep scratches, or yellowing from sun exposure. Damage to the pipe can create "hot spots" or dark spots when illuminated.
- Check Wiring and Connectors: Inspect the entire length of the wiring harness. Look for any cuts, frayed wires, or signs of previous, amateur repairs (like electrical tape or non-OEM connectors). The connector pins should be straight and free of corrosion.
- Ask About the Donor Vehicle: If possible, find out the trim level of the vehicle the part came from. Parts from a Prestige or S-Line model with the multi-color package are more likely to be the correct hardware. A part from a base model may not support multi-color functionality even if it fits physically.
- Choose a Reputable Seller: Buy from a recycled parts seller that offers a warranty and a clear return policy. This protects you if the part is dead on arrival or has been misrepresented.
Pro Tip: A used OEM light strip is often a better choice than a cheap, full aftermarket kit. The OEM part is designed for perfect fitment and seamless integration with your car's MMI without needing extra coding or adapters.
🎬 Watch: Audi B9 ambient lighting retrofit guideKnown Issues, TSBs, and Recalls

While there are no specific recalls for the dashboard ambient lighting on these models, some related issues and Technical Service Bulletins (TSBs) are worth noting:
- Software Glitches: Forum discussions reveal that ambient lighting failures are sometimes caused by software issues within the car's control modules. In some cases, a dealer software update is required to fix flickering or non-responsive lights.
- Control Module Faults: The Central Electronics Control Module (J519) or Comfort System Central Control Module (J393) governs the ambient lighting. A fault in this module can cause widespread lighting issues. TSB 57 23 02 2058452/4 addresses a control module loop that can be fixed with a software update, which could potentially be related.
- MMI System Issues: TSB 91 24 57 2075325/1 was issued for a problem where the MMI screen gets stuck on a "Loading system..." message, which would prevent you from accessing the lighting controls. A simple MMI reset (pressing and holding the volume knob for 10+ seconds) can sometimes resolve temporary glitches.
Cost Comparison
The cost to fix a faulty dashboard ambient light can vary significantly depending on whether you do it yourself and the source of the replacement part.
| Part/Service | Estimated Cost |
|---|---|
| New OEM Part | $150 - $250 |
| New Aftermarket Kit (Full Interior) | $200 - $800+ |
| Used OEM Part | $50 - $125 |
| Shop Labor (Replacement) | $200 - $400 |
| Dealer Diagnosis | $160 - $250+ |
Replacement Overview & Difficulty
Replacing the dashboard ambient light strip involves removing the main decorative trim piece that runs across the passenger side of the dashboard. While not mechanically complex, it requires a high degree of care to avoid damaging expensive interior panels.
- Difficulty: 3/5 (Moderate)
- Estimated Time: 1.5 - 2.5 hours
- Tools Needed: Plastic trim removal tools, 8mm socket, Torx T20 driver.
General Steps:
- Disconnect the Battery: As a precaution, disconnect the negative battery terminal before working on interior electronics.
- Remove Side and Lower Panels: You will likely need to remove the side dash panel (accessible when the passenger door is open) and the panel under the glovebox to access retaining bolts.
- Remove Retaining Bolts: There are typically several 8mm bolts and/or T20 Torx screws holding the main trim piece in place. Some are hidden behind other panels or inside the glove box area.
- Carefully Pry the Trim: Using plastic trim removal tools, gently pry the dashboard trim away from the dash. It is held in by a series of clips. Work slowly and evenly to avoid breaking the clips or the trim itself.
- Disconnect and Swap: Once the trim is loose, you can access the electrical connector for the ambient light strip. Disconnect it, swap the old light strip for the new one, and reconnect it.
- Test and Reassemble: Before snapping everything back into place, temporarily reconnect the battery and test the new light to ensure it functions correctly. Then, carefully reinstall all trim pieces in the reverse order of removal.
Warning: Dashboard trim pieces are fragile and expensive to replace. Using metal tools like a screwdriver to pry panels will almost certainly scratch or gouge the soft-touch plastics. Always use a proper set of plastic trim removal tools.
🎬 See: How to safely remove Audi interior trimFrequently Asked Questions (FAQ)
Can I add multi-color ambient lighting if my car only has white lights?
It is possible, but it's not as simple as just swapping the light strip. Vehicles with only white ambient lighting often lack the necessary control module hardware and software programming. While full aftermarket kits exist to perform this upgrade, simply installing a used multi-color OEM light strip into a base model car will likely not work without additional hardware and coding.
🎬 Watch: Installing extra dashboard ambient lightsWhy did only my dashboard light fail, but the door lights still work?
The ambient lighting system is composed of several individual LED modules that are connected to a central controller. It's common for one of these modules or its specific wiring to fail while the rest of the system remains operational. The problem is most likely with the light strip itself or its direct connection, not the entire system.
The dealer quoted me a very high price to fix my ambient lighting. Why?
Dealer repair costs can be high for several reasons. First, diagnosing electrical issues can be time-consuming, and labor rates are high. A technician may spend an hour or more just tracing the fault. Second, they will only use new OEM parts, which are the most expensive option. Finally, if the issue is with a control module and not just the light strip, the part itself can cost over $500.
My MMI settings for the lights are gone or grayed out. What should I do?
First, try a simple MMI system reset by pressing and holding the main volume knob for about 10-15 seconds until the screen goes blank and reboots. This can solve temporary software glitches. If the problem persists, it indicates a communication failure between the MMI and the lighting control module, which will require a diagnostic scan to pinpoint the cause.
Helpful Videos
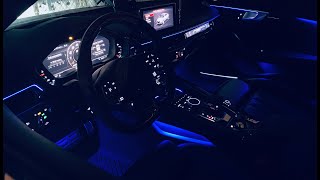
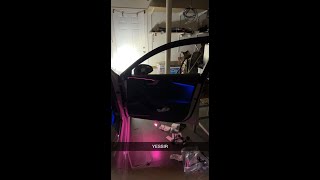
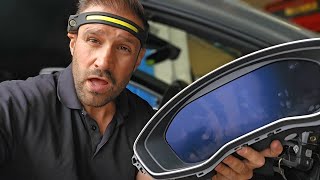
![Audi A4 B9_Interior Trim Removal & Wrap_[ POV: Carbon fiber look]4K](https://img.youtube.com/vi/xSpNVUlHVxg/mqdefault.jpg)
Technical Specifications
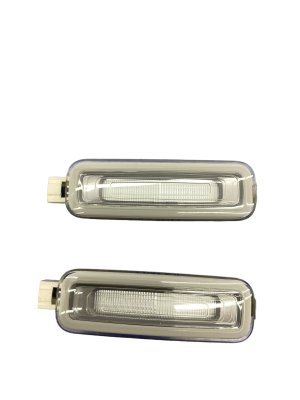
OEM Part Numbers: 8W0947094
LED light strip/pipe integrated into dashboard trim. Controlled via vehicle MMI system. Part of the multi-color ambient lighting package (Audi option code QQ2).
We Have This Part in Stock



The information in this article is provided for general reference and educational purposes only. Vehicle specifications, procedures, and part compatibility can vary by production date, trim level, and region. Always consult your vehicle's factory service manual and verify part numbers before purchasing or performing repairs. Safety-critical components such as airbags, seat belts, and braking systems should be installed by a qualified professional.
- Audi S5:
- Audi A4:
- Audi S4:
- Audi A5:
- Audi RS5: