

Audi A4, A5, Q5 & S5 Overhead Console Guide (2013-2016): Diagnosing Failures, Parasitic Drains, and Replacement
Your definitive guide to troubleshooting and replacing the overhead dome light and switch module in your 2013-2015 Audi A4, A5, Q5, and 2016 Audi S5.
- The most critical failure symptom is a parasitic battery drain caused by the module preventing the car from entering 'sleep mode'.
- Replacement is an easy DIY job, requiring only a T25 Torx driver and a pry tool, and takes less than 30 minutes.
- When buying a used part, you must match the OEM number (8T0947135B) and verify features like sunroof controls and microphone.
- Complete aftermarket console assemblies are not available, making a quality used OEM part the best value for replacement.
Symptoms of a Failing Overhead Console

When the overhead console begins to fail, it can cause a range of electrical issues, from minor annoyances to problems that can leave you with a dead battery. Because it's an electronic module, symptoms are not always straightforward.
1. Parasitic Battery Drain
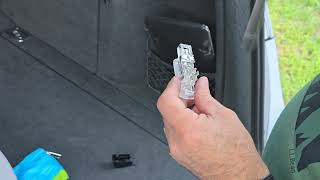
This is the most serious and common symptom associated with a failing overhead console in these Audi models. A fault within the module's circuitry can prevent the vehicle's electronic systems from going into 'sleep mode' after the car is locked. This results in a constant, low-level power draw that will drain the battery, often overnight. If you repeatedly find your battery dead 🎬 Watch: Diagnosing a real-world Audi battery drain issue for no apparent reason, the overhead console is a primary suspect. Technicians often trace these draws by measuring current at the battery while pulling fuses related to the interior comfort and lighting systems.
2. Interior Lights or Switches Not Working
A more direct symptom is the failure of the lights or switches themselves. This can manifest in several ways:
- Map/Reading Lights Don't Turn On: One or more of the individual lights may stop responding when you press the button.
- Lights Don't Turn On With Door: The lights may fail to illuminate when a door is opened, which could be a fault in the console or a related door latch sensor.
- Sunroof Controls Inoperative: If the sunroof switch is part of the console, it may stop working, preventing the sunroof from opening or closing.
- Ambient Lighting Failure: The subtle red ambient LEDs within the console may dim or stop working completely.
In some cases, a total loss of interior lighting can be caused by a blown fuse, which can happen when trying to install aftermarket LED bulbs that short the circuit.
🎬 See: How to safely install LED interior lights3. Rattling Noises
Over time, the plastic housing and mounting clips of the console can loosen, leading to buzzing or rattling noises from the headliner area, especially when driving on rough surfaces. Owners often report that pressing on the console temporarily stops the noise.
Pro Tip: Before replacing the entire console for a lighting issue, check the fuses. The fuse for the interior lights on these models can be linked to the 'Vehicle Electrical System Control Module' or 'Comfort Control Module' and may not be obviously labeled as 'Dome Light'.
Buying a Used Overhead Console: What to Check

Since new aftermarket assemblies are generally not available, a quality used OEM part is the most cost-effective solution. Here’s what to look for when buying a recycled overhead console.
1. Match the Part Number Exactly
The most critical step is to match the OEM part number. The primary part number for these vehicles is 8T0947135B. However, there may be different suffix letters that denote color (e.g., beige, gray, black) or specific features. Always get the part number from your original unit before ordering. Using a part with the wrong number can lead to incompatible features.
2. Inspect All Mounting Points
The console is held in place by a combination of a central Torx screw and several plastic and metal clips. These clips are fragile and can easily break during removal. Carefully inspect the used part for any broken tabs or bent metal clips. A unit with broken clips will not sit securely in the headliner and will likely cause rattles.
3. Verify Features
These consoles come in several variations. Before purchasing, confirm the used unit has the same features as your original:
- Sunroof Control: Does it have a sunroof switch, and is it for the correct type of sunroof (standard vs. panoramic)?
- Microphone Grille: If your vehicle has factory Bluetooth, the console should have a small grille for the microphone.
- Color: Ensure the color matches your vehicle's headliner.
4. Check Button Condition
Physically press each button on the console. They should have a solid, tactile click and return to their position smoothly. Buttons that are sticky, loose, or feel worn out may indicate a high-mileage or heavily used part.
Cost Comparison: New vs. Used Overhead Console
Replacing the overhead console can be affordable if you opt for a used part and perform the labor yourself.
| Part Type | Estimated Cost |
|---|---|
| New OEM | $350 - $500 |
| New Aftermarket | Not Available |
| Used OEM | $50 - $150 |
| Shop Labor | $60 - $120 |
Step-by-Step Replacement Guide (Difficulty: 1/5)

Replacing the overhead console is a straightforward DIY task that typically takes less than 30 minutes.
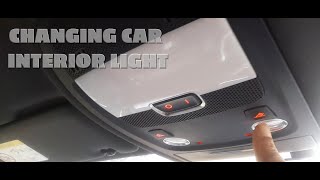
🎬 Watch: Step-by-step interior light console removal guide- Gather Tools: You will need a T25 Torx driver and a plastic trim removal tool.
- Access the Screw: Open the sunglasses holder compartment in the console. Inside, you will see a single T25 Torx screw.
- Remove the Screw: Use the T25 driver to completely remove the screw.
- Pry the Console Down: Carefully insert a plastic pry tool between the front edge of the console and the headliner. Gently pry downwards to release the front metal clips. Work your way around the sides to release the remaining clips.
- Disconnect the Wiring: Once the console is loose, lower it enough to access the electrical connector on the back. Press the release tab on the connector and pull it out.
- Install the New Console: Connect the electrical plug to the new unit, making sure it clicks into place. Align the tabs at the rear of the console with the slots in the headliner, then push the front of the console upwards firmly until all the clips snap securely into place. Reinstall the T25 Torx screw inside the sunglasses holder.
Frequently Asked Questions (FAQ)
My battery keeps dying. Could the dome light really be the cause?
Yes. A faulty overhead console module is a known cause of parasitic battery drain on these Audi models. The module can fail to shut down properly, keeping other vehicle electronics awake and draining the battery when the car is parked.
Can I replace the bulbs with LEDs?
Yes, but with caution. While many owners successfully upgrade to LED bulbs for a brighter, more modern look, using cheap or poorly designed LEDs can sometimes cause issues. These can include flickering, lights not working at all, or even blowing a fuse. If you install LEDs and your interior lights stop working, the first thing to check is the fuse.
Why don't my interior lights turn on when I open the driver's door, but they work for other doors?
This specific issue is usually caused by a faulty door latch sensor in the driver's door, not the overhead console itself. The car doesn't receive the signal that the door has been opened, so it doesn't command the lights to turn on.
Is it difficult to replace the overhead console myself?
No, this is considered a very easy DIY job. It typically only requires removing one screw and carefully prying the unit out. The difficulty is rated 1 out of 5, and it can usually be done in under 30 minutes.
Helpful Videos
Technical Specifications
OEM Part Numbers: 8T0947135B
Houses switches for interior lighting, sunroof, and often a microphone for Bluetooth. Connects to the vehicle's comfort control module.
We Have This Part in Stock



The information in this article is provided for general reference and educational purposes only. Vehicle specifications, procedures, and part compatibility can vary by production date, trim level, and region. Always consult your vehicle's factory service manual and verify part numbers before purchasing or performing repairs. Safety-critical components such as airbags, seat belts, and braking systems should be installed by a qualified professional.
- Audi A5:
- Audi A4:
- Audi Q5:
- Audi S5:
- 🎬 Helpful Videos
- 🛍️ Shop This Part
- Symptoms of a Failing Overhead Console
- 1. Parasitic Battery Drain
- 2. Interior Lights or Switches Not Working
- 3. Rattling Noises
- Buying a Used Overhead Console: What to Check
- 1. Match the Part Number Exactly
- 2. Inspect All Mounting Points
- 3. Verify Features
- 4. Check Button Condition
- Cost Comparison: New vs. Used Overhead Console
- Step-by-Step Replacement Guide (Difficulty: 1/5)
- Frequently Asked Questions (FAQ)
- 🎟️ Get 5% Off