

2015-2017 Dodge Viper Interior Mirror: Auto-Dimming Failure and Replacement Guide
This guide covers common problems like fluid leaks, part number variations, and a step-by-step replacement for the Gen 5 Viper's auto-dimming rear view mirror.
- The most common failure is the internal auto-dimming fluid leaking or forming a 'bubble', which requires replacement.
- The leaking fluid is corrosive and can damage your car's interior; remove a failing mirror immediately.
- Replacement is a very simple DIY job, requiring only a T20 Torx driver and about 20 minutes.
- A used OEM mirror is a cost-effective option, but inspect it carefully for signs of fluid failure before buying. A professional repair service is another good alternative.
Symptoms of a Failing Interior Mirror

When the interior rear view mirror on a 2015-2017 Dodge Viper begins to fail, the symptoms are usually very noticeable. Because it's an electronic component, failures can be both physical and functional.
1. Leaking Fluid or a "Bubble" Inside the Glass
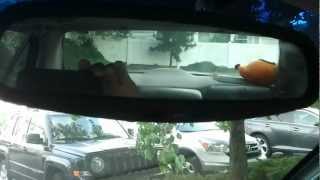
The most common failure is the breakdown of the electrochromic gel used for the auto-dimming feature. Over time, the seal around the glass can fail, allowing the gel to degrade and air to enter, creating a visible bubble or a distorted, lava lamp-like appearance. This not only looks bad but can also obstruct your view. In some cases, the fluid can leak out from the bottom of the mirror housing.
Warning: The fluid inside an auto-dimming mirror is a chemical that can be corrosive. If it leaks onto your dashboard or center console, it can permanently damage the plastic or leather surfaces. If you see signs of a leak, it's best to remove the mirror as soon as possible.
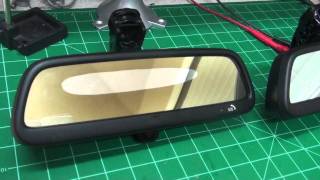
🎬 See how to fix a malfunctioning auto-dimming mirror2. Auto-Dimming Feature Stops Working or Flickers
An electronic failure can cause the auto-dimming function to stop working entirely. You'll notice significantly more glare from headlights at night. This can be caused by a failure in the mirror's internal circuit board, a bad light sensor, or a problem with the power connection. Sometimes, the mirror may flicker between dim and normal states, which is often a sign of a failing internal component or a poor electrical connection.
3. Compass, Temperature, or Uconnect Buttons Are Inoperative
If your mirror includes features like a compass display or Uconnect buttons, a total loss of power can cause them to stop working. This usually points to a problem with the wiring harness connector behind the mirror or a blown fuse. Intermittent operation, where wiggling the mirror causes the functions to work temporarily, often indicates a broken solder joint on the mirror's circuit board where the power connector is attached.
Known Issues, TSBs, and Recalls
As of mid-2024, there are no specific recalls or Technical Service Bulletins (TSBs) from Dodge or the National Highway Traffic Safety Administration (NHTSA) that directly address failures of the interior rear view mirror for the 2015-2017 Viper. However, the electrochromic fluid failure is a widely known issue across many manufacturers that use this type of mirror from suppliers like Magna Donnelly. The 2015 Viper was included in a broad safety recall (NHTSA 15V-461 / FCA R40) for potential unauthorized electronic access to vehicle systems, which was remedied with a software update. This recall was not related to the mirror itself.
Buying a Used 2015-2017 Viper Interior Mirror

Due to the high cost of a new OEM mirror, a used part is often the best option. However, it's important to inspect it carefully to avoid buying a part that is already failing.
What to Inspect on a Used Mirror
- Check for Leaks: Carefully examine the glass for any signs of a bubble, discoloration, or separation, which indicates the auto-dimming fluid has failed. Look at the bottom edge of the plastic housing for any sticky residue, a sign of a past or current leak.
- Verify Features: The Viper mirror came with Uconnect/911/Assist buttons. Ensure the used mirror you are buying has the correct button configuration for your vehicle.
- Inspect the Connector: Look at the electrical connector on the back. Make sure none of the pins are bent or corroded and that the plastic housing isn't cracked.
- Check the Mount: Ensure the mounting point on the back of the mirror is intact and not cracked or stripped.
Compatibility and Part Numbers
The primary part numbers for the 2015-2017 Viper mirror are 68141142AA, 68141142AB, and 68141142AC. These numbers represent minor revisions, and they are generally interchangeable. Part number 68226596AB is also listed for some 2016 models. Always confirm the part number before purchasing. The key is to ensure your vehicle has the factory wiring for the auto-dimming feature. If your original mirror was a basic, non-powered mirror, you will not have the necessary harness to power an auto-dimming unit without significant custom wiring.
Pro Tip: Given the high failure rate of the electrochromic fluid, some owners opt for a repair service. Companies can take your original mirror, replace the failed internal glass with a new cell, and send it back, often with a warranty. This can be a reliable alternative to buying a used mirror that might fail later.
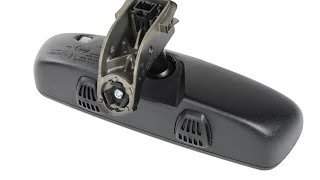
🎬 Watch: How an auto-dimming mirror repair service worksInterior Mirror Replacement Guide

Replacing the interior mirror on a Gen 5 Viper is a straightforward DIY job that typically takes less than 20 minutes.
Tools Needed:
- T20 Torx driver or Allen key (depending on the specific screw)
- Small flathead screwdriver or trim removal tool
Step-by-Step Replacement
- Disconnect the Electrical Connector: Before removing the mirror, carefully unplug the wiring harness. There is a small tab on the connector that must be depressed to release it. Do not pull on the wires themselves.
- Loosen the Set Screw: Look at the base of the mirror where it meets the metal button on the windshield. There is a small T20 Torx set screw that clamps the mirror onto the button. Loosen this screw a few turns; you do not need to remove it completely.
- Slide the Mirror Off: Once the screw is loose, slide the entire mirror assembly upward, parallel to the glass, to disengage it from the windshield button.
- Install the New Mirror: Slide the replacement mirror down onto the windshield button until it's fully seated.
- Tighten the Set Screw: Tighten the T20 Torx screw until the mirror is held firmly in place. Do not overtighten, as you could damage the mirror mount or the windshield button.
- Reconnect and Test: Plug the electrical connector back into the new mirror. Turn the ignition on and test the mirror's functions, including the auto-dimming feature (you can cover the forward-facing sensor with your finger and shine a light on the mirror glass to test it).
Cost Comparison
Prices for a 2015-2017 Dodge Viper interior mirror can vary significantly based on the source.
| Part Type | Estimated Cost |
|---|---|
| New OEM | $800 - $1,200 |
| New Aftermarket | Not commonly available for this specific model. |
| Used OEM | $150 - $300 |
| Remanufactured/Repaired | $120 - $180 (requires sending your original mirror in) |
| Shop Labor | $50 - $100 |
Frequently Asked Questions (FAQ)
Is the fluid leaking from my mirror dangerous?
Yes, the electrochromic fluid inside the mirror is a chemical that can be a skin and eye irritant. More importantly, it is corrosive and can permanently stain or eat away at plastic and leather interior trim if it drips. It's crucial to remove a leaking mirror promptly.
Why did my mirror fail? It just has a bubble in it.
The "bubble" is caused by a failure of the perimeter seal around the two pieces of glass that contain the electrochromic gel. Over time, due to heat cycles and vibration, the seal breaks down, allowing air to get in and the gel to degrade. This is a common manufacturing defect in this type of mirror and not due to user error.
Can I install a cheaper, basic mirror instead?
Physically, a basic mirror with the same mounting button could be installed. However, you would lose the auto-dimming and any Uconnect functionality. You would also have an unused electrical connector that should be secured to prevent rattles.
My mirror is just loose and wobbly. Do I need a new one?
Not necessarily. First, check that the T20 set screw at the base is tight. If the looseness is in the ball joint of the mirror itself, it's a common issue. While some suggest inserting paper to tighten the joint, a more robust fix involves carefully disassembling the mirror and adding a small washer or shim to the ball joint assembly.
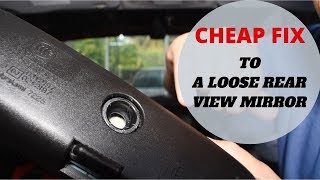
🎬 Watch: Fix a loose Dodge rearview mirror ball jointHelpful Videos
Technical Specifications
OEM Part Numbers: 68141142AA 68141142AB 68141142AC 68226596AB
Features: Auto-dimming (electrochromic), integrated Uconnect/911/Assist buttons. Mount type: Windshield button with T20 Torx set screw.

The information in this article is provided for general reference and educational purposes only. Vehicle specifications, procedures, and part compatibility can vary by production date, trim level, and region. Always consult your vehicle's factory service manual and verify part numbers before purchasing or performing repairs. Safety-critical components such as airbags, seat belts, and braking systems should be installed by a qualified professional.
- Dodge Viper:
- 🎬 Helpful Videos
- Symptoms of a Failing Interior Mirror
- 1. Leaking Fluid or a "Bubble" Inside the Glass
- 2. Auto-Dimming Feature Stops Working or Flickers
- 3. Compass, Temperature, or Uconnect Buttons Are Inoperative
- Known Issues, TSBs, and Recalls
- Buying a Used 2015-2017 Viper Interior Mirror
- What to Inspect on a Used Mirror
- Compatibility and Part Numbers
- Interior Mirror Replacement Guide
- Step-by-Step Replacement
- Cost Comparison
- Frequently Asked Questions (FAQ)
- 🎟️ Get 5% Off