

2021-2025 Toyota Sienna Center Console Bezel: Decoding Trim Finishes and Part Numbers
A detailed guide to identifying, inspecting, and replacing the correct instrument panel and console trim for your 2021-2025 Sienna, avoiding common compatibility mistakes and damage.
- Part compatibility is critical. The correct bezel part number depends entirely on your Sienna's trim level and options like wireless charging.
- Verify your vehicle's interior trim code from the sticker in the driver's door jamb to ensure an exact color and finish match.
- The common 'piano black' finish is extremely prone to scratches and swirl marks; consider a protective film after installation.
- Replacement requires disassembling a large portion of the center console and may trigger a temporary 'Parking Brake Malfunction' warning light that needs to be reset.
Known Issues and Owner Complaints
While the instrument panel bezel itself is not a common failure point, owners of 2021-2025 Toyota Siennas report several frustrations with the center console area where this part is located.
Extreme Susceptibility to Scratches
Many Sienna trim levels use a shiny, 'piano black' plastic finish on the center console bezel and surrounding trim pieces. Owners frequently complain that this surface is incredibly soft and prone to showing fingerprints, dust, and fine scratches from normal use. Even wiping it with the wrong type of cloth can cause swirl marks. This has led many owners to seek out aftermarket protective films or wraps to cover the easily damaged surface.
The 'Center Console Black Hole'
A widely discussed design flaw is the gap that can open at the back of the center console storage lid. When the lid is opened, items like phones, keys, or cards can slide off the top and fall into an inaccessible void within the console assembly. Retrieving these items requires significant disassembly of the center console. While this is not a failure of the bezel itself, it is a major issue with the assembly it is part of. Some owners report that later model years may have added small ridges to mitigate this issue, but the problem persists for many.
Identifying the Correct Bezel: A Critical Step
Due to the variety of interior options on the 4th generation Sienna, verifying you are purchasing the correct bezel is the most important step. Using a part from the wrong trim level will result in a mismatched interior finish and may not fit correctly if options like wireless charging are different.
Trim Level and Options Matter
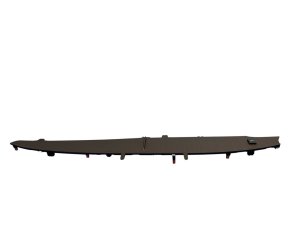
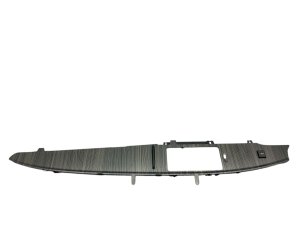
The specific instrument panel bezel your Sienna requires depends on its trim level (LE, XLE, XSE, Limited, Platinum, Woodland) and factory options. The verified OEM part number 55475-08110-E0 specifically fits models equipped with the wireless charging option and has a 'Wolf Wood' finish. Other vehicles will use different part numbers with different finishes (e.g., standard black, metallic patterns). Always verify the part number and description match your vehicle's features before purchasing.
How to Find Your Interior Trim Code
To ensure a perfect match for your interior color and finish, you must use your vehicle's interior trim code. This code is found on the vehicle identification plate, which is a black sticker located in the driver's side door jamb. The sticker lists manufacturing details, the exterior paint code (labeled C/TR), and the interior trim code. The trim code is a short alphanumeric sequence (e.g., EA15 for light gray) that precisely identifies your interior scheme. Provide this code to the parts seller to guarantee a correct match.
Pro Tip: When buying a used bezel, ask the seller to provide a picture of the donor vehicle's VIN sticker from the door jamb. This allows you to personally verify the interior trim code and confirm it matches your own.
Buying a Used Instrument Panel Bezel
Purchasing a used OEM bezel is an excellent way to save money, especially compared to the high cost of a new part from the dealer. However, careful inspection is key.
What to Physically Inspect
- Mounting Tabs: Carefully check the back of the bezel for any broken, cracked, or stressed plastic mounting tabs. These are essential for a secure, rattle-free installation.
- Surface Finish: Look for deep scratches, scuffs, or chemical stains that have gone through the top layer of the finish. For 'piano black' parts, expect some minor swirl marks, but avoid parts with significant, deep scratches.
- Previous Repairs: Look for signs of glue, epoxy, or plastic filler, which indicate a previous, likely improper, repair.
- Integrity of Openings: Ensure the plastic around the shifter, cupholders, and button cutouts is not cracked or broken.
Why Used OEM is Often the Best Choice
For a cosmetic interior part like this, a used Original Equipment Manufacturer (OEM) part is almost always superior to a new aftermarket one. The OEM part guarantees a perfect match to your vehicle's interior color, texture, and sheen. It will also fit precisely with all mounting points and surrounding panels, something that can be a problem with cheaper aftermarket copies.
Replacement Overview
Replacing the center console bezel is a moderately difficult task that a patient DIYer can accomplish. The process involves carefully prying up multiple trim pieces and removing several bolts. The entire upper console assembly often needs to be unbolted and lifted to access all the bezel's connection points.
The basic steps involve:
- Removing side panels from the center console.
- Prying up smaller trim inserts and disconnecting electrical connectors for switches.
- Removing several 10mm bolts located at the front and sides of the console box assembly.
- Lifting the console assembly to release the main bezel.
Warning: Disconnecting the electronic parking brake switch and other console components may trigger a 'Parking Brake System Malfunction' message on the dashboard after reassembly. This typically requires a specific reset procedure to clear.
Related Recalls and Service Bulletins
As of mid-2024, there are no specific recalls or Technical Service Bulletins (TSBs) for the instrument panel bezel on the 2021-2025 Toyota Sienna. However, a significant safety recall was issued for these model years concerning improperly tightened bolts on the third-row seat assemblies. This issue can increase the risk of injury in a crash. While this recall is unrelated to the instrument panel, owners should check if their vehicle is affected by visiting Toyota.com/recall or nhtsa.gov/recalls.
Cost Comparison
| Part Type | Estimated Cost |
|---|---|
| New OEM | $235 - $360 |
| New Aftermarket | Varies, often sold as protective films or covers rather than full bezel replacements. |
| Used OEM | $75 - $175 |
| Shop Labor | $150 - $300 |
Frequently Asked Questions (FAQ)
Why are there so many different part numbers for the same bezel?
Each part number corresponds to a specific combination of finish (e.g., piano black, wood grain, metallic) and options (e.g., with or without a wireless charging pad cutout). This is why you must match the part to your vehicle's specific trim and features.
Can I install a higher-trim bezel, like the 'Wolf Wood' version, in my base model Sienna?
Physically, it may fit if the core shape is the same. However, you must ensure the cutouts match your vehicle's options. For example, if you don't have a wireless charger, a bezel with a cutout for one will leave an empty, unfinished-looking spot. The color and finish will also not match the rest of your interior trim.
How can I protect my new or existing console bezel from scratches?
Many owners recommend applying a clear or matte-finish protective vinyl film, similar to a screen protector for a phone. These are often sold as pre-cut kits for the Sienna. Using only high-quality microfiber towels for cleaning can also help prevent swirl marks.
What is the 'center console black hole' and can it be fixed?
This refers to a gap where items can fall into the console assembly when the storage lid is open. There is no official Toyota fix. The only way to retrieve a lost item is to disassemble the console. Some owners have created their own barriers or use aftermarket console trays to prevent items from being near the gap.
Technical Specifications
OEM Part Numbers: 55475-08110 55475-08110-E0 55475-08010-C1
Finish and options vary by part number. Part 55475-08110-E0 is described as having a 'Wolf Wood' finish and is designed for models with wireless charging.
We Have This Part in Stock

The information in this article is provided for general reference and educational purposes only. Vehicle specifications, procedures, and part compatibility can vary by production date, trim level, and region. Always consult your vehicle's factory service manual and verify part numbers before purchasing or performing repairs. Safety-critical components such as airbags, seat belts, and braking systems should be installed by a qualified professional.
- Toyota Sienna:
- 🛍️ Shop This Part
- Known Issues and Owner Complaints
- Extreme Susceptibility to Scratches
- The 'Center Console Black Hole'
- Identifying the Correct Bezel: A Critical Step
- Trim Level and Options Matter
- How to Find Your Interior Trim Code
- Buying a Used Instrument Panel Bezel
- What to Physically Inspect
- Why Used OEM is Often the Best Choice
- Replacement Overview
- Related Recalls and Service Bulletins
- Cost Comparison
- Frequently Asked Questions (FAQ)
- 🎟️ Get 5% Off