

2001-2007 Escape, Tribute & Mariner Instrument Panel Bezel: Cracks, Fading, and Replacement
This guide covers the common failure points and critical compatibility checks for the instrument panel surround bezel on the 2001-2007 Ford Escape, 2001-2006 Mazda Tribute, and 2005-2007 Mercury Mariner.
- Compatibility is critical: You must match the bezel to your vehicle's climate control system (manual or automatic).
- The most common failures are physical: Look for cracks and broken mounting tabs, which cause rattles and poor fit.
- This part is shared across the 2001-2007 Ford Escape, 2001-2006 Mazda Tribute, and 2005-2007 Mercury Mariner.
- Replacement is a simple DIY task that usually takes less than an hour with basic hand tools.
Symptoms of a Failing Instrument Panel Bezel
Since the instrument panel bezel is a static trim piece, its failure is almost always physical or cosmetic. There are no electrical components within the bezel itself, so you won't see any diagnostic trouble codes. Instead, look for visible signs of damage.
- Cracks: The most common issue is the development of cracks, especially in vehicles frequently exposed to sunlight and heat. UV rays and temperature fluctuations can make the plastic brittle over time, leading to stress cracks.
- Broken Mounting Tabs: The bezel is held in place by a series of plastic clips and screw tabs. These can easily break during removal for other repairs, like replacing the radio or climate control unit. If tabs are broken, the bezel may rattle, squeak, or fit loosely in the dash.
- Fading and Discoloration: Prolonged sun exposure can cause the black plastic to fade to a dull gray, creating an aged appearance in the vehicle's interior.
- Scratches and Gouges: Normal wear and tear, or carelessness during other repairs, can lead to deep scratches or gouges in the plastic surface.
Warning: A loose or broken bezel can potentially interfere with access to important controls like the hazard lights or defroster buttons. While not an immediate safety crisis, it should be addressed to ensure full functionality and prevent rattles.
Buying a Used Instrument Panel Bezel: What to Check
A used OEM bezel is often the best choice, as it guarantees the same fit, color, and texture as the original part. Aftermarket replacements can sometimes have slight variations in color or fitment. When inspecting a used bezel, pay close attention to the following areas:
- Verify Compatibility (The MOST Important Step): This bezel was made in several variations. You must match your vehicle's specific options.
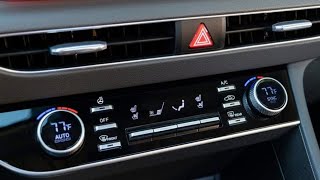
- Climate Controls: The most critical difference is the opening for the climate controls. One version is for manual climate controls (three large rotary dials 🎬 Watch: Understanding the difference between manual and automatic climate systems.), and the other is for automatic climate control (a digital display with buttons). They are not interchangeable. Carefully compare the photos of the used part to your existing bezel.
- Message Center: Some higher trim models were equipped with an optional message center (a small digital display within the instrument cluster). Bezels for these models have a slightly different shape around the gauge cluster opening. Verify if your vehicle has this option before buying.
- Finish/Color: The standard finish is black plastic. However, some trim levels on the Ford Escape, Mazda Tribute, and Mercury Mariner offered silver or woodgrain finishes. Ensure the part you are buying matches your vehicle's interior trim.
- Inspect All Mounting Points: Carefully flip the bezel over and check every single plastic tab and screw hole. Look for stress marks (white lines in the plastic) or outright cracks. Even one broken tab can cause a poor fit or a persistent rattle.
- Check for Cracks Around Openings: Pay special attention to the thin plastic areas around the radio, climate control, and vent openings. These are common weak points.
- Examine the Surface Finish: Look for deep scratches, chemical stains, or significant sun fading that won't be easily cleaned or restored.
Known Issues, TSBs, and Recalls
There are no specific recalls or Technical Service Bulletins (TSBs) from Ford, Mazda, or Mercury directly related to the instrument panel bezel cracking or failing for these vehicles. Failures are almost always due to age, environmental exposure, or damage during other repairs. While there have been recalls for the instrument *cluster* (the electronic gauges themselves) on some Ford Escape models of different generations for issues like going blank, these do not pertain to the plastic bezel surround.
Replacement Difficulty and Procedure
Replacing the instrument panel bezel on a 2001-2007 Ford Escape, 2001-2006 Mazda Tribute, or 2005-2007 Mercury Mariner is a straightforward DIY job.
- Difficulty: 2 out of 5
- Estimated Time: 30-60 minutes
- Tools Needed: 7mm socket or nut driver, Phillips head screwdriver, plastic trim removal tools.
Step-by-Step Replacement Guide:
- Disconnect the Battery: As a safety precaution, disconnect the negative battery terminal.
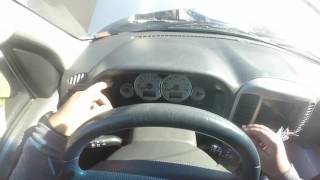
- Remove Mounting Screws: There are typically two 7mm screws located at the top of the bezel, inside the instrument cluster hood. 🎬 Watch: How to access and replace instrument cluster bulbs.
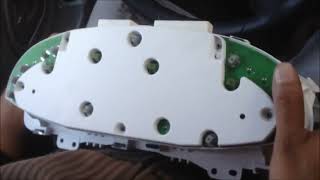
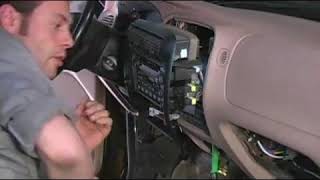
- Gently Pry the Bezel: Using a plastic trim removal tool to avoid scratching the dashboard, carefully pry around the edges of the bezel. It is held in by several pressure clips. You may need to lower the steering column to its lowest position and move the gear selector down 🎬 See this walkthrough for removing the bezel and instrument cluster. to provide clearance.
- Disconnect Electrical Connectors: Before you can fully remove the bezel, you must disconnect the wiring harnesses for the hazard light switch, rear defroster, 4WD switch (if equipped), and any other switches mounted in the bezel. These connectors have small release tabs that need to be depressed.
- Install the New Bezel: Connect all the electrical harnesses to the replacement bezel, line up the clips, and gently press it into place. Reinstall the mounting screws. Reconnect the battery.
Pro Tip: When prying the old bezel off, be patient. The plastic clips can be stiff, especially on older vehicles. Applying steady, even pressure is better than using brute force, which can break the clips or the dashboard itself.
Cost Comparison
| Part Type | Estimated Cost |
|---|---|
| New OEM | $150 - $250+ (if still available) |
| New Aftermarket | $70 - $120 |
| Used OEM | $40 - $90 |
| Shop Labor | $75 - $150 |
Frequently Asked Questions
Will this bezel fit my vehicle with automatic climate control?
No, this specific bezel design is for models with manual climate controls, which feature three rotary dials. The version for automatic climate control has a different-shaped opening for a digital display and is not interchangeable.
Is it difficult to swap the vents and switches from my old bezel to the new one?
No, the air vents and switches are typically held in by small clips or Phillips head screws. They can be easily transferred from the old, broken bezel to the replacement part in a few minutes.
My bezel is just faded. Can I restore it instead of replacing it?
Yes, for minor fading or light scratches, you can often restore the look of the bezel using a quality automotive interior plastic trim restorer. However, this will not fix any cracks or broken mounting tabs.
Why is my bezel rattling after I replaced my car stereo?
A rattling bezel after a stereo installation almost always means one or more of the plastic mounting clips were broken during removal or were not fully seated during reinstallation. The bezel must be removed again to inspect the clips and ensure it is securely fastened.
Helpful Videos
Technical Specifications
OEM Part Numbers: 5L8Z-78044D70-AAA EC04-64-32YE
Material: Molded Plastic

The information in this article is provided for general reference and educational purposes only. Vehicle specifications, procedures, and part compatibility can vary by production date, trim level, and region. Always consult your vehicle's factory service manual and verify part numbers before purchasing or performing repairs. Safety-critical components such as airbags, seat belts, and braking systems should be installed by a qualified professional.
- Ford Escape:
- Mazda Tribute:
- Mercury Mariner: