

Bentley Continental & Flying Spur Dash Bezel Guide (2003-2019): Cracks, Fading, and Matching Wood Grain
This guide covers the common cosmetic failures of the wood instrument panel bezel and how to choose the correct used replacement for your Continental or Flying Spur.
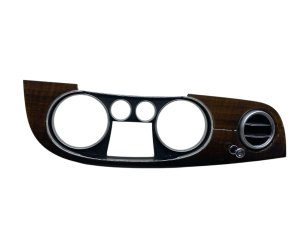
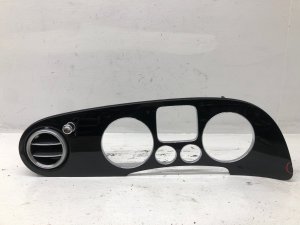
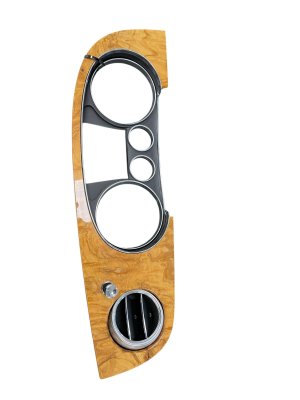
- The most critical factor when buying a used bezel is perfectly matching the specific wood veneer (e.g., Burr Walnut, Dark Fiddleback Eucalyptus) to your car's interior.
- Common failures are purely cosmetic, such as cracked lacquer and fading from sun exposure; these do not affect vehicle operation.
- When buying a used part, always get clear photos of the back to verify that all mounting clips are intact to prevent rattles.
- Replacement is a careful but feasible DIY job using plastic trim tools; a new OEM part is extremely expensive, making a quality used part the best value.
Symptoms of a Failing Instrument Panel Bezel
Failure of this part is almost always cosmetic, but can sometimes result in annoying noises. These issues are common as the vehicle ages and is exposed to sunlight and frequent temperature changes.
Cracked Lacquer or "Crazing"
The most common problem is the development of fine, web-like cracks in the clear lacquer finish. This is often called "crazing." These cracks are caused by the natural wood base expanding and contracting at a different rate than the hard lacquer finish, especially with exposure to heat and UV rays. The damage often appears first on the top edges most exposed to the sun.
Fading or Discoloration
Years of sun exposure can cause the wood veneer to fade and the lacquer to take on a yellowish tint. This can lead to a mismatch between different wood panels in the car, as some parts get more sun than others.
Rattling or Buzzing Noises
The bezel is held in place by a series of metal and plastic clips. If these clips break, often during a previous repair for another component behind the dash, the panel can become loose. This may cause persistent rattling or buzzing sounds from the dashboard, especially when driving on uneven roads.
Damaged Integrated Air Vents
The center air vents are built into the bezel. If the vent louvers or their metal adjustment knobs are broken or stuck, the entire bezel assembly must be replaced to restore function.
Warning: While many interior components are shared, always verify fitment for your specific model and year. The Continental range includes the GT (coupe), GTC (convertible), and the Flying Spur (which became its own model line). Trim pieces can have subtle differences.
Buying a Used Instrument Panel Bezel: What to Check
Given the high cost of a new OEM bezel, a quality used part is the best value. However, careful inspection is critical to get a part that is a true upgrade.
1. Match Your Wood Grain EXACTLY
This is the most important step. Bentley offered numerous wood finishes over the years, such as Burr Walnut, Dark Stained Burr Walnut, and Dark Fiddleback Eucalyptus. These veneers can look very similar in photos but will be a noticeable mismatch when installed. If you are unsure of your vehicle's specific trim, you may need to contact a dealer with your VIN to get the original build sheet.
2. Inspect for Lacquer Cracks
Examine high-resolution photos of the part, paying close attention to the top edge and the areas around the vent openings. Ask the seller for pictures in bright, direct light, which can help reveal hairline cracks that are otherwise invisible. Avoid any parts that already show signs of crazing or cracking.
3. Check All Mounting Tabs
Turn the bezel over and inspect the back. Ensure all plastic and metal mounting clips are present and intact. Even one broken tab can cause a poor fit or lead to the same rattles you might be trying to fix. If any tabs are broken, it's best to find another part.
4. Verify LHD vs. RHD
This part is specific to the vehicle's driving orientation. A bezel from a Right-Hand Drive (RHD) vehicle (e.g., from the UK, Australia, or Japan) will not fit a Left-Hand Drive (LHD) North American vehicle correctly. Confirm the part is from an LHD car before purchasing.
Replacement Guide
Replacing the center instrument panel bezel is a manageable DIY task for those with patience and the right tools. The main risk is damaging adjacent expensive trim pieces.
- Difficulty: 3/5
- Estimated Time: 1-1.5 Hours
- Tools Required: Plastic trim removal tool kit, microfiber towels.
Step-by-Step Overview
- Protect the surrounding area (like the gear selector) with a microfiber towel to prevent scratches.
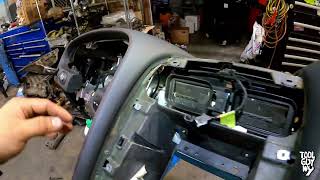
- Using a plastic trim tool, carefully begin prying the bezel away from the dashboard. Start at a lower corner and work your way around the edge. The panel is held in by strong metal clips that will release with a pop.
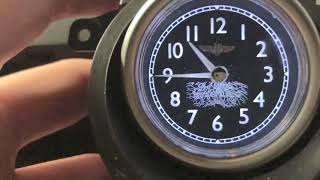
- Do not pull the bezel away completely once it's loose. There are electrical connectors for the analog clock and hazard switch on the back.
- Reach behind the panel, press the release tabs on the connectors, and unplug them.
- Installation is the reverse of removal. Reconnect the electrical plugs, align the bezel with the opening, and press firmly around the edges to engage all the clips.
Pro Tip: This bezel often needs to be removed to access the instrument cluster or infotainment system. Because of this, many used bezels may have broken clips from improper removal by previous technicians. This is why checking the back of a used part is so important.
Known Issues, Recalls, and TSBs
There are no known recalls or Technical Service Bulletins (TSBs) from Bentley or the NHTSA specifically for cracking or cosmetic failure of the instrument panel bezel. This type of wear is generally considered normal for an aging vehicle. While there are numerous recalls for various Bentley models, none pertain to the dashboard trim itself.
Cost of Replacement
The cost for this part varies dramatically between new and used options, making a recycled part a very attractive option.
| Part Type | Estimated Cost |
|---|---|
| New OEM | $1,500 - $2,500+ |
| New Aftermarket | Not commonly available |
| Used OEM | $250 - $600 |
| Shop Labor | $150 - $350 |
Frequently Asked Questions (FAQ)
Can a cracked wood bezel be repaired?
Yes, it is possible for a specialist in wood veneer restoration to refinish a cracked bezel. However, this process is often labor-intensive and can be more expensive than purchasing a high-quality used replacement. It's typically reserved for rare or vintage vehicles where replacement parts are unavailable.
🎬 See how specialists restore classic Bentley wood trim.Will a bezel from a Continental GT fit my Flying Spur?
Within the same generation (e.g., 2003-2011), the parts are often physically interchangeable as the front cabin architecture is very similar. However, the most critical factor is an exact match of the wood veneer and finish. Do not assume compatibility based on the model name alone; always prioritize matching the specific wood type.
Why are the wood panels in my car different colors?
This is usually due to uneven sun exposure over many years. The instrument panel bezel and door cappings often receive more direct sunlight than lower trim pieces, causing their lacquer to yellow and the wood to fade at a faster rate.
Is replacing the instrument panel bezel a good DIY project?
For a careful and patient DIYer, yes. The process involves simple tools and no complex mechanical steps. The primary challenge is being gentle with the plastic trim tools to avoid scratching or cracking the expensive surrounding dashboard components.
Helpful Videos

Technical Specifications
OEM Part Numbers: 3W0819201 3W0819201F 3W0819357 3W0857059 3W0858701 3W0858701A 3W3857059
Material: Wood veneer (various types such as Burr Walnut, Dark Stained Burr Walnut, Dark Fiddleback Eucalyptus) with a high-gloss lacquer finish. Integrated components include center air vents and mounting points for an analog clock and hazard switch.
We Have This Part in Stock

The information in this article is provided for general reference and educational purposes only. Vehicle specifications, procedures, and part compatibility can vary by production date, trim level, and region. Always consult your vehicle's factory service manual and verify part numbers before purchasing or performing repairs. Safety-critical components such as airbags, seat belts, and braking systems should be installed by a qualified professional.
- Bentley Continental:
- Bentley Flying Spur:
- 🎬 Helpful Videos
- 🛍️ Shop This Part
- Symptoms of a Failing Instrument Panel Bezel
- Cracked Lacquer or "Crazing"
- Fading or Discoloration
- Rattling or Buzzing Noises
- Damaged Integrated Air Vents
- Buying a Used Instrument Panel Bezel: What to Check
- 1. Match Your Wood Grain EXACTLY
- 2. Inspect for Lacquer Cracks
- 3. Check All Mounting Tabs
- 4. Verify LHD vs. RHD
- Replacement Guide
- Step-by-Step Overview
- Known Issues, Recalls, and TSBs
- Cost of Replacement
- Frequently Asked Questions (FAQ)
- 🎟️ Get 5% Off