

2015-2017 Ram ProMaster City Uconnect 5.0 Radio: Failures, Programming, and Replacement Guide
This guide covers common Uconnect 5.0 screen problems, critical programming requirements, and how to choose the right used display for your van.
- A replacement radio MUST be programmed to the vehicle using a "Proxy Alignment" procedure to avoid a flashing odometer and ensure proper function.
- Only buy a replacement radio that matches your original features. This guide covers the 5.0-inch screen WITHOUT navigation and WITHOUT satellite radio.
- Common failures include a black screen, unresponsive touchscreen, and constant rebooting.
- A used OEM radio is a good value, but you may need the donor vehicle's VIN to get the anti-theft code from a dealer.
Common Symptoms of a Failing Infotainment Display
The Uconnect 5.0 system in the ProMaster City can develop several common issues. Many of these are related to the screen itself or the internal software.
- Black or Blank Screen: The most common failure is a screen that goes completely black and unresponsive. Audio might still play, but the display is dead.
- Unresponsive Touchscreen: The display may light up, but it won't respond to any touch commands, making it impossible to change settings or radio stations.
- Ghost Touches: The unit may act as if it's being touched when it isn't, causing random changes to settings, radio stations, or menus.
- Constant Rebooting: The radio may get stuck in a loop where it turns on, shows the Ram logo, and then shuts off and restarts every few minutes. This has been noted by some owners to happen frequently when a phone is connected via Bluetooth.
- Bluetooth Connectivity Issues: The unit may fail to pair with phones or constantly drop the Bluetooth connection.
Diagnosing the Uconnect 5.0 Display
Before assuming the unit is dead, try these simple diagnostic steps:
- Check Fuses: Consult your owner's manual to locate the fuse for the radio and inspect it. A blown fuse is a simple and cheap fix.
- Perform a Soft Reset: With the vehicle running, press and hold the power/volume knob and the tune/scroll knob simultaneously for about 10-15 seconds. The system should shut down and restart. This can often clear up software glitches.
- Vehicle Power Cycle: If a soft reset doesn't work, turn the vehicle off, open the driver's door for at least 60 seconds to let all modules power down completely, then close the door and restart the vehicle.
Known Issues, Recalls, and Technical Service Bulletins (TSBs)
While there are no major recalls specifically for the Uconnect 5.0 display in this vehicle, the ProMaster City has been subject to several recalls and TSBs for electrical issues. One recall (NHTSA ID: 16V253) involved a software error in the trailer tow lighting control module that could prevent trailer brake lights from working. While not directly a radio issue, it highlights the interconnected nature of the vehicle's electronics. TSBs for other Uconnect systems often address software updates for issues like blank screens, battery drain, and connectivity problems, which are similar to the symptoms seen in the ProMaster City's unit.
Important: The most critical issue when replacing this radio is the need for programming. Failure to perform this step correctly will result in a non-functional or partially functional unit and a flashing odometer.
Buying a Used Infotainment Display for Your ProMaster City
Purchasing a used OEM radio is often the most cost-effective solution, but compatibility and programming are key. Aftermarket Android-based units are available, but they may require cutting the sub-dash and complex wiring.
Compatibility is Critical: Match the Features
The most important step is to ensure the replacement unit matches the one in your vehicle. This guide is for the 5.0-inch Uconnect display WITHOUT navigation and WITHOUT satellite radio. Part numbers to look for include 5YZ75LXHAA, 7356251900, and 7356251930. Installing a radio with different features (like navigation or satellite radio) will cause conflicts with the vehicle's computer.
The Anti-Theft Code and Proxy Alignment
Because the ProMaster City is based on a Fiat platform, its electronic modules are linked together through a system called a Controller Area Network (CAN bus). When a new module like a radio is installed, the Body Control Module (BCM) needs to recognize and integrate it. This process is called a Proxy Alignment.
- Flashing Odometer: If you install a replacement radio without performing a Proxy Alignment, the most common symptom is a flashing odometer. This indicates a mismatch between the modules on the network.
- Anti-Theft Code: Some units may also require a four-digit anti-theft code. If buying a used radio, try to get the VIN of the vehicle it came from. A dealer can sometimes provide the code with the radio's serial number and the donor VIN.
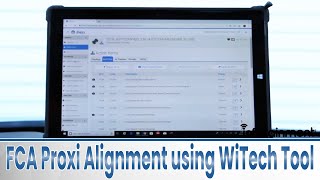
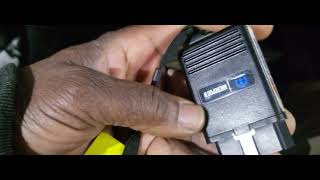
- Who Can Program It? A Proxy Alignment must be performed with a capable scan tool. While the dealership's wiTECH software is 🎬 Watch: Step-by-step proxy alignment using the wiTECH tool the official tool, some advanced independent shops with tools like Autel or Snap-on may be able to perform the procedure. For advanced DIYers, software like AlfaOBD or MultiECUScan can also perform a Proxy Alignment, but this requires a specific OBD adapter and technical knowledge.
What to Inspect on a Used Unit
When buying a used radio, check for physical damage. Inspect the screen for deep scratches or signs of delamination (a bubbling or peeling look on the screen surface). Ensure all plastic mounting tabs and connector ports on the back are intact.
Step-by-Step Replacement Walkthrough
- Disconnect the Battery: Before starting, disconnect the negative terminal from your vehicle's battery to prevent electrical shorts.
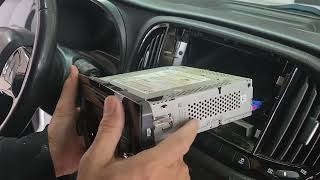
- Gather Your Tools: You will need a set of radio removal tools (DIN tools), which are two U-shaped keys that insert into the four small holes on the face of the radio. A coat hanger can sometimes be used, but the proper tools work best. 🎬 See this quick video on removing the factory radio
- Insert the Tools: Insert the two DIN tools into the holes on each side of the radio until you hear or feel a click. This releases the internal retaining clips.
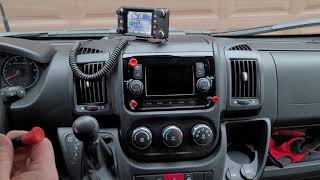
- Remove the Radio: Apply outward pressure on the tools and gently pull the radio out of the 🎬 Watch: How to remove the stereo and dash clipboard dashboard.
- Disconnect Connectors: Carefully disconnect the main wiring harness, the antenna cable, and any other connectors on the back of the unit. Most have a release tab that needs to be pressed.
- Install the New Unit: Connect the wiring to the replacement radio, slide it into the dash until it clicks into place, and then reconnect the vehicle's battery.
- Perform Proxy Alignment: After installation, the vehicle must undergo a Proxy Alignment procedure at a dealership or a properly equipped independent shop to prevent a flashing odometer and ensure full functionality.
Cost Comparison
| Item | Estimated Cost |
|---|---|
| New OEM (Mopar) | $600 - $800+ (if available) |
| New Aftermarket (Android-style) | $280 - $600 |
| Used OEM | $100 - $250 |
| Shop Labor (Replacement) | $100 - $200 |
| Shop Labor (Proxy Alignment) | $100 - $250 |
Frequently Asked Questions (FAQ)
Does a replacement radio for a ProMaster City need to be programmed?
Yes, absolutely. A procedure called a "Proxy Alignment" is required to make the new radio communicate correctly with the vehicle's other computers. Without it, you will likely have a flashing odometer and may lose functionality. This must be done by a dealer or a shop with advanced diagnostic tools.
Can I upgrade to a radio with navigation?
While physically possible, upgrading to a factory navigation unit is complex. It requires not only the Proxy Alignment but also potentially adding a GPS antenna and changing vehicle configuration settings in the Body Control Module. It is generally not a simple plug-and-play swap.
Why is my odometer flashing after replacing the radio?
A flashing odometer is the classic sign of a proxy configuration error in Fiat-Chrysler vehicles. It means the Body Control Module has detected a new or mismatched module (your new radio) on the vehicle network that has not been properly aligned.
How do I find the anti-theft code for a used radio?
The anti-theft code is tied to the radio's serial number and the VIN of the vehicle it was originally installed in. If you purchase a used unit, try to get the donor vehicle's VIN. With both the VIN and the radio's serial number, a Ram dealer's parts department can often look up the code for you.
Helpful Videos
Technical Specifications
OEM Part Numbers: 5YZ75LXHAA 7356251900 7356251930 07356340030
Uconnect 5.0 (RA2) system with 5-inch touchscreen. For vehicles without factory navigation and without satellite radio.
We Have This Part in Stock



The information in this article is provided for general reference and educational purposes only. Vehicle specifications, procedures, and part compatibility can vary by production date, trim level, and region. Always consult your vehicle's factory service manual and verify part numbers before purchasing or performing repairs. Safety-critical components such as airbags, seat belts, and braking systems should be installed by a qualified professional.
- Ram ProMaster City:
- 🎬 Helpful Videos
- 🛍️ Shop This Part
- Common Symptoms of a Failing Infotainment Display
- Diagnosing the Uconnect 5.0 Display
- Known Issues, Recalls, and Technical Service Bulletins (TSBs)
- Buying a Used Infotainment Display for Your ProMaster City
- Compatibility is Critical: Match the Features
- The Anti-Theft Code and Proxy Alignment
- What to Inspect on a Used Unit
- Step-by-Step Replacement Walkthrough
- Cost Comparison
- Frequently Asked Questions (FAQ)
- 🎟️ Get 5% Off