

2002-2008 MINI Cooper Ignition Coil: Why Terminal #3 Corrodes and Causes Misfires
This guide covers the common failure points, symptoms, and replacement of the first-generation MINI Cooper ignition coil, including the critical model year differences.
- The most common failure is corrosion on terminal #3, leading to misfires. Always inspect this terminal on a used part.
- This coil fits 2002-2006 Hardtops (R50/R53) and 2005-2008 Convertibles (R52). It does NOT fit 2007+ Hardtop (R56) models.
- Replacement is a very easy DIY job, taking less than 30 minutes with basic tools.
- Driving with a persistent misfire can damage the expensive catalytic converter. Address the issue promptly.
Symptoms of a Failing Ignition Coil
When the ignition coil on a first-generation MINI Cooper begins to fail, the signs are usually quite noticeable. Because this single part is responsible for firing all four spark plugs, a fault can cause significant performance issues.
- Engine Misfires: This is the most common symptom. A misfire feels like a shudder, hesitation, or a jerking motion from the engine, especially under acceleration. It might be more pronounced at low RPMs or when the engine is under a heavy load.
- Rough Idle: When stopped, the engine may vibrate or shake more than usual. This is caused by inconsistent spark delivery to one or more cylinders.
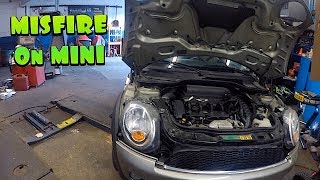
- Check Engine Light: A failing coil will almost always trigger the Check Engine Light. Using an OBD-II scanner will typically reveal misfire-related codes, such as a general P0300 (Random/Multiple Cylinder Misfire) or cylinder-specific codes like P0301, P0302, P0303, and P0304. 🎬 Watch: A mechanic explains Mini Cooper misfire symptoms and codes You may also see a code for the ignition coil circuit itself, like P0351.
- Reduced Fuel Economy: An engine that isn't running efficiently due to misfires will burn more fuel to produce the same amount of power.
- Backfiring: In some cases, unburned fuel can pass into the exhaust system and ignite, causing a loud pop or bang from the tailpipe. This is a clear sign of a significant ignition problem.
- Hard Starting: A weak coil may struggle to produce enough voltage to start the engine, especially in cold weather, leading to extended cranking times.
Warning: While you can drive with a misfiring engine for a short time, it's not recommended. A continuous misfire allows unburned fuel to enter the exhaust, which can overheat and destroy the catalytic converter—a much more expensive repair.
Known Issues for 2002-2008 MINI Cooper
Corrosion on Terminal #3
The most well-known and widespread issue with the stock ignition coil on R50, R52, and R53 MINIs is corrosion on the output terminals, especially the terminal for cylinder #3. The original equipment coil uses steel terminals that are prone to rust when exposed to moisture. This corrosion increases electrical resistance, weakening the spark sent to the spark plug and causing a misfire in that cylinder. Forum users and mechanics frequently report finding significant reddish-brown or white corrosion on this specific terminal.
Model Year and Body Style Compatibility
It is critical to understand that this ignition coil only fits first-generation MINI models. There is often confusion around the 2007 and 2008 model years.
- Fits: 2002-2006 Hardtop models (R50/R53).
- Fits: 2005-2008 Convertible models (R52).
- Does NOT Fit: 2007 and later Hardtop models (R56 and newer). These second-generation cars use a completely different 'coil-on-plug' ignition system.
Recalls and Technical Service Bulletins (TSBs)
My research indicates there are no official recalls or TSBs from MINI or the NHTSA specifically for the ignition coil on the 2002-2008 first-generation models. Known recalls for these years typically relate to the electro-hydraulic power steering system or airbags. A TSB (SI M12 01 15) was issued for later, second-generation MINIs (R55, R56, etc.) regarding ignition coil failures, but this does not apply to the 2002-2008 models covered in this guide.
Buying a Used Ignition Coil
A high-quality used OEM ignition coil can be a reliable and cost-effective alternative to a new part, especially when compared to cheap aftermarket options. Here’s what to look for:
- Inspect the Terminals: This is the most important check. Look closely at all four metal output terminals where the spark plug wires connect. Pay extra attention to terminal #3. Reject any coil with visible rust, corrosion, or heavy discoloration. You can try to clean minor corrosion with sandpaper, but a clean part is always a better starting point.
- Check the Housing: Inspect the black plastic housing for any cracks, chips, or signs of heat damage (melting or warping). Also look for white or black lines that look like lightning strikes, which indicate electrical arcing and a definite failure.
- Verify OEM Branding: Look for manufacturer markings from original suppliers like Delphi or Mini/BMW. A used OEM part is often more reliable than a new, unbranded aftermarket coil.
- Mileage vs. Condition: For this part, physical condition is more important than mileage. A clean, corrosion-free coil from a 100,000-mile car is a much better purchase than a corroded one from a 50,000-mile car that was exposed to moisture.
Pro Tip: When installing your coil—new or used—apply a small amount of dielectric grease to the terminals before connecting the spark plug wires. This helps seal out moisture and prevent future corrosion.
Cost Comparison
| Part Type | Estimated Cost |
|---|---|
| New OEM (Dealer) | $135 - $160 |
| New Aftermarket (Delphi, Standard) | $45 - $75 |
| Used OEM | $25 - $50 |
| Shop Labor Cost | $65 - $100 |
Replacement Difficulty: 1/5 (Very Easy)
Replacing the ignition coil on a first-generation MINI is a straightforward job that most DIY mechanics can complete in under 30 minutes with basic tools.
Estimated Time: 0.5 hours
Tools Needed: Ratchet, socket extension, 10mm socket.
Step-by-Step Replacement Guide
- Locate the Coil: Open the hood. The ignition coil is mounted to the front of the engine, just behind the radiator, with four spark plug wires coming out of it.
- Disconnect Wires: Carefully pull each of the four spark plug wires off the coil terminals. It's a good idea to label them with masking tape (1, 2, 3, 4) to ensure they go back in the correct order.
- Unplug Connector: Unplug the single electrical connector going into the side of the coil pack.
- Remove Bolts: Using a 10mm socket, remove the two or three bolts that secure the coil to its mounting bracket.
- Install New Coil: Mount the new coil and tighten the bolts. Reconnect the main electrical plug. Apply a dab of dielectric grease to each terminal and reconnect the spark plug wires in the correct order. 🎬 Watch: How to install an upgraded coilpack and spark plugs
Frequently Asked Questions
Why does only terminal #3 seem to corrode?
While there's no definitive engineering reason confirmed by MINI, the prevailing theory among owners is related to its position. It is often the terminal that is most exposed to water spray or moisture that gets past the hood seals, leading to the steel terminal rusting over time.
Can I just clean the corrosion off my old coil?
Sometimes. If the corrosion is light, you can clean it off with a wire brush or sandpaper. However, if the terminal is badly pitted or has lost a significant amount of material, the connection to the spark plug wire will be poor, and the coil should be replaced. Cleaning is often a temporary fix.
Do I need to replace my spark plug wires at the same time?
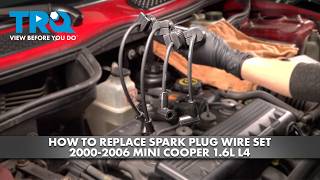
It is highly recommended. If the coil terminal is corroded, the inside of the spark plug wire boot that connects to it is likely corroded as well. Worn wires can also cause a new coil to work harder and fail prematurely. Replacing the coil and wires together is a best practice.
🎬 See this step-by-step guide to replacing your spark plug wiresWhat's the difference between an R50, R52, and R53?
These are the chassis codes for the first-generation MINI. R50 refers to the base Cooper Hardtop, R53 is the supercharged Cooper S Hardtop, and R52 is the Convertible model (both base and S). All three use the same ignition coil pack.
Helpful Videos
![How to Install a MSD Coilpack MSD Wires NGK Spark Plug on a MINI Cooper [Updated 2023]](https://img.youtube.com/vi/E9n_LKFwPHQ/mqdefault.jpg)
Technical Specifications
OEM Part Numbers: 12137510738 12131487707 7510738
This is a single coil pack system with four output terminals for spark plug wires. The primary failure mode is corrosion on the steel terminals, not internal electrical failure.
We Have This Part in Stock



The information in this article is provided for general reference and educational purposes only. Vehicle specifications, procedures, and part compatibility can vary by production date, trim level, and region. Always consult your vehicle's factory service manual and verify part numbers before purchasing or performing repairs. Safety-critical components such as airbags, seat belts, and braking systems should be installed by a qualified professional.
- MINI Cooper:
- 🎬 Helpful Videos
- 🛍️ Shop This Part
- Symptoms of a Failing Ignition Coil
- Known Issues for 2002-2008 MINI Cooper
- Corrosion on Terminal #3
- Model Year and Body Style Compatibility
- Recalls and Technical Service Bulletins (TSBs)
- Buying a Used Ignition Coil
- Cost Comparison
- Replacement Difficulty: 1/5 (Very Easy)
- Step-by-Step Replacement Guide
- Frequently Asked Questions
- 🎟️ Get 5% Off