

1998-2002 Pontiac Sunfire HVAC Control: Symptoms and Replacement Guide
A complete guide to diagnosing, replacing, and sourcing a used climate control unit for your 1998-2002 Pontiac Sunfire.
- Before buying, confirm your vehicle has both A/C and rear defrost, as this control unit is specific to those options.
- The common issue of the fan only working on the highest speed is almost always caused by the separate blower motor resistor, not the main control unit.
- Replacement is a simple DIY task that requires removing the center dash trim and a few screws, with no programming needed.
- A used OEM unit is often a more reliable and cost-effective solution than a new aftermarket part for this vehicle.
Symptoms of a Failing HVAC Control Unit
When the climate control module in a 1998-2002 Pontiac Sunfire begins to fail, it can cause a range of frustrating issues. Because it's an electronic component, symptoms can sometimes be intermittent or seem unrelated.
- Incorrect Air Temperature: One of the most common signs of failure is the system blowing air that doesn't match the temperature setting. You might get hot air when you want cold, or vice-versa, because the module is failing to properly operate the blend door that mixes hot and cold air.
- Air Blows from the Wrong Vents: You may find that air only comes out of the defrost vents, regardless of the setting. This happens when the control unit can't send the correct signal to the mode door actuators that direct airflow. 🎬 See how to fix a knocking air door actuator
- Unresponsive Buttons or Knobs: If pressing the A/C button, rear defrost, or turning the fan speed knob does nothing or only works sometimes, the internal contacts of the control unit may be worn out or failing.
- Blower Fan Issues: The fan may get stuck on one speed or not work at all. While a fan that only works on the highest setting is often caused by a separate part called the blower motor resistor, a faulty fan switch within the control unit can also be the culprit.
- No Power or Backlighting: A complete failure of the unit can result in no power to the climate system at all. The backlighting for the controls may also go out, which can be a sign of an internal electrical issue or related to a broader instrument panel lighting problem noted in a recall.
Buying a Used HVAC Control: What to Check
Purchasing a used OEM HVAC control unit is a cost-effective way to restore your climate system. Since these are simple, non-programmed modules, a good used part can be just as reliable as a new one. Here’s what to look for.
Compatibility Warning: This specific control unit is designed for 1998-2002 Sunfire models equipped with both air conditioning (A/C) and a rear window defroster. Before purchasing, verify your vehicle has these options by checking for the A/C and rear defrost buttons on your original unit.
Physical Inspection Checklist
- Check the Faceplate: Look for deep scratches, cracks, or damage to the plastic housing.
- Inspect the Knobs and Buttons: Make sure all knobs turn smoothly and that the buttons press and return without sticking. Check for excessive wear on the button graphics.
- Examine Electrical Connectors: The pins in the rear connectors should be straight, clean, and free of any corrosion or signs of overheating (like melted plastic).
- Verify Part Numbers: If possible, match the part number on the replacement unit to your original. Known compatible OEM part numbers include 15-72481, 16242872, 52481507, 12214672, and 9350502.
Why a Used OEM Unit is Often a Smart Choice
For a vehicle like the 1998-2002 Sunfire, a used original equipment (OEM) part is often a better choice than a new aftermarket one. The original GM parts were built to a high standard of quality for fit, finish, and electronic durability. Aftermarket units can sometimes have issues with button feel, backlighting color, or long-term reliability, whereas a tested, used OEM part offers a known level of quality at a significant discount.
Recalls and Technical Service Bulletins (TSBs)
While there are no recalls specifically for the HVAC control unit itself, there are two related safety recalls for this generation of Pontiac Sunfire that owners should be aware of:
- NHTSA Recall No. 04V036000 (GM No. 04002): This recall addresses a potential fire risk in the steering column due to high current flow through the ignition switch if the driver holds the key in the "start" position for too long. While not directly part of the HVAC system, it involves the vehicle's core electrical system.
- NHTSA Recall No. 99V218: This recall notes that the instrument panel backlighting may fail after adjusting the interior light intensity. If your HVAC control backlighting is out, but the rest of the instrument panel is also dark, this could be the cause.
No specific Technical Service Bulletins (TSBs) related to widespread failure of the HVAC control unit were identified.
Replacement Guide
Replacing the HVAC control unit on a 1998-2002 Pontiac Sunfire is a straightforward job that most DIY mechanics can complete with basic hand tools.
- Difficulty: 2 out of 5
- Estimated Time: 30-45 minutes
- Tools Needed: Phillips screwdriver, 7mm socket and ratchet.
Step-by-Step Instructions
- Disconnect the Battery: Before starting any electrical work, disconnect the negative terminal from the vehicle's battery to prevent short circuits.
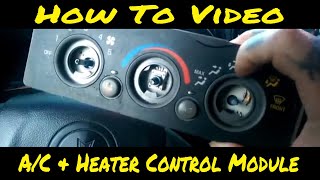
- Remove the Center Dash Bezel: The plastic trim piece surrounding the radio and HVAC controls needs to be removed. It is typically held in place by clips and a few screws. Gently pry the bezel away from the dashboard to release the clips. 🎬 Watch this video guide on removing the dash bezel
- Unscrew the HVAC Control Unit: With the bezel removed, you will see the screws (usually two or four 7mm hex-head screws) holding the control unit in place. Remove these screws.
- Disconnect Electrical and Vacuum Connectors: Carefully pull the unit out from the dash. On the back, you will find one or more electrical connectors and possibly a vacuum line harness. Press the release tabs on the connectors to unplug them.
- Install the New Unit: Connect the electrical and vacuum lines to the replacement control unit. Slide it back into the dashboard and secure it with the mounting screws.
- Reassemble and Test: Snap the center dash bezel back into place. Reconnect the battery, start the vehicle, and test all functions of the new HVAC control unit—fan speeds, temperature blend, mode selection, A/C, and rear defrost—to ensure everything is working correctly.
Pro Tip: While you have the dash open, it's a good time to check the condition of the radio and other nearby component connections. This can save you from having to take the dash apart again in the future.
Cost Comparison
The cost to replace an HVAC control unit can vary significantly depending on the source of the part and whether you perform the labor yourself.
| Part Type | Estimated Cost |
|---|---|
| New OEM | $350 - $500+ (if available) |
| New Aftermarket | $250 - $350 |
| Used OEM | $40 - $100 |
| Shop Labor | $112 - $164 |
Frequently Asked Questions (FAQ)
Why does my fan only work on the highest speed?
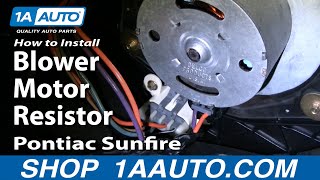
This is a classic symptom of a failed blower motor resistor, not the HVAC control unit itself. The highest fan setting bypasses the resistor and sends full voltage directly to the blower motor. The resistor is a separate, inexpensive part located in the HVAC ducting under the passenger side dashboard and is relatively easy to replace.
🎬 Watch: How to replace the blower motor resistorDo I need to program a replacement HVAC control unit?
No. The HVAC control unit on a 1998-2002 Pontiac Sunfire is a simple plug-and-play module. No special programming or calibration is required after installation.
Can a bad HVAC control drain my car's battery?
While uncommon for this specific part, a faulty electronic module can potentially have an internal short that causes a parasitic draw on the battery. If you are experiencing a dead battery along with other HVAC issues, the control unit could be a possible, though unlikely, cause.
Is it difficult to access the HVAC control unit for replacement?
No, access is relatively easy. On the Sunfire, the control unit is located directly behind the center dash trim panel that surrounds the radio. This panel can be removed with basic tools, providing direct access to the control unit's mounting screws.
Helpful Videos

Technical Specifications
OEM Part Numbers: 15-72481 16242872 52481507 12214672 9350502
Manual control type for vehicles with air conditioning and rear window defrost.
We Have This Part in Stock



The information in this article is provided for general reference and educational purposes only. Vehicle specifications, procedures, and part compatibility can vary by production date, trim level, and region. Always consult your vehicle's factory service manual and verify part numbers before purchasing or performing repairs. Safety-critical components such as airbags, seat belts, and braking systems should be installed by a qualified professional.
- Pontiac Sunfire:
- 🎬 Helpful Videos
- 🛍️ Shop This Part
- Symptoms of a Failing HVAC Control Unit
- Buying a Used HVAC Control: What to Check
- Physical Inspection Checklist
- Why a Used OEM Unit is Often a Smart Choice
- Recalls and Technical Service Bulletins (TSBs)
- Replacement Guide
- Step-by-Step Instructions
- Cost Comparison
- Frequently Asked Questions (FAQ)
- 🎟️ Get 5% Off