

1993 Pontiac Firebird HVAC Control: The One-Year-Only Compatibility Trap
Your definitive guide to diagnosing, buying, and replacing the unique manual HVAC control unit for the 1993 Pontiac Firebird.
- This part is for 1993 models ONLY. Units from 1994+ Firebirds have a different connector and will not work.
- Before buying, verify the OEM part number is 16181042 or 16190402.
- If air is stuck on the defrost setting, the problem is almost always a broken vacuum line in the engine bay, not the control unit.
- New parts are unavailable, so a tested used OEM unit is your only viable replacement option.
Critical Compatibility Warning: 1993 Only
Warning: The HVAC control unit for the 1993 Pontiac Firebird is a one-year-only part. It is specifically designed for models equipped with both manual air conditioning (A/C) and a rear window defogger. The electrical connector on the back of the 1993 unit is different from the one used on 1994 and newer Firebird models. They are not interchangeable. Before purchasing, you must verify the part number on your original unit matches OEM part numbers 16181042 or 16190402.
Symptoms of a Failing HVAC Control
Problems with your climate system may not always be the control unit itself. It's important to distinguish between a faulty control head and issues with other parts of the system it commands.
Air Only Blows from Defrost Vents
This is the most common HVAC issue on these cars. The system is designed to default to the defrost setting when it loses vacuum. 99% of the time, this is caused by a broken or brittle vacuum line or check valve in the engine bay, not the control unit in the dash. Before replacing the control unit, inspect the small plastic vacuum lines near the passenger side of the intake manifold for cracks or breaks.
🎬 Watch: How to fix the defrost-only vacuum line issueFan Only Works on High Speed
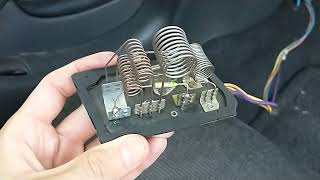
If your blower fan only operates on the highest setting (setting 4) and not on 1, 2, or 3, the problem is almost certainly a failed blower motor resistor, not the fan switch in the control unit. The resistor is a separate, inexpensive part located in the HVAC box under the hood on the passenger side. The highest fan setting bypasses the resistor, which is why it still works.
🎬 See how to replace the blower motor resistorBurnt-Out Backlighting
One of the most frequent and annoying failures is when the bulbs that illuminate the control face burn out, making it impossible to see the controls at night. The sliders and buttons may still function perfectly. The bulbs themselves can be replaced.
Inoperative A/C or Defrost Buttons
If the indicator light on the A/C or rear defrost button doesn't turn on and the system doesn't activate, the switch within the control unit may have failed. This can be due to a broken solder joint or a worn-out internal switch mechanism.
Sliders are Stuck or Broken
The physical sliders for temperature, fan speed, or air direction can become difficult to move or break internally from age and use. The plastic components can become brittle and crack.
Buying a Used 1993 Firebird HVAC Control
Since new OEM and aftermarket units are generally no longer available, a tested, used OEM part is the best and often only option. Here’s what to look for.
1. Verify Compatibility Above All Else
This is the most important step. A used control unit must be from a 1993 Firebird with the same options (manual A/C and rear defrost). Ask the seller to confirm the part number is 16181042 or 16190402. Do not buy a unit from a 1994 or newer model, as the wiring connector will not fit.
2. Physical Inspection Checklist
- Electrical Connector: Look at the pins on the back of the unit. They should be straight and free of any green or white corrosion. Check the plastic housing for any signs of melting or charring, which indicates a past electrical short.
- Vacuum Port: Inspect the multi-port vacuum connector on the back. Ensure the plastic nipple isn't cracked or broken, as this would cause a vacuum leak.
- Mounting Tabs: Check that all plastic mounting tabs are intact. Broken tabs will result in a loose-fitting unit in your dash.
- Slider and Button Feel: If you can inspect it in person, move the sliders and press the buttons. They should operate smoothly without binding or feeling excessively loose.
- Faceplate Condition: Check the faceplate for deep scratches, peeling, or worn graphics that could make it hard to read.
Pro Tip: Ask the seller if the backlighting bulbs have been tested or recently replaced. Even if they haven't, replacing them is a manageable DIY job once the unit is out of the car.
Cost Comparison
Pricing for this specific part reflects its age and availability. Labor for replacement typically involves removing the center dash trim, which most shops can do relatively quickly.
| Part Type | Estimated Cost |
|---|---|
| New OEM | null (Discontinued) |
| New Aftermarket | null (Not manufactured) |
| Used OEM | $75 - $150 |
| Remanufactured | null |
| Shop Labor Cost | $100 - $200 |
Replacement Overview
Replacing the HVAC control unit is a straightforward job suitable for a DIYer with basic tools. The main challenge is removing the plastic dash trim without breaking any old clips.
- Difficulty: 2 out of 5
- Estimated Time: 1 hour
- Tools Needed: Phillips screwdriver, trim removal tools (or a flat-head screwdriver wrapped in tape), socket set.
Step-by-Step Walkthrough
- Disconnect the Battery: Always disconnect the negative battery terminal before working on electrical components.
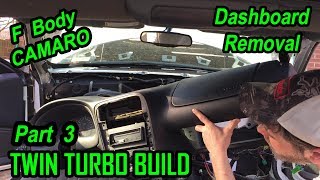
- Remove Dash Trim Panel: The large plastic bezel surrounding the radio and HVAC controls must be removed. It is held in by several screws, some of which may be in the glove box area or lower dash panels. Once the screws are out, carefully pry the panel away from the dash. 🎬 Watch this video guide on removing the dash trim
- Unscrew the HVAC Unit: The control unit is held into the dash frame with a few screws (typically 2-4). Remove these.
- Disconnect Harnesses: Gently pull the unit out enough to access the back. Disconnect the main electrical connector and the vacuum line harness. The electrical connector has a release tab you must press.
- Install the New Unit: Connect the electrical and vacuum harnesses to the replacement unit, slide it into place, secure it with the screws, and reinstall the dash trim panel.
- Reconnect Battery and Test: Reconnect the battery and test all functions—fan speeds, A/C and defrost buttons, and all air direction settings—to ensure proper operation.
Known Issues, Recalls, and Service Bulletins
As of mid-2026, there are no specific recalls or Technical Service Bulletins (TSBs) issued by the NHTSA or General Motors that directly address failure of the HVAC control unit for the 1993 Pontiac Firebird. Recalls for this model year pertain to other systems.
Frequently Asked Questions (FAQ)
Can I use an HVAC control from a 1994 Firebird or Camaro?
No. The 1993 model year uses a unique electrical connector. Control units from 1994 and newer models will not plug into your vehicle's wiring harness.
Why is air only blowing out of my defrost vents?
This is a classic symptom of a vacuum loss in the HVAC system. The system is designed to default to defrost as a safety measure. The most likely cause is a cracked, brittle, or disconnected vacuum line in the engine bay, usually near the intake manifold on the passenger side. It is rarely caused by the control unit itself.
How do I replace the light bulbs in the HVAC control unit?
Once the unit is removed from the dash, you can access the bulbs. They are typically small #74 bulbs that sit in sockets on the circuit board. You may need to gently pry the front faceplate off the unit to access them. The bulbs can be difficult to pull out; using a piece of duct tape to create a pull-tab or carefully using needle-nose pliers is a common method.
Is it difficult to replace the HVAC control unit myself?
No, it is considered a relatively easy DIY job. The most difficult part is carefully removing the large plastic dash bezel without cracking the 30+ year-old plastic. The actual unbolting and swapping of the unit is very simple. The entire job can usually be done in about an hour.
Helpful Videos

Technical Specifications
OEM Part Numbers: 16181042 16190402
Fits 1993 models with manual A/C and rear window defogger. Uses a unique electrical connector for the 1993 model year. Illumination is provided by #74 incandescent bulbs.
We Have This Part in Stock


The information in this article is provided for general reference and educational purposes only. Vehicle specifications, procedures, and part compatibility can vary by production date, trim level, and region. Always consult your vehicle's factory service manual and verify part numbers before purchasing or performing repairs. Safety-critical components such as airbags, seat belts, and braking systems should be installed by a qualified professional.
- Pontiac Firebird:
- 🎬 Helpful Videos
- 🛍️ Shop This Part
- Critical Compatibility Warning: 1993 Only
- Symptoms of a Failing HVAC Control
- Air Only Blows from Defrost Vents
- Fan Only Works on High Speed
- Burnt-Out Backlighting
- Inoperative A/C or Defrost Buttons
- Sliders are Stuck or Broken
- Buying a Used 1993 Firebird HVAC Control
- 1. Verify Compatibility Above All Else
- 2. Physical Inspection Checklist
- Cost Comparison
- Replacement Overview
- Step-by-Step Walkthrough
- Known Issues, Recalls, and Service Bulletins
- Frequently Asked Questions (FAQ)
- 🎟️ Get 5% Off