

2006-2015 Honda Pilot HVAC Control: Solving Issues from Blank Screens to Faulty Buttons
This guide helps you diagnose, replace, and choose the correct used HVAC control unit, saving you from common compatibility mistakes between generations and trim levels.
- The most critical step is identifying your Pilot's generation (2006-2008 vs. 2009-2015) and if it has a factory navigation system, as the parts are not interchangeable.
- Many symptoms, like the A/C not working (check relay) or fan issues (check resistor), are often caused by cheaper related parts, not the main control unit.
- Used OEM units are the most economical choice, costing a fraction of a new dealer part ($50-$200 used vs. $560-$1600+ new). There are no complete aftermarket control units available.
- Replacement is a DIY-friendly job (2/5 difficulty) that involves removing dash trim and a few screws, typically taking about an hour.
First: Identify Your Pilot's Generation and Options

Before diagnosing any issue, you must know which Honda Pilot you have. The 2006-2015 model years span two completely different generations with incompatible parts.
- 1st Generation: 2006, 2007, 2008
- 2nd Generation: 2009, 2010, 2011, 2012, 2013, 2014, 2015
Within each generation, the HVAC control units are different based on trim level and factory options. This is the most common mistake buyers make.
Warning: The single most important factor is whether your Pilot has the factory Navigation System. The control units for Navigation and non-Navigation models are physically different and electronically incompatible. You cannot swap one for the other.
You must also distinguish between front (main dash) and rear (center console) control units, as well as automatic vs. manual climate controls.
Is It Really Your HVAC Control Unit? Common Related Failures

Many symptoms that seem like a bad control unit are actually caused by less expensive, related parts. Always check these first before replacing the main control head.
Common Issues: 1st Generation (2006-2008)
- No Heat from Front Vents: A very common problem is a loose screw on the heater control valve, located in the engine bay against the firewall. This valve controls the flow of hot coolant to the heater core. If the cable linkage becomes loose, the valve won't open, resulting in no heat. Tightening the screw is a free and easy fix to try first. 🎬 Watch: This video shows you how to fix the heater valve for free.
- Fan Only Works on High Speed: This is a classic symptom of a failed blower motor resistor (also called a power transistor). This part is located behind the glove box and is responsible for controlling the fan's lower speeds.
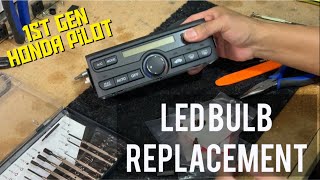
- Burnt-Out Button Lights: If the controls work but the buttons are dark, the small incandescent bulbs on the internal circuit board have simply burned out. These can be replaced individually without needing a whole new unit. 🎬 Watch: Step-by-step guide to replacing burnt-out climate control bulbs.
Common Issues: 2nd Generation (2009-2015)
- A/C Blows Warm, Compressor Not Turning On: The most frequent cause is a failed A/C compressor clutch relay, located in the under-hood fuse box. This is an inexpensive and easy part to swap. 🎬 See how to quickly replace the A/C compressor relay yourself. You can test it by swapping it with an identical relay from a non-critical system (like the horn).
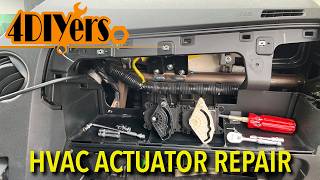
- Airflow Stuck in One Position (e.g., Defrost): This is usually a failed mode door actuator. This small electric motor is located behind the dash and moves the doors that direct airflow. It can get stuck or fail electronically.
- Temperature Stuck on Hot or Cold: This points to a failed blend door actuator. Similar to the mode door actuator, this motor controls a door that blends hot and cold air to achieve your desired temperature.
- No Air from Rear Vents: The rear climate system has its own blower motor, resistor, and fuses located in a secondary fuse box under the hood. A problem with the rear system is often independent of the front.
Symptoms of a Failing HVAC Control Unit

If you've ruled out the related components above, your main control unit may be at fault. Symptoms point directly to the user interface and its internal electronics.
- Unresponsive or Intermittent Buttons: Pressing a button for the fan, temperature, or mode does nothing, or only works sometimes.
- Blank or Flickering Display: The LCD screen that shows temperature and settings is dim, completely dark, or flashes randomly.
- Erratic Behavior: The system seems to have a mind of its own, changing temperature, fan speed, or airflow direction without any input.
- Complete Power Loss: The entire unit is dead with no lights and no function. Always check the fuses first, but if they are good, the unit itself has likely failed internally.
Recalls & TSBs: As of early 2026, there are no specific recalls or widespread Technical Service Bulletins (TSBs) issued by Honda for the HVAC control unit itself on 2006-2015 Pilot models. Any existing recalls for this period typically concern other components like airbags.
Buying a Used HVAC Control: What to Look For

Given the extremely high cost of a new OEM unit, a used part is the most practical solution for most owners. Here’s how to buy a good one.
- Confirm Your Exact Configuration: This is the most critical step. Determine if your Pilot is a Gen 1 or Gen 2. Then, confirm if you have Automatic Temperature Control (ATC) and, most importantly, if you have the factory Navigation system.
- Match Part Numbers: The best way to ensure compatibility is to remove your old unit and match the OEM part number on the sticker. The provided list of part numbers shows there are many variations. Part numbers starting with S9V are for 1st Gen (2006-2008) models, while those starting with SZA are for 2nd Gen (2009-2015) models.
- Physical Inspection: When buying online or in person, check for clear, legible button graphics (no excessive wear), an unscratched display screen, and intact mounting tabs. Ensure the electrical connectors on the back are not cracked or corroded.
- Ask About Testing: Reputable sellers will often test the unit's basic functions (powering on, button response) before pulling it from the donor vehicle. Ask if the part was tested and if they offer a warranty.
- Why Used OEM is a Good Choice: For this specific part, there are virtually no new aftermarket complete control units available. A used OEM unit is made by Honda to the original specifications, ensuring proper communication with the vehicle's other systems, which a cheap aftermarket part might not do. The cost savings are significant, with used units often costing less than 10% of a new one.
Cost Comparison
| Part Type | Estimated Cost | Notes |
|---|---|---|
| New OEM | $560 - $1,600+ | Extremely expensive and varies significantly by part number (Nav vs. Non-Nav). |
| New Aftermarket | Not Available | Complete control units are generally not manufactured by aftermarket brands. Only related components like resistors or actuators are available. |
| Used OEM | $50 - $200 | The most cost-effective option. Prices on sites like eBay vary by condition and seller. |
| Shop Labor | $100 - $165 | Replacement is straightforward and typically takes about an hour of labor. |
Replacement Overview
- Difficulty: 2 out of 5. Requires basic tools and patience.
- Estimated Time: 0.5 - 1.5 hours.
- Tools Needed: Phillips head screwdriver, small flathead screwdriver, and plastic trim removal tools.
The general process involves carefully prying off the surrounding dash trim panels to expose the screws holding the HVAC control unit in place. Once the screws are removed, the unit can be pulled out, the electrical connectors on the back can be disconnected, and the new unit can be installed. For 1st Gen models, this often involves removing the storage pocket/ashtray area below the unit first.
Pro Tip: Before starting, disconnect the negative battery terminal to prevent any electrical shorts or the need for a system reset. After installation, some vehicles may require the HVAC system to self-calibrate. This can sometimes be initiated by pulling the specific HVAC fuse for 10 seconds and reinstalling it, then starting the vehicle and letting it idle for a minute without touching the controls.
Frequently Asked Questions (FAQ)
Can I install a control unit from a Pilot with Navigation into my non-Nav Pilot?
No. The units are not interchangeable. They have different wiring, different software, and often a different physical shape to accommodate the screen. You must buy the correct unit for your vehicle's factory-installed options.
Do I need to program a replacement HVAC control unit?
For most Pilot models (LX, EX, EX-L), a replacement unit that matches your original part number is plug-and-play and does not require programming. Some warnings exist for high-end Touring models, which may require programming by a technician, but this is not common for most swaps.
Why are my control buttons sticky or the coating peeling?
This is a common cosmetic issue on many cars from this era. The soft-touch coating on the plastic can degrade over time from use, cleaning products, and sun exposure. While it doesn't affect function, it can be unsightly. Careful cleaning can sometimes help, but replacement is the only way to restore a perfect finish.
Is a bad control unit the same as a bad blower motor resistor?
No. A bad control unit is the 'brain' with the buttons. A bad blower motor resistor is the part that controls fan speed. The most common symptom of a bad resistor is the fan only working on its highest setting, while the control unit itself still lights up and responds.
Helpful Videos
Technical Specifications
OEM Part Numbers: 79600-SZA-A11 79600-SZA-A21ZA 79600-SZA-A31 79600-SZA-A31ZA 79600S9VA51ZA 79600S9VA52ZA 79600SZAA01ZA 79600SZAA11 79600SZAA110M1 79600SZAA11ZA 79600SZAA310M1 79600SZAA31ZA 79600SZAA41 79600SZAA41ZA 79600SZAA51
Compatibility is determined by vehicle generation (Gen 1: 2006-2008, Gen 2: 2009-2015) and factory options, primarily the presence of a navigation system and automatic vs. manual temperature control.
We Have This Part in Stock



The information in this article is provided for general reference and educational purposes only. Vehicle specifications, procedures, and part compatibility can vary by production date, trim level, and region. Always consult your vehicle's factory service manual and verify part numbers before purchasing or performing repairs. Safety-critical components such as airbags, seat belts, and braking systems should be installed by a qualified professional.
- Honda Pilot:
- 🎬 Helpful Videos
- 🛍️ Shop This Part
- First: Identify Your Pilot's Generation and Options
- Is It Really Your HVAC Control Unit? Common Related Failures
- Common Issues: 1st Generation (2006-2008)
- Common Issues: 2nd Generation (2009-2015)
- Symptoms of a Failing HVAC Control Unit
- Buying a Used HVAC Control: What to Look For
- Cost Comparison
- Replacement Overview
- Frequently Asked Questions (FAQ)
- 🎟️ Get 5% Off