

2010-2016 Honda CR-V HVAC Control: A Guide to Manual vs. Automatic Units and Common Fixes
This guide explains the critical differences between manual and automatic climate controls for the 2010-2016 Honda CR-V, helping you diagnose failures and choose the correct used replacement part.
- The biggest mistake is buying a manual control unit for a CR-V with automatic climate control, or vice-versa. They are not interchangeable and must be matched to your vehicle's trim level.
- Many HVAC problems, like no cold air, are caused by other system components (compressor, refrigerant leaks, relays), not the control unit itself. Diagnose the system before replacing this part.
- Replacement is a simple DIY job that requires only basic trim removal tools and a screwdriver, and typically takes less than an hour.
- Used OEM units do not require any special programming; they are plug-and-play as long as you have the correct part for your vehicle's options.
The Critical Difference: Manual vs. Automatic Climate Control

For the 2010-2016 Honda CR-V, the single most important factor when replacing the HVAC control unit is identifying whether your vehicle has manual or automatic climate control. The two systems use different control modules that are not interchangeable. Installing the wrong type will result in a non-functional climate system.
Warning: Before purchasing a replacement unit, you must visually confirm which system your CR-V has. Part numbers for these two types are different and cannot be swapped.
Manual Climate Control
Typically found on lower trim levels like the LX and some EX models, the manual system is straightforward. It features three large rotary dials:
- Left Dial: Controls fan speed (Off, 1, 2, 3, 4).
- Center Dial: Controls temperature (blue for cold, red for hot).
- Right Dial: Controls airflow direction (defrost, vents, floor, etc.).
With this system, you are in direct control and must constantly adjust the dials to maintain a comfortable temperature.
Automatic Climate Control
Commonly equipped on higher trim levels like the EX-L, the automatic system is more advanced. It allows you to set a specific temperature (e.g., 72°F), and the system will automatically manage fan speed, air direction, and A/C compressor operation to reach and maintain that temperature. Visually, it is distinguished by:
- An 'AUTO' button.
- A digital screen that displays the set temperature.
- Buttons for fan speed and mode selection instead of large dials.
- Often includes a 'DUAL' or 'SYNC' button for separate driver and passenger temperature zones.
Symptoms of a Failing HVAC Control Unit

While many A/C problems are caused by other components, a faulty control unit has specific electronic symptoms:
- No Power or Blank Display: The unit is completely dead, with no lights or response. Before condemning the unit, always check the related fuses first. 🎬 See how to check your AC fuses and relays here. A Reddit user reported replacing the module did not fix a no-power issue, which was likely caused by a fuse or wiring problem upstream.
- Unresponsive Buttons or Dials: Buttons or dials do not respond when pressed or turned, or they work intermittently. For example, turning the temperature dial may not change the air temperature at all.
- Incorrect or Stuck Output: The unit sends incorrect signals, causing issues like the A/C blowing hot air when set to cold, or being stuck in defrost mode regardless of the setting. This can sometimes be confused with a bad blend door actuator. 🎬 Watch this guide to troubleshoot blend door and DTC issues.
- Erratic Fan Speed: The blower fan speed changes randomly or doesn't match the setting on the dial. Note that this can also be a symptom of a bad blower motor resistor.
- A/C Compressor Not Engaging: The control unit is responsible for sending the signal to the A/C compressor clutch. If the unit fails, it may not send this signal, preventing the A/C from turning on. However, this symptom is more commonly caused by low refrigerant, a bad relay, or a faulty compressor clutch.
How to Run the Self-Diagnostic Test
Your CR-V's HVAC control unit has a built-in self-diagnostic function that can help identify problems by flashing trouble codes.
- Turn the ignition switch to the OFF (0) position.
- Set the fan dial to OFF and the temperature dial to Max Cool.
- Press and hold the VENTILATION button (the button that selects fresh or recirculated air).
- While holding the button, turn the ignition switch to ON (II).
- Release the VENTILATION button. The indicator on the button will turn on for 2 seconds, and then the system will begin its self-test.
- If any problems are detected, the indicator light will blink a specific number of times to indicate a Diagnostic Trouble Code (DTC). You can look up these codes in a service manual to pinpoint the issue.
Buying a Used 2010-2016 CR-V HVAC Control

Purchasing a used OEM control unit is a cost-effective solution, but careful verification is essential.
Inspection Checklist:
- Verify Control Type: This is the most crucial step. Ensure the used unit is either Manual or Automatic, matching your vehicle's original system perfectly.
- Match Part Numbers: While many part numbers may be compatible, the safest bet is to match the number on your original unit to the replacement. The part number is printed on a sticker on the unit's housing.
- Check for Options: Some units have buttons for heated seats or a windshield de-icer. Confirm the replacement unit has the exact same button configuration as your original.
- Physical Condition: Inspect the unit for cosmetic wear. Check for deep scratches on the faceplate and worn-off rubber on the knobs, which is common. Ensure the display (on automatic units) is free of cracks or dark spots.
- Connector Integrity: Look at the electrical connector port on the back. Make sure none of the pins are bent, broken, or corroded.
Cost of Replacement
Replacing the HVAC control unit can vary significantly in cost depending on the type of part you choose.
| Part Type | Estimated Cost | Notes |
|---|---|---|
| New OEM | $680 - $1,030+ | Purchased from a Honda dealership. Very expensive but comes with a manufacturer warranty. |
| New Aftermarket | $150 - $250 | Made by companies like Dorman. Offers a new part at a lower cost, but quality can sometimes be inconsistent with OEM. |
| Used OEM | $30 - $100 | Salvaged from a vehicle of the same model. Offers the best value, providing an original quality part at a low price. |
| Shop Labor | $98 - $143 | The job is relatively quick for a professional. Most shops can complete it in under an hour. |
Replacement Overview

Replacing the HVAC control unit in a 2010-2016 CR-V is a straightforward job that most DIYers can handle with basic tools.
- Difficulty: 2 out of 5
- Estimated Time: 0.5 - 1 hour
- Tools Needed: Phillips head screwdriver, plastic trim removal tools.
General Steps:
- Disconnect the Battery: As a safety precaution, disconnect the negative battery terminal.
- Remove Trim Panels: Using plastic pry tools to avoid scratching the dashboard, carefully remove the trim panel around the gear shifter. Then, remove the upper trim panel located just above the HVAC control unit. These panels are held in by clips.
- Unscrew the Control Unit: The HVAC control unit is secured by two Phillips head screws, one on each side. Remove these screws.
- Disconnect and Remove: Gently pull the unit straight out from the dashboard. On the back, you will find one or more electrical connectors. Press the release tab on each connector and pull to disconnect them. The old unit is now free.
- Installation: Installation is the reverse of removal. Connect the electrical plugs to the new unit, slide it into place, secure it with the two screws, and snap the trim panels back on.
Pro Tip: The plastic clips on the trim panels can be very tight. Pull firmly and evenly to release them. A video guide can be very helpful to see the exact prying points.
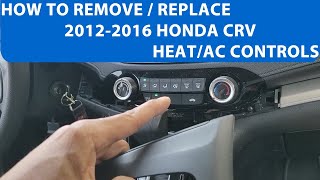
🎬 Watch this video to see how to remove the control unit.Known Issues, Recalls, and TSBs
As of early 2026, there are no specific recalls or Technical Service Bulletins (TSBs) from Honda or the NHTSA for the HVAC control unit itself on the 2010-2016 CR-V. While numerous recalls exist for this generation (primarily for Takata airbags), none address the climate control module. Most widespread HVAC complaints for this vehicle are related to other parts of the A/C system, such as the compressor clutch or refrigerant leaks.
Frequently Asked Questions (FAQ)
Can I upgrade my manual climate control to an automatic system?
No, this is not a simple plug-and-play swap. The automatic system uses additional components, including in-cabin temperature sensors and different wiring harnesses, that are not present in a vehicle with manual controls. Attempting this conversion would be complex and costly.
Does a used HVAC control unit need to be reprogrammed?
No. For the 2010-2016 Honda CR-V, the HVAC control unit does not require any special programming or calibration after installation. It is a plug-and-play component, provided you have sourced the correct part for your vehicle's system (manual or automatic).
Why are there so many different part numbers for the same unit?
The various part numbers reflect minor differences in the unit. These can include the color of the trim (e.g., Shiny Dark Metallic), whether it's for a manual or automatic system, and whether it includes buttons for options like heated seats. This is why matching the part to your vehicle's specific features is so important.
My A/C is blowing warm air. Is the control unit bad?
While possible, it's unlikely to be the control unit. Warm air is most commonly caused by low refrigerant (due to a leak), a faulty A/C compressor or clutch, a bad relay, or a clogged condenser. You should have the system professionally diagnosed before replacing the control unit for this symptom.
Helpful Videos

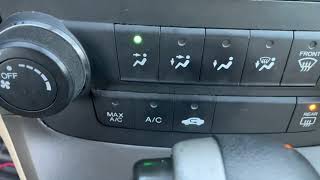
Technical Specifications
OEM Part Numbers: 79500T0AA0 79500T0AA01 79500T0AA012M1 79500T0AA01ZA 79500T0AA01ZB 79500T0AC01 79500T0AC01ZA 79500T1WA01 79500T1WA010 79500T1WA010M1 79500T1WA01ZA 79500T1WA01ZB 79500T1WA01ZC 79600-T0G-A41ZB 79600SWAA42
Varies by manual or automatic climate control system. Units are specific to trim level and optional features like heated seats.
We Have This Part in Stock



The information in this article is provided for general reference and educational purposes only. Vehicle specifications, procedures, and part compatibility can vary by production date, trim level, and region. Always consult your vehicle's factory service manual and verify part numbers before purchasing or performing repairs. Safety-critical components such as airbags, seat belts, and braking systems should be installed by a qualified professional.
- Honda CR-V:
- 🎬 Helpful Videos
- 🛍️ Shop This Part
- The Critical Difference: Manual vs. Automatic Climate Control
- Manual Climate Control
- Automatic Climate Control
- Symptoms of a Failing HVAC Control Unit
- How to Run the Self-Diagnostic Test
- Buying a Used 2010-2016 CR-V HVAC Control
- Inspection Checklist:
- Cost of Replacement
- Replacement Overview
- Known Issues, Recalls, and TSBs
- Frequently Asked Questions (FAQ)
- 🎟️ Get 5% Off