

1998-2019 Ford E-Series Heater Control: Your Guide for Non-AC Vans
This guide covers the heater-only (non-A/C) control unit for the Ford E-150, E-250, E-350, E-450, and E-550, focusing on correct identification, common problems, and replacement.
- This control unit is ONLY for vans WITHOUT air conditioning. Verify your vehicle does not have an A/C button before purchasing.
- Most HVAC issues are NOT the control unit. If the fan only works on high, replace the blower motor resistor. If air is stuck on defrost, find the vacuum leak.
- Before buying a used unit, inspect the rear electrical connectors for melting, especially the one for the fan speed switch, as this is a known failure point.
- Replacement is simple for DIYers, requiring only basic trim tools and a 7mm socket, and takes less than an hour.
Diagnosing Your Ford E-Series Heater Problem: Is It Really the Control Unit?
Before you replace the main heater control unit in your 1998-2014 Ford E-150, 1998-2014 Ford E-250, 1998-2019 Ford E-350, 1998-2003 Ford E-450 Super Duty, or 2002-2003 Ford E-550 Super Duty, it's critical to understand that most HVAC problems in these vans are caused by other, more common parts. Correctly diagnosing the issue will save you time and money.
Common Problems Often Mistaken for a Bad Control Unit
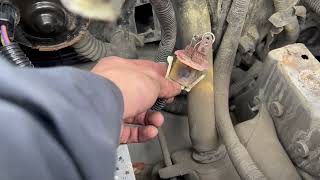
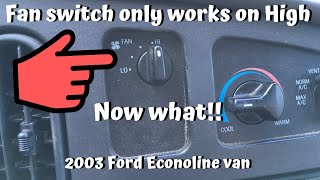
- Symptom: Fan only works on the highest speed. This is the classic sign of a failed blower motor resistor, not the control unit. The highest fan setting bypasses the resistor, which is why it's the only speed that works. The resistor is a separate, inexpensive part located under the hood, typically behind the battery. 🎬 See how to replace the blower motor resistor
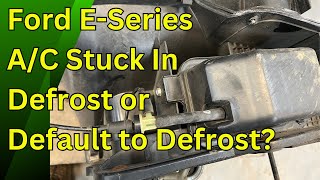
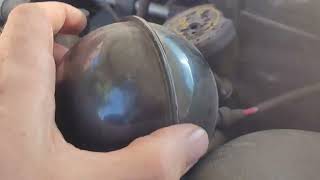
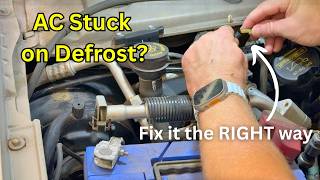
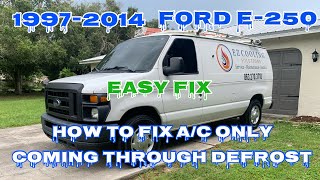
- Symptom: Air only blows out of the defrost vents. This is caused by a vacuum leak under the hood. The system uses vacuum to hold the vent doors in position. When a leak occurs (often a cracked plastic line or reservoir), the system defaults to sending all air to the windshield defrost vents. 🎬 Watch this video to find and fix the vacuum leak
- Symptom: A clicking or popping noise from the dashboard when changing temperature. This indicates a failed blend door actuator. This small electric motor controls the door that mixes hot and cold air. The clicking sound is the sound of broken plastic gears inside the actuator.
Symptoms of a Failing Heater Control Unit
If you've ruled out the issues above, here are the primary symptoms that point directly to a faulty heater control head itself:
- Unresponsive Knobs or Buttons: Turning the fan speed, temperature, or vent selector knobs has no effect. The unit may still have power and light up, but your inputs do nothing.
- Completely Dead Unit: The control panel has no backlight, and none of the functions work. This can indicate an internal electrical failure or a problem with the main connector.
- Melted Fan Speed Switch or Connector: You may smell burning plastic, or the fan speed knob may feel loose or stop clicking into position. This is a known issue on these vans and often requires replacing both the control unit and the wiring connector (pigtail).
Buying a Used Heater Control: What to Check
Purchasing a used OEM heater control is a great way to save money, as they are often more durable than new aftermarket alternatives. However, careful verification is essential to ensure you get the right part.
1. Verify It's a "Heater-Only" Unit (No A/C)
Warning: This is the most common compatibility mistake. These vans were sold with and without air conditioning, and the control units are different and not interchangeable. You MUST get the version that matches your van's original options.
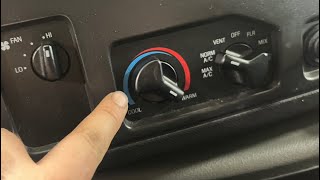
Look at the mode selector knob (the right-hand knob). A "Heater-Only" unit will NOT have an "A/C" or "MAX A/C" position or a separate A/C button. The positions will typically be for Vent, Floor, Mix, and Defrost. An A/C-equipped unit will have an explicit A/C setting or button.
2. Check for Auxiliary (Rear) Controls
Many passenger versions of the E-Series vans came with a separate, auxiliary heater unit for the rear of the van. If your van has this option, you need a control unit that can operate it.
- Without Rear Controls: The fan speed knob (left-hand knob) will only have speeds for the front blower (e.g., Off, Low, Med, High).
- With Rear Controls: The fan speed knob will have additional settings to control the rear fan, often marked "REAR". Check your original unit; if it has settings for a rear fan, your replacement must have them too.
3. Inspect the Electrical Connectors
Before buying, ask the seller for clear photos of the back of the unit. Pay close attention to the electrical port for the fan speed switch. Look for any signs of melting, charring, or discoloration on the plastic around the pins. A melted connector is a sign of overheating and is a major red flag.
Known Issues, TSBs, and Recalls
While there are no major recalls for this specific control unit within the 1998-2019 year range, there is a notable history of related issues.
- NHTSA Investigation (1997-2008 models): The National Highway Traffic Safety Administration (NHTSA) investigated over 1,000 complaints of melting fan speed switches that led to smoke or hot-to-the-touch dash controls. While the investigation was closed without a formal recall, Ford did redesign the switch to mitigate the issue. This confirms that the fan switch is a known weak point, making it crucial to inspect the connector on any used part.
Replacement Guide (DIY)
Replacing the heater control unit is a relatively simple job that most DIY mechanics can complete in under an hour.
- Difficulty: 2 out of 5
- Estimated Time: 0.5 - 1 hour
- Tools Needed: Plastic trim removal tools, 7mm socket or nut driver.
Step-by-Step Process
- Disconnect the Battery: Always disconnect the negative battery terminal before working on electrical components.
- Remove Dash Bezel: Carefully pry off the large plastic trim piece that surrounds the radio and climate controls. It is held in by clips. Start from a bottom corner and work your way around.
- Unscrew the Control Unit: The heater control unit is typically held in place by four 7mm screws. Remove these screws.
- Disconnect Connectors: Gently pull the unit out from the dash. The wiring harness is often short, so be careful. Press the release tabs on the electrical connectors and the vacuum line harness to unplug them from the back of the unit.
- Install the New Unit: Installation is the reverse of removal. 🎬 Watch this step-by-step climate control unit replacement video Plug in the connectors, screw the new unit into place, and carefully snap the dash bezel back on.
Pro Tip: If your old unit's fan connector was melted, it is highly recommended to replace the wiring harness connector (pigtail) at the same time. Splicing in a new pigtail will prevent the same failure from happening to your replacement unit.
Cost Comparison
Prices for a replacement heater control unit can vary significantly based on the source.
| Part Source | Estimated Price Range |
|---|---|
| New OEM (Motorcraft) | $150 - $250 |
| New Aftermarket | $60 - $120 |
| Used OEM (Recycled) | $50 - $95 |
| Shop Labor Cost | $100 - $200 |
Frequently Asked Questions (FAQ)
Why does my van's fan only work on the 'High' setting?
This is the most common HVAC failure on these vans and it is caused by a bad blower motor resistor, which is a separate part located under the hood. It is not a failure of the dash control unit.
Why does air only blow from my defrost vents?
This is caused by a loss of engine vacuum to the HVAC system. The system is designed to default to the defrost position for safety when a vacuum leak occurs. The leak is usually a cracked plastic line or reservoir in the engine bay.
How do I know for sure if I need the 'Heater-Only' control unit?
Look at your current control unit. If it does not have a button labeled 'A/C' or a snowflake symbol, and the mode selector knob does not have a 'MAX A/C' position, you have a heater-only system. The part described in this guide is the correct one for your vehicle.
Do I need to program a replacement heater control unit?
No. This is a simple plug-and-play module. There is no programming or calibration required for replacement on these models.
Helpful Videos

Technical Specifications
OEM Part Numbers: F49Z19986A F7UZ19B888AB F7UZ19C733AB F8UH18D462AA F8UHAA F8UZ18549AA XC2Z19C733AA YH-1479 YH-1515
Manual control type (non-digital). Operates via electrical switches and vacuum lines. Designed for vehicles without factory air conditioning. May include controls for auxiliary rear heater.
We Have This Part in Stock



The information in this article is provided for general reference and educational purposes only. Vehicle specifications, procedures, and part compatibility can vary by production date, trim level, and region. Always consult your vehicle's factory service manual and verify part numbers before purchasing or performing repairs. Safety-critical components such as airbags, seat belts, and braking systems should be installed by a qualified professional.
- Ford E-150:
- Ford E-250:
- Ford E-350:
- Ford E-450 Super Duty:
- Ford E-550 Super Duty:
- 🎬 Helpful Videos
- 🛍️ Shop This Part
- Diagnosing Your Ford E-Series Heater Problem: Is It Really the Control Unit?
- Common Problems Often Mistaken for a Bad Control Unit
- Symptoms of a Failing Heater Control Unit
- Buying a Used Heater Control: What to Check
- 1. Verify It's a "Heater-Only" Unit (No A/C)
- 2. Check for Auxiliary (Rear) Controls
- 3. Inspect the Electrical Connectors
- Known Issues, TSBs, and Recalls
- Replacement Guide (DIY)
- Step-by-Step Process
- Cost Comparison
- Frequently Asked Questions (FAQ)
- 🎟️ Get 5% Off