

2011-2015 Kia Optima Hood Latch: Failure Symptoms, Replacement, and Safety
Diagnose a hood that won't open or close, a persistent 'Hood Ajar' light, and learn how to replace the latch yourself.
- A faulty hood latch is a critical safety issue; if the hood is loose or rattles, do not drive the vehicle until it is repaired.
- The most common symptoms are a hood that won't close properly and a persistent 'Hood Ajar' warning light on the dash, which is caused by a failed sensor inside the latch.
- This part is a simple DIY replacement, typically taking less than 30 minutes with basic tools. Tracing the old latch's position before removal is key to easy alignment.
- While some Kia models had a recall for the secondary hood latch, the 2011-2015 Optima was not included in that specific campaign.
Symptoms of a Failing 2011-2015 Kia Optima Hood Latch

A failing hood latch can present several distinct symptoms, ranging from a minor annoyance to a critical safety hazard. Being aware of these signs can help you diagnose the problem before it becomes severe.
- Hood Won't Close or Latch: You may have to slam the hood multiple times for it to catch, or it may not lock down at all. This often points to a worn-out or seized internal mechanism.
- Hood is Difficult to Open: The release lever inside the car may feel stiff, or pulling it does nothing. This can be caused by a stretched cable, a binding latch mechanism due to rust, or a problem with the cable routing.
- 'Hood Ajar' Warning Light Stays On: A persistent warning light on the dash, even when the hood is securely closed, is a very common symptom for this vehicle. This is almost always caused by a failure of the small micro-switch integrated into the latch assembly.
- Hood Rattles or Feels Loose: If you notice the hood vibrating or making rattling noises while driving, the latch is not holding it down firmly. This indicates a high risk of the hood opening unexpectedly.
- Hood Pops Open While Driving: This is the most dangerous symptom and indicates a complete failure of both the primary and secondary latches. If this happens, pull over immediately as soon as it is safe to do so. Driving with a hood that could fly up and obstruct your vision is extremely hazardous.
- Visible Rust or Damage: A visual inspection may reveal significant corrosion, bent components, or broken springs on the latch assembly, which can compromise its function.
Known Issues, Recalls, and Technical Service Bulletins (TSBs)

While some Kia models were involved in a significant recall for secondary hood latches, the 2011-2015 Optima has its own specific points of interest.
Hood Latch Recall Information
There was a well-known Kia recall (NHTSA Campaign ID: 16V385, Kia Recall SC134) for secondary hood latches that could corrode and fail to engage. However, this recall applied to the 2006-2014 Kia Sedona and did NOT include the 2011-2015 Kia Optima. There are no active hood latch safety recalls for the 2011-2015 Optima.
Technical Service Bulletins (TSBs)
Kia has issued TSBs that are relevant to servicing the hood latch and related components:
- TSB-GEN085: This bulletin announces a special service tool designed to help remove the interior hood release lever without breaking its pivot point.
Pro Tip: Before assuming the latch is broken, always try cleaning and lubricating the mechanism thoroughly with a penetrating oil followed by white lithium grease. Often, dirt and old, dried grease are the culprits behind a sticking latch.
Buying a Used Hood Latch for Your 2011-2015 Optima

A used OEM hood latch from a reputable recycler is an excellent, cost-effective alternative to a new part. Because fitment and sensor function are critical, a genuine used part is often a safer bet than a cheap aftermarket copy. Here’s what to check before you buy:
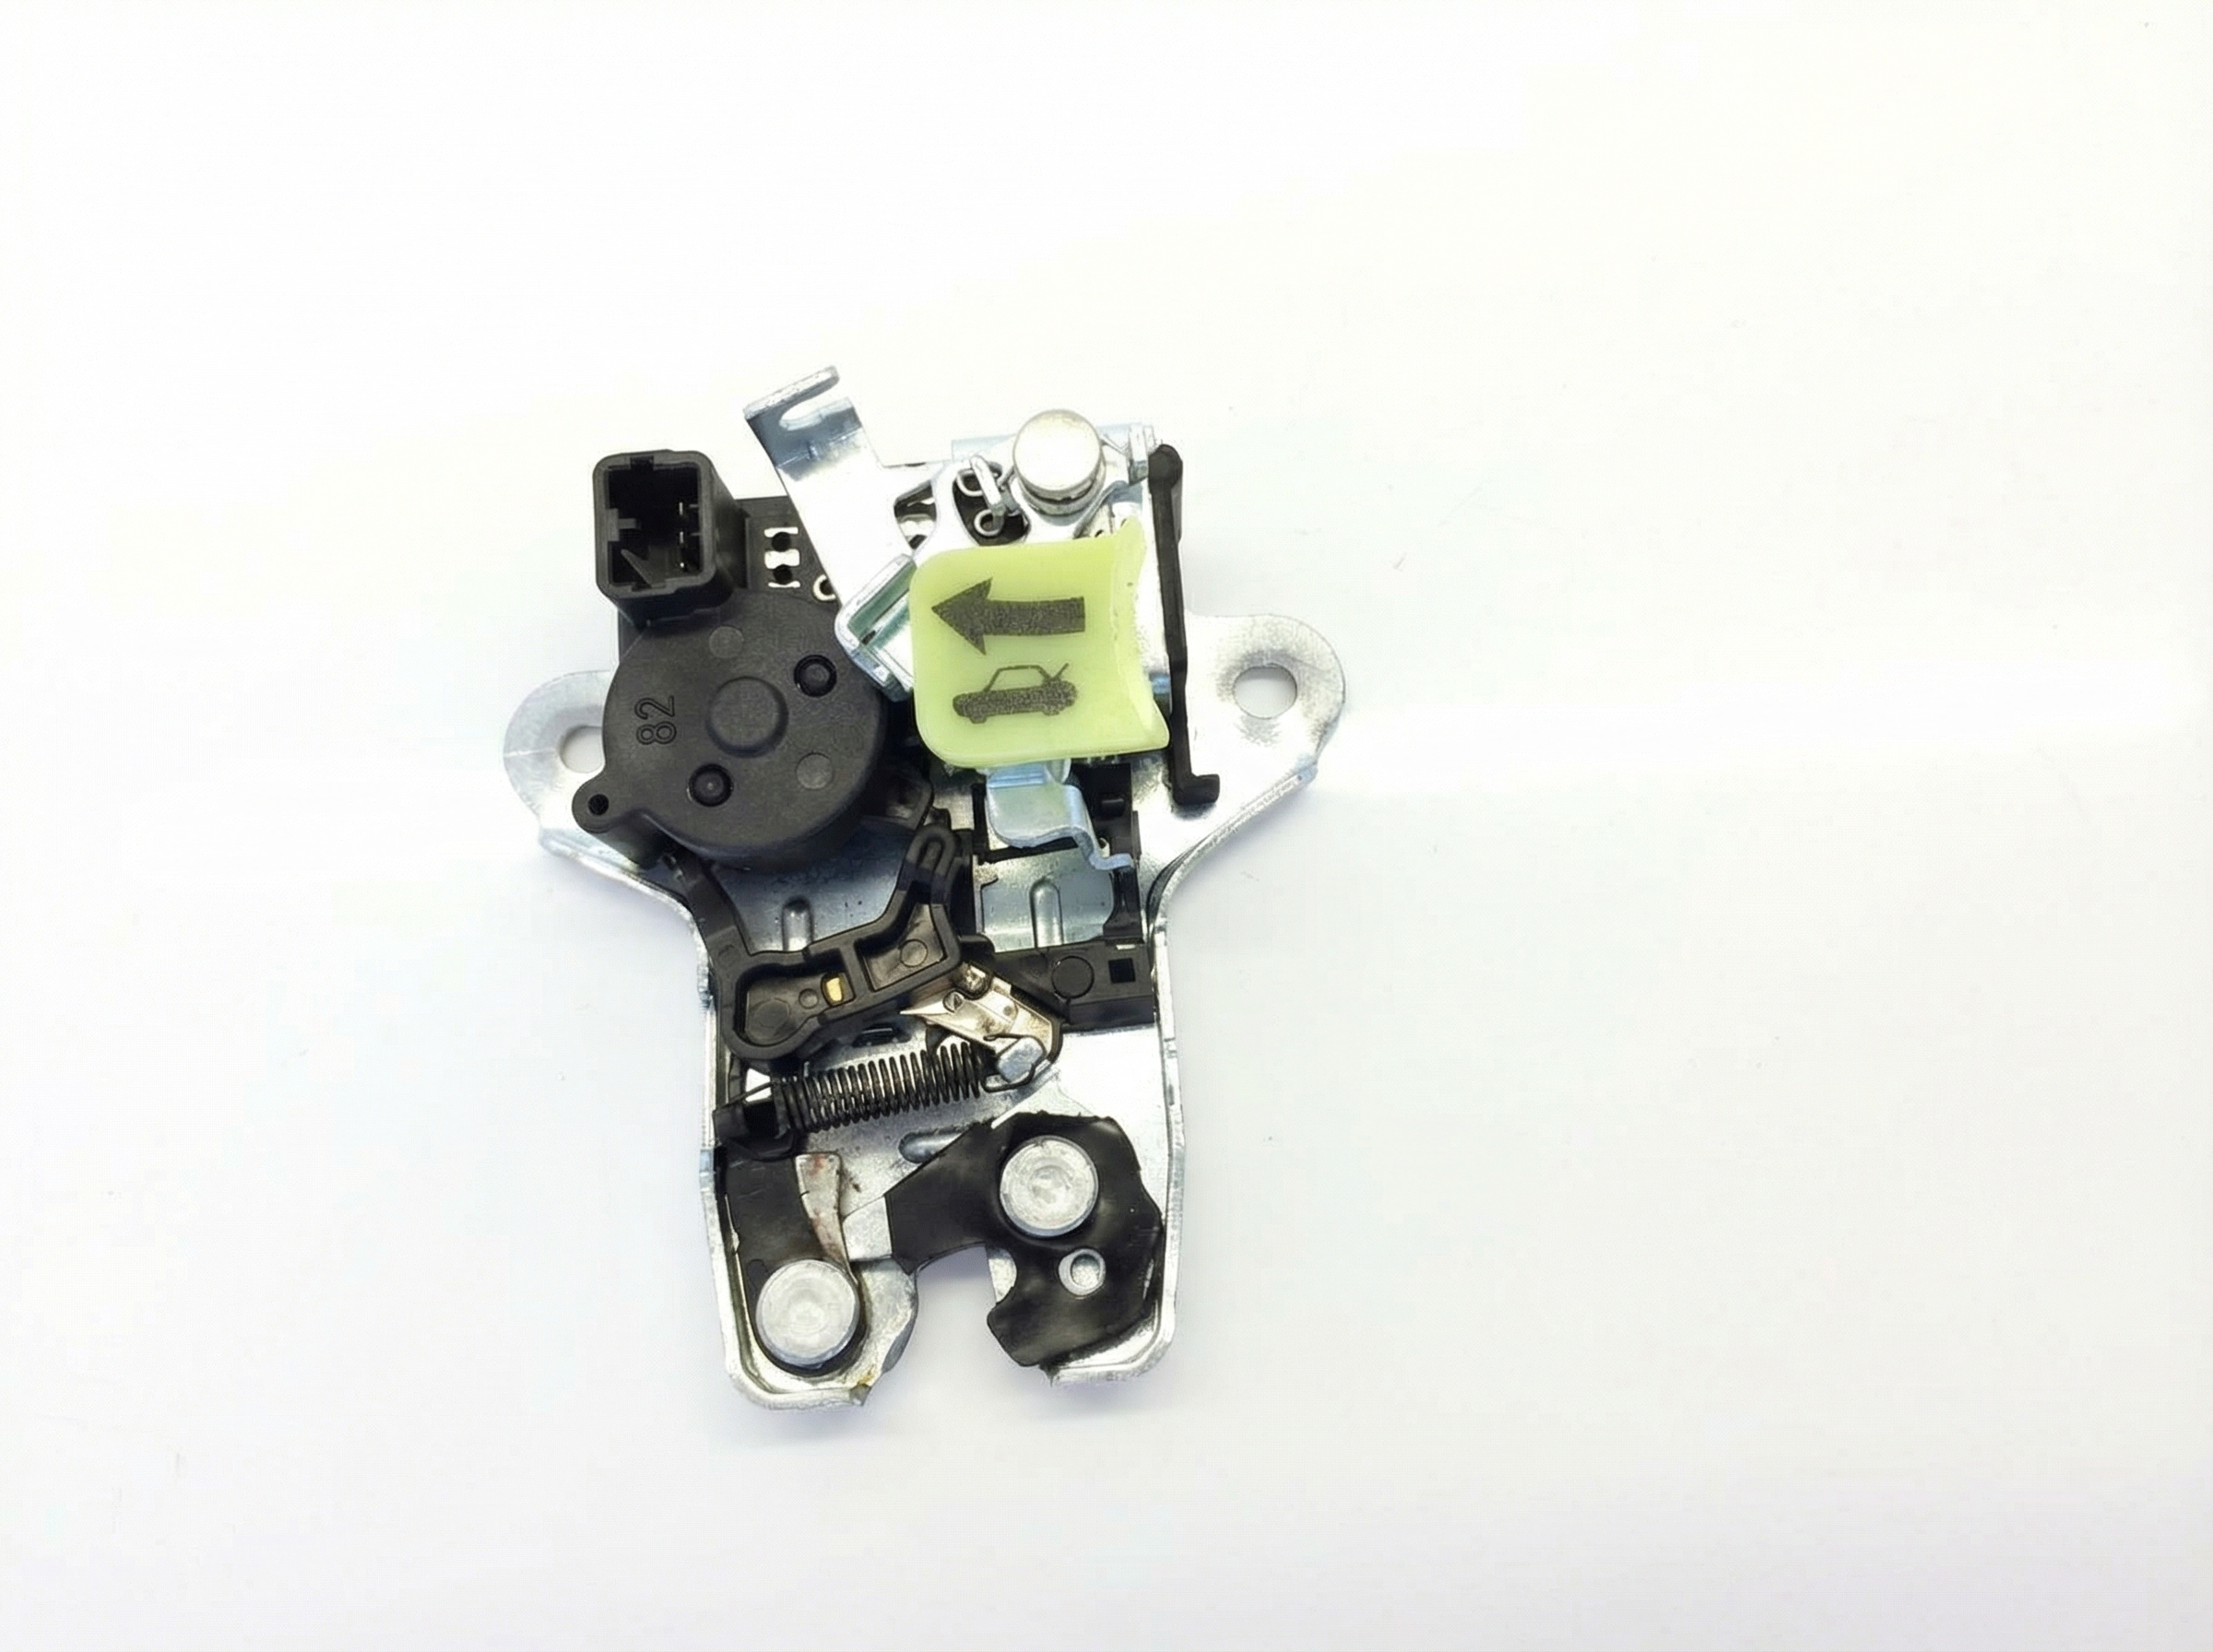
- Verify the Part Number: The primary OEM part number for this generation is 81130-2T000. Ensure the part you are buying matches this number.
- Inspect the Mechanism: Look for heavy rust or corrosion. Use a screwdriver to manually push the catch and see if it moves freely and springs back sharply. A sluggish or gritty feeling indicates internal wear or contamination.
- Check the Electrical Connector: Examine the plastic connector for the 'Hood Ajar' sensor. Make sure it isn't cracked, and the pins inside are straight and free of corrosion.
- Look at the Spring: The main return spring should be intact and have strong tension. A weak or broken spring is a common failure point.
- Consider the Source Vehicle: If possible, choose a part from a low-mileage vehicle that was registered in a dry, non-rust-belt climate. This significantly increases the chances of getting a part with a long service life ahead of it.
Cost Comparison for a 2011-2015 Kia Optima Hood Latch
Prices can vary based on supplier and location, but this table provides a general estimate of what you can expect to pay for the part and installation.
| Part Type | Estimated Cost |
|---|---|
| New OEM | $40 - $60 |
| New Aftermarket | $15 - $35 |
| Used OEM | $30 - $50 |
| Shop Labor | $85 - $125 |
Hood Latch Replacement Guide (DIY)
Warning: Always test the latch mechanism thoroughly before closing the hood completely. If you close the hood with a disconnected or improperly installed release cable, you may not be able to open it again without significant effort.
- Difficulty: 2/5 (Easy)
- Estimated Time: 0.5 hours
- Tools Needed: Socket wrench (likely 10mm), trim removal tool or flathead screwdriver, marker.
Step-by-Step Instructions
- Access the Latch: Open the hood. Use a trim removal tool to pop out the plastic clips holding the radiator shroud (the black plastic cover at the front of the engine bay) and remove it.
- Mark the Position: Before unbolting the old latch, use a marker to trace its outline on the radiator support frame. This will make aligning the new latch much easier and save you a lot of adjustment time.
- Disconnect Components: Disconnect the electrical connector for the hood sensor. Then, detach the hood release cable from the side of the latch mechanism.
- Remove the Old Latch: Using a socket wrench, remove the two or three bolts holding the latch to the radiator support.
- Install the New Latch: Position the new latch within the outline you traced earlier. Start the bolts by hand but do not tighten them completely.
- Reconnect and Test: Reconnect the release cable and the electrical sensor. Gently lower the hood to test alignment and make sure it clicks into the secondary catch. Adjust the latch's position as needed until the hood striker aligns perfectly.
- Final Tightening: Once you are satisfied with the alignment, tighten the mounting bolts. The recommended torque is 13.7 – 17.4 lb-ft.
- Final Checks: Close the hood firmly. It should close without slamming. Go into the car and pull the release lever to ensure it pops open smoothly. Check your dashboard to confirm the 'Hood Ajar' light is off when the hood is closed and on when it's open. Reinstall the radiator shroud.
Frequently Asked Questions (FAQ)
My 'Hood Ajar' light is on, but my hood is closed. Do I need a whole new latch?
Most likely, yes. For the 2011-2015 Optima, the sensor switch is integrated into the hood latch assembly. While you should first check the wiring and connector for damage, the switch itself is the most common point of failure and is not typically sold separately. Replacing the entire latch assembly is the standard repair.
Can I just lubricate a sticking hood latch instead of replacing it?
Yes, and this should always be your first step. A thorough cleaning with a degreaser followed by an application of penetrating lubricant (like PB B'laster or WD-40) and then a final coat of white lithium grease can often restore function to a latch that is sticking due to dirt or rust. If this doesn't solve the problem, replacement is necessary.
Is a faulty hood latch dangerous to drive with?
Yes, it is extremely dangerous. If the latch fails to secure the hood, it can fly open while driving, completely obstructing your view and potentially shattering the windshield. If your hood rattles, feels loose, or does not close securely, you should not drive the vehicle until it is repaired.
My hood release lever feels loose and does nothing. Is the problem the latch or the cable?
It could be either. First, check the release lever inside the car to see if the cable has simply detached from the handle. If it's connected, have a helper pull the lever while you watch the cable at the latch assembly. If the cable moves but the latch doesn't release, the latch is the problem. If the cable doesn't move at all, it is likely stretched, snapped, or has come loose from its mounting points.
Technical Specifications
OEM Part Numbers: 81130-2T000
Mounting Bolt Torque: 13.7 – 17.4 lb-ft (18.6 – 23.5 N.m)
We Have This Part in Stock

The information in this article is provided for general reference and educational purposes only. Vehicle specifications, procedures, and part compatibility can vary by production date, trim level, and region. Always consult your vehicle's factory service manual and verify part numbers before purchasing or performing repairs. Safety-critical components such as airbags, seat belts, and braking systems should be installed by a qualified professional.
- Kia Optima:
- 🛍️ Shop This Part
- Symptoms of a Failing 2011-2015 Kia Optima Hood Latch
- Known Issues, Recalls, and Technical Service Bulletins (TSBs)
- Hood Latch Recall Information
- Technical Service Bulletins (TSBs)
- Buying a Used Hood Latch for Your 2011-2015 Optima
- Cost Comparison for a 2011-2015 Kia Optima Hood Latch
- Hood Latch Replacement Guide (DIY)
- Step-by-Step Instructions
- Frequently Asked Questions (FAQ)
- 🎟️ Get 5% Off