

2016-2024 MINI Clubman Headlight Switch: A Buyer's Guide to Options and Replacement
This guide covers the common failure symptoms, replacement costs, and critical compatibility warnings for the F54 MINI Cooper Clubman headlight switch.
- Compatibility is critical: You must buy a replacement switch with the exact same button layout (Auto headlights, front/rear fogs) as your original.
- Replacement is very easy for DIYers, requiring only a trim tool and about 20 minutes.
- No programming is needed when replacing the switch with an identical part.
- Symptoms like flickering lights or non-working fog lights often point directly to a failing switch, but always check fuses first.
Common Symptoms of a Failing Headlight Switch
When the headlight switch in a MINI Clubman begins to fail, it can cause a range of confusing and potentially unsafe lighting issues. Because the switch controls multiple lighting systems, symptoms can vary.
- Inconsistent Headlight Operation: The headlights may flicker, dim intermittently, or fail to turn on or off. This can happen randomly or when driving over bumps.
- Automatic Headlights Malfunction: If equipped, the "Auto" function may stop working, forcing you to turn the lights on and off manually. The lights might also stay on long after entering bright daylight or fail to turn on in the dark.
- Fog Lights or Parking Lights Inoperative: The buttons for the front or rear fog lights may become unresponsive, or the parking lights may fail to illuminate when selected.
- Complete Failure: In some cases, the switch can fail completely, leaving you with no control over any exterior lighting. This is a major safety hazard, especially at night.
- Instrument Panel Dimmer Not Working: The thumbwheel that controls the dashboard brightness may stop responding.
Pro Tip: Before condemning the switch, check the lighting system fuses and the bulbs themselves. In some MINIs, lighting problems can also be caused by wiring harness issues near the bulkhead or a faulty Body Domain Controller (BDC). However, if multiple lighting functions controlled by the switch are acting up simultaneously, the switch itself is a likely culprit.
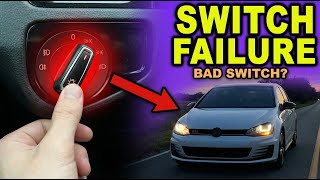
🎬 Watch: How to tell if your headlight switch is badKnown Issues, Recalls, and Service Bulletins
While there are no specific recalls for the headlight switch itself on the 2016-2024 MINI Clubman, there are a few related items of note:
- NHTSA Recall 17V-222: This recall affected 2016-2017 Clubman models due to a software error in the Body Domain Controller (BDC). The issue caused incorrect brake light behavior when a turn signal was activated. The fix was a software update performed by the dealer. While not a switch failure, it highlights the BDC's role in lighting control.
- TSB M630122: This Technical Service Bulletin addresses an issue where the ambient lighting changes color after the vehicle goes to sleep, pointing to potential software glitches in the body control systems.
- Melted Headlight Harnesses: Some owners on forums have reported issues with melted headlight wiring harnesses, which can cause high/low beam malfunction errors and headlight failure. This is separate from the switch but can produce similar symptoms.
Buyer's Guide: How to Choose the Right Used Headlight Switch
Purchasing a used OEM headlight switch is a great way to save money, but careful selection is critical to avoid compatibility problems. Unlike many parts, a visual match is more important than a part number match.
The Golden Rule: Match the Buttons Exactly
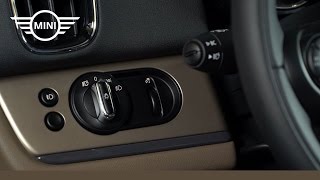
🎬 Watch: How to use your MINI lighting controlsWarning: Fitment is entirely dependent on your vehicle's specific lighting options. Multiple switch versions exist. You must purchase a switch with the exact same button configuration as your original part.
Before you buy, look at your car's current switch and compare it to the photos of the part you intend to purchase. Check for the presence or absence of these three key features:
- Automatic Headlights: Does the rotary dial have an "A" position to the far left? If your car has this feature, your replacement switch must also have it.
- Front Fog Lights: Is there a button with an icon showing a lamp with angled lines pointing down and to the left? This is for the front fog lights.
- Rear Fog Lights: Is there a button with an icon showing a lamp with straight lines pointing to the right? This is for the rear fog lights.
Installing a switch with a different configuration will likely result in non-functioning features or error messages.
Physical Inspection Checklist
- Check for Wear: Ensure the graphics on the dial and buttons are clear and not worn off.
- Test the Dial: The rotary dial should click into each position with a positive, tactile feel. A mushy or loose dial is a sign of wear.
- Inspect Connectors: Look at the electrical connector port on the back. The pins should be straight, clean, and free of any corrosion or damage.
- Check Mounting Tabs: Verify that all plastic mounting tabs around the housing are intact and not cracked or broken. These are essential for a secure fit in the dashboard.
Part Numbers: A Guide, Not a Guarantee
While a visual match is most important, part numbers can help confirm a match. The part number is typically printed on a sticker on the switch housing. Known OEM part numbers and their supercessions include 61315A25471 and 5A2547001. This part may also replace older numbers like 61316824879, 61319301806, 61319390255, and 61319865845. However, always prioritize the button layout over the part number, as many different configurations can exist under similar numbers.
Installation Guide
Replacing the headlight switch on a MINI Clubman is a straightforward job that most DIYers can complete with basic tools.
- Difficulty: 1/5 (Very Easy)
- Estimated Time: 15-20 minutes
- Tools Needed: Plastic trim removal tool or a flathead screwdriver with the tip wrapped in tape.
Step-by-Step Replacement
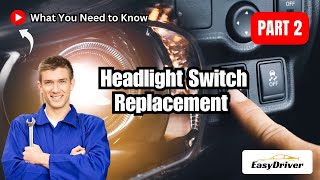
🎬 See this easy DIY headlight switch replacement walkthrough- Disconnect the Battery: As a safety precaution, disconnect the negative terminal of your car's battery.
- Pry Out the Switch Panel: The headlight switch assembly is held in by clips. Carefully insert a plastic trim tool between the switch panel and the dashboard. Gently pry outwards to release the clips and pull the assembly out.
- Disconnect the Electrical Connector: On the back of the switch, there is a single wiring harness connector. Press the release tab on the connector and pull it straight out.
- Connect the New Switch: Plug the wiring harness into the new switch assembly. You should hear a click as it locks into place.
- Test the Switch: Reconnect the battery. Before pushing the switch back into the dash, turn the ignition on and test all functions: parking lights, low beams, auto mode, fog lights, and the instrument dimmer wheel.
- Reinstall the Panel: If everything works correctly, align the switch panel with the opening in the dashboard and press it firmly until the clips snap back into place.
Cost Comparison: New vs. Used
Prices for a replacement headlight switch can vary significantly. A used OEM part offers a substantial savings over a new dealer part.
| Part Type | Estimated Cost | Notes |
|---|---|---|
| New OEM | $190 - $250 | Purchased from a MINI dealer or authorized online retailer. Guarantees compatibility if the correct version is ordered. |
| New Aftermarket | $50 - $150 | Availability can be limited. Quality and long-term reliability may not match OEM standards. |
| Used OEM | $40 - $100 | Best value. Sourced from a recycled vehicle. Ensure you match the button configuration exactly. |
| Shop Labor | $60 - $130 | Typically less than one hour of labor at a professional shop. |
Frequently Asked Questions (FAQ)
Do I need to program the headlight switch after installation?
No, for a like-for-like replacement, no programming or coding is required. The switch is a simple input device, and as long as the new switch has the same functions as the old one, it should work immediately upon installation.
Can I upgrade to a switch with automatic headlights or fog lights?
It depends. If your car already has the necessary hardware (like the rain/light sensor on the windshield for auto headlights), simply swapping the switch may enable the feature without coding. However, adding a feature like front fog lights that was never installed at the factory requires additional wiring, hardware, and professional coding of the Body Domain Controller. Simply installing a switch with the fog light button will not make the lights work.
My automatic headlights seem too sensitive or not sensitive enough. Is the switch bad?
Probably not. The sensitivity of the automatic headlight system is controlled by the rain/light sensor and the vehicle's software, not the switch itself. It's common for the lights to turn on quickly when entering a tunnel and take a minute or two to turn off after returning to bright light. This behavior is normal and not a sign of a faulty switch.
My headlights work, but my interior dome lights don't. Could it be the headlight switch?
It's unlikely. While the headlight switch has a dimmer for the instrument panel, the main overhead dome and reading lights are typically controlled by their own switches in the overhead console. If those lights are not working, check their dedicated fuses and switches first.
Helpful Videos
Technical Specifications
OEM Part Numbers: 61315A25471 5A2547001 61319865845 61316824879 61319301806 61319390255
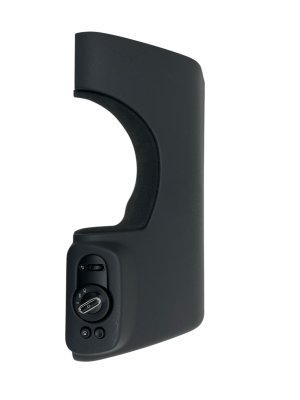
Dash-mounted rotary and push-button control unit for exterior lighting.
We Have This Part in Stock

The information in this article is provided for general reference and educational purposes only. Vehicle specifications, procedures, and part compatibility can vary by production date, trim level, and region. Always consult your vehicle's factory service manual and verify part numbers before purchasing or performing repairs. Safety-critical components such as airbags, seat belts, and braking systems should be installed by a qualified professional.
- MINI Cooper Clubman:
- 🎬 Helpful Videos
- 🛍️ Shop This Part
- Common Symptoms of a Failing Headlight Switch
- Known Issues, Recalls, and Service Bulletins
- Buyer's Guide: How to Choose the Right Used Headlight Switch
- The Golden Rule: Match the Buttons Exactly
- Physical Inspection Checklist
- Part Numbers: A Guide, Not a Guarantee
- Installation Guide
- Step-by-Step Replacement
- Cost Comparison: New vs. Used
- Frequently Asked Questions (FAQ)
- 🎟️ Get 5% Off