

Tesla Model S & X Headlight Module Failure (2021-2025): A Guide to Replacement and Programming
Diagnose flickering or dead headlights, find the right used module, and learn the mandatory software reinstall procedure for your refreshed Model S or Model X.
- A replacement module (new or used) WILL NOT WORK until a "Software Reinstall" is performed via the car's Service Mode.
- Modules are side-specific due to software; match the part number and install on the correct side (Left or Right).
- Failure is often indicated by a single dead or flickering headlight and a dashboard warning message.
- A used OEM module is a cost-effective repair, but requires careful part number matching and the mandatory software procedure.
Headlight Technology in the Refreshed (2021+) Model S and X

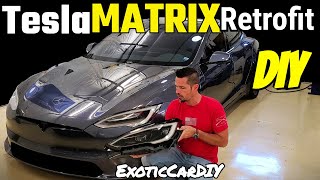
The 2021 model year marked a significant refresh for the Tesla Model S and Model X, sometimes referred to as the "Palladium" update. A key part of this update was the introduction of a more advanced, fully LED-based headlight system. These are not simple LED bulbs but complete, sealed assemblies with adaptive capabilities. Depending on the vehicle's configuration and date of manufacture, this can include Matrix or Global headlight technology 🎬 See a full DIY Matrix headlight retrofit walkthrough that adjusts the light pattern to avoid dazzling other drivers while maximizing illumination. The Headlight Control Module is the brain that makes these features possible, interpreting data from the vehicle's cameras and sensors to control the light output.
Common Symptoms of a Failing Headlight Control Module

A faulty headlight control module can cause a range of issues, from a minor annoyance to a critical safety problem. Because the module controls multiple functions, you may experience one or more of the following symptoms, typically on just one side of the vehicle:
- Complete or Partial Headlight Failure: The low beam, high beam, or amber turn signal may stop working entirely.
- Flickering Lights: The headlight may flicker intermittently, sometimes triggered by specific temperatures.
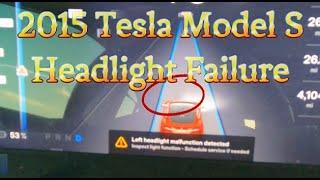
- Dashboard Warning Messages: The car will often report the fault with a generic "Headlight malfunction detected" message or a more specific alert like "Right headlight malfunction detected". Specific service alert codes, such as BC_w005, may also be logged.
- Loss of Adaptive Functions: The headlights may stop swiveling when you turn the steering wheel, or the auto high-beam feature may become disabled. Note that this can also be caused by a dirty windshield blocking the forward-facing camera.
- Burnt Smell or Corrosion: In cases of water intrusion, you may notice a distinct electrical burning smell or visible green corrosion on the module's connector pins if you remove it for inspection.
Known Issues, Recalls, and Technical Service Bulletins (TSBs)
NHTSA Recall 24V-904 (Tesla Service Bulletin SB-24-00-017)
This recall specifically affects a small batch of 25 Tesla Model X vehicles manufactured between June 5, 2024, and August 2, 2024. The issue involved the low beam headlights and parking lights flickering in certain low-temperature conditions. According to the NHTSA report, the problem was caused by a unique combination of a software issue and headlamp hardware that was produced near the edge of its design specifications. Tesla addressed this issue by deploying an over-the-air (OTA) software update to all affected vehicles, which resolved the problem without requiring a physical repair. The recall identifies the specific headlamp assembly part numbers as 1800040-00-C (Left Hand) and 1800041-00-C (Right Hand).
Warning: While many lighting glitches can be fixed with a software update or even a simple touchscreen reboot, a persistent failure of one headlight points to a hardware problem, most commonly the control module itself.
Buying a Used Headlight Control Module: What to Look For

Given the high cost of a new headlight assembly from Tesla, a used OEM module is an excellent cost-saving alternative. Unlike many complex electronics, a used module can be made to work perfectly if you follow the correct procedure. Here’s what to check:
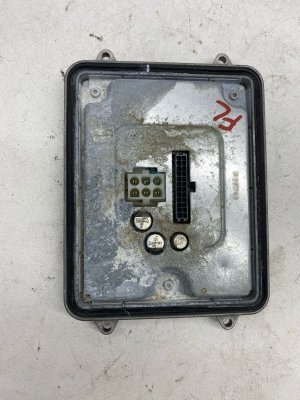
- Match the Part Number: This is the most critical step. The module is typically mounted to the bottom of the headlight assembly. You may need to remove the old module to find the part number printed on its label. Match this number exactly to ensure you are buying a compatible part.
- Inspect the Connector Pins: Ask the seller for a clear photo of the electrical connector port. Look for any signs of white or green corrosion, or bent/damaged pins. A clean connector is essential for reliable operation.
- Check the Housing: Look for cracks or damage to the plastic or metal casing. A compromised housing can allow moisture to enter and destroy the internal circuit board.
- Understand Left vs. Right: While the modules for the left and right headlights may look identical and even share the same physical footprint, they are programmed for a specific side. You must install a right-side module on the right headlight and a left-side module on the left. Installing a module on the wrong side will cause it to not function until a full software reinstall is performed.
Replacement and Programming
Replacing the headlight control module is an advanced DIY task, primarily because of the mandatory software steps required after installation.
1. Physical Installation
There are two main approaches to accessing the module, which is attached to the bottom of the headlight housing with several Torx screws.
- Fender Liner Method: Some DIY mechanics have successfully accessed the module by turning the front wheel, removing the plastic fender liner clips, and reaching up behind the headlight assembly. This avoids removing the bumper but offers very limited working space.
- Bumper Removal Method: The official Tesla service procedure requires removing the front fascia (bumper) and then removing the entire headlight assembly from the vehicle. This provides clear access to the module but is a much more involved job.
2. Mandatory Software Reinstallation
Pro Tip: A replacement module (new or used) will NOT work by simply plugging it in. The vehicle will not recognize the new hardware until you perform a software reinstall.
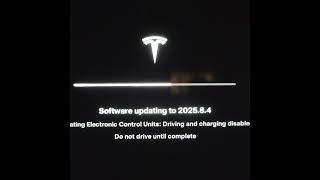
This is the step that trips up most people. You must put the car into "Service Mode" and trigger a software reinstall. This forces the car's computer to scan for and configure new hardware, including the replacement headlight module.
- On the main touchscreen, navigate to Controls > Software.
- Press and hold the model name (e.g., "Model S") for a few seconds until a password prompt appears.
- Enter the access code "service".
- In the Service Mode menu, find the option for Software Reinstall and initiate the process. 🎬 Watch this guide to software reinstall after replacing a headlight
- The process can take anywhere from five minutes to over an hour, during which the car will be inoperable. Once complete, the new headlight module should be recognized and functional.
3. Headlight Aiming and Calibration
After replacing the module or the entire headlight assembly, you must adjust the headlight aim. This is also done through the Service Mode menu.
On the touchscreen, go to Controls > Service > Adjust Headlights. This will bring up an interface that allows you to use the steering wheel scroll wheels to adjust the beam height and direction. While you can perform a basic alignment against a wall, for perfect results that comply with regulations, the adjustment should be done using a professional headlight aiming tool.
| Part/Service | Estimated Cost |
|---|---|
| New OEM Headlight Assembly (Includes Module) | $1,500 - $3,600+ (per side, from Tesla) |
| New Aftermarket Module | $60 - $150 (Limited availability and unproven quality) |
| Used OEM Module | 🎬 Watch how to fix a failing Tesla headlight for cheap$40 - $120 |
| Shop Labor (Bumper R&R, Install, Programming) | $400 - $800+ |
Frequently Asked Questions (FAQ)
Can I just swap the module from the working headlight to the non-working side to test it?
Yes, but it's not a simple plug-and-play test. The modules are software-paired to their original side. If you move the left module to the right side, it will not work until you perform the "Software Reinstall" procedure. After the reinstall, it will be paired to the right side. If you then move it back, you will have to do another software reinstall to get it working on the left side again.
My adaptive headlights stopped turning. Is the module bad?
Not necessarily. The adaptive headlight function relies on the car's forward-facing cameras. If the windshield area in front of the camera is dirty, foggy, or obstructed, the system will disable adaptive functions as a safety precaution and revert to standard, fixed low beams. Always ensure your windshield is clean before assuming a hardware fault.
Why did my headlight module fail?
The most common cause of failure is water intrusion. The module is located at the bottom of the headlight assembly, making it susceptible to moisture if any of the headlight seals fail. This moisture shorts out the circuit board. Other causes can include electrical surges or simple end-of-life failure of electronic components.
Do I have to go to Tesla to have a new module programmed?
No. The critical "Software Reinstall" function is accessible to anyone through the vehicle's own Service Mode on the touchscreen. This allows a DIYer or an independent repair shop to successfully install and configure a replacement module without needing Tesla's proprietary diagnostic tools.
Helpful Videos
Technical Specifications
OEM Part Numbers: 1800040-00-C 1800041-00-C 1563713-00-G 00199215 00201021 00201024 00200352
The Headlight Control Module is a vehicle-specific ECU (Electronic Control Unit) that operates on the vehicle's low-voltage system. It controls all functions of the adaptive LED headlight assembly.
We Have This Part in Stock

The information in this article is provided for general reference and educational purposes only. Vehicle specifications, procedures, and part compatibility can vary by production date, trim level, and region. Always consult your vehicle's factory service manual and verify part numbers before purchasing or performing repairs. Safety-critical components such as airbags, seat belts, and braking systems should be installed by a qualified professional.
- Tesla S:
- Tesla X:
- 🎬 Helpful Videos
- 🛍️ Shop This Part
- Headlight Technology in the Refreshed (2021+) Model S and X
- Common Symptoms of a Failing Headlight Control Module
- Known Issues, Recalls, and Technical Service Bulletins (TSBs)
- NHTSA Recall 24V-904 (Tesla Service Bulletin SB-24-00-017)
- Buying a Used Headlight Control Module: What to Look For
- Replacement and Programming
- 1. Physical Installation
- 2. Mandatory Software Reinstallation
- 3. Headlight Aiming and Calibration
- Frequently Asked Questions (FAQ)
- 🎟️ Get 5% Off