

2016-2024 Toyota RAV4 Headlight Guide: Generation, Tech, and VIN Mismatches
This guide covers the critical differences between 4th and 5th generation RAV4 headlights, including Halogen vs. LED types, to prevent costly purchasing mistakes.
- The 2016-2018 (4th Gen) and 2019-2024 (5th Gen) RAV4 are different vehicles; their headlight assemblies are NOT interchangeable.
- Compatibility is complex, depending on generation, lighting technology (Halogen, LED, Adaptive), and even build location (VIN-specific for 2016-2018 models).
- Factory LED headlights are sealed units. If the main light source fails, the entire assembly must be replaced.
- Replacement requires removing the front bumper cover and aiming the new headlight. Adaptive models may also require electronic calibration.
Critical: Two Generations, Zero Interchangeability

The most important fact about 2016-2024 Toyota RAV4 headlights is that this period covers two completely different vehicle generations, and their parts are not interchangeable. Failure to identify your vehicle's generation is the most common and costly mistake.
- 4th Generation (2016-2018): These model years represent the facelift of the fourth-gen RAV4. They feature a sleeker, more rounded headlight design. These were available with either halogen or optional LED headlights.
- 5th Generation (2019-2024): The RAV4 was fully redesigned for the 2019 model year, with a boxier, more aggressive style, including angular headlights. All 5th-gen models come with LED headlights, but the technology and features vary significantly by trim.
Warning: A headlight from a 2018 RAV4 will NOT fit a 2019 RAV4, and vice-versa. The mounting points, shape, and electrical connectors are completely different.
Headlight Variants by Generation and Trim

5th Generation (2019-2024)
All 5th-gen RAV4s use LED technology, but there are key differences:
- Multi-LED Reflector (LE Trim): Base model RAV4s use a reflector-style housing with multiple LED chips to project light.
- Bi-LED Projector (XLE, XLE Premium, Adventure, TRD Off-Road, Limited): Higher trims use a projector lens for a sharper, more focused beam pattern with a distinct cutoff line. These are often referred to as Bi-LED because a single projector can provide both low and high beams.
- Adaptive Front-Lighting System (AFS): Available on top trims like the Limited and some Hybrid models, these projector headlights physically turn with the steering wheel to illuminate corners. These assemblies contain extra motors and sensors, making them the most complex and expensive type.
- Bezel Color: Some trims feature headlights with black inner bezels for a sportier look, while others have chrome bezels. This is primarily an aesthetic difference but is important for matching a single replacement to the other side.
4th Generation (2016-2018)
The 4th-gen facelift offered a choice between older and newer technology:
- Halogen Projector (LE, XLE): Lower trims used a projector housing with a replaceable halogen bulb (typically size 9012 or HIR2). These produce a warmer, yellowish light.
- LED Projector (SE, Limited, Platinum): Higher trims came with sealed LED headlights that offered brighter, whiter light. Like the 5th-gen models, if the LED fails, the entire assembly must be replaced.
- Build Location (VIN): A critical compatibility point for this generation is the vehicle's manufacturing plant. Headlights for North American-built RAV4s (VIN starting with 1, 2, 4, or 5) are different from those for Japan-built models (VIN starting with J). You must verify your vehicle's VIN before ordering.
Known Issues, TSBs, and Recalls

- Moisture and Condensation: This is a common issue across many vehicles, including the RAV4. Toyota has issued technical service bulletins (TSBs) explaining that a small amount of fog or condensation that clears after running the lights for about 30 minutes is normal. However, if you see water pooling at the bottom of the housing, streaks, or persistent fog, the headlight seal has failed, and the assembly needs replacement to prevent damage to internal electronics.
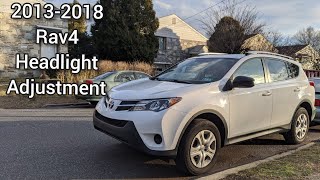
- Poor Visibility Complaints (2016-2018): The NHTSA has received numerous owner complaints about the low-beam headlights on 2016-2018 models, citing a beam pattern that is aimed too low, has a sharp cutoff, and provides poor peripheral vision. 🎬 See how to adjust the beam on 2013-2018 models While this has not resulted in a recall, it is a well-documented owner concern.
- Recall 20TA15 (2021 RAV4 Prime): A small number of 2021 RAV4 Prime vehicles were recalled because the headlight aiming caps may have been improperly closed at the factory, which could allow for mis-adjustment.
Symptoms of a Failing Headlight Assembly

Beyond a complete lack of light, other symptoms can indicate a problem with the assembly itself, not just a bulb.
- Dim or Flickering Light (LED Models): On LED headlights, dimming or flickering is often a sign of a failing internal driver module or the LED chip itself. In most cases, this requires replacing the entire headlight assembly.
- Condensation Inside the Lens: As mentioned, any water that pools or does not clear on its own indicates a failed seal. This moisture can corrode connectors and short out electronic modules.
- Cracked or Hazy Lens: UV damage and impacts can cause the polycarbonate lens to become yellow, hazy, or cracked. This reduces light output and is a safety hazard.
- Adaptive Headlight (AFS) Warning Light: If your RAV4 is equipped with AFS, a malfunction in one of the headlight motors or sensors will typically trigger a warning light on the dashboard.
Buying a Used Headlight Assembly: What to Check
A used OEM headlight is often a great value, providing the same fit and quality as a new part. However, careful inspection is key.
Physical Inspection Checklist
- Mounting Tabs: Check every mounting tab and bracket. These are often the first things to break in a minor impact or during removal. A headlight with broken tabs will not sit securely and cannot be aimed correctly.
- Lens Condition: Inspect the lens for deep scratches, cracks, or 'crazing' (a network of fine cracks from UV damage). Minor hazing can sometimes be polished out, but significant damage cannot.
- Seals and Housing: Look for any signs that the headlight was previously opened or improperly sealed. Check the rear of the housing for cracks or damage.
- Internal Moisture: Look closely for any dried water spots or a faint white residue on the inside of the lens or chrome. This is a red flag that the unit has had a moisture problem in the past.
Compatibility Verification
Warning: Upgrading from halogen to LED headlights is not a simple plug-and-play swap. It requires different wiring harnesses and potentially coding the vehicle's computer. It is always best to replace your headlight with the same type that the vehicle was originally equipped with.
Before you buy, confirm these five points:
- Generation: Does it match your vehicle (2016-2018 or 2019-2024)?
- Side: Is it for the correct side (Left/Driver or Right/Passenger)?
- Technology: Does it match your original lights (Halogen, LED, or Adaptive LED)?
- Build Location (2016-2018): Does your VIN start with 'J' (Japan) or a number (North America)? Ensure the part matches.
- Connectors: Compare the electrical connectors on the back of the used part to your original. They should be identical.
Replacement and Adjustment
Replacing a RAV4 headlight assembly is a moderately difficult job that is feasible for a DIY mechanic.
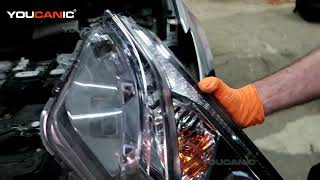
- Bumper Removal: On both the 4th and 5th generation RAV4, the front bumper cover must be removed 🎬 Watch: Step-by-step guide to removing the 4th-gen headlight assembly to access all the bolts holding the headlight assembly in place.
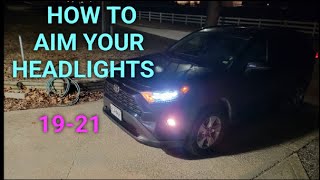
- Aiming is Required: Any time a headlight assembly is replaced, it MUST be aimed correctly. This ensures you can see properly at night without blinding oncoming drivers. The adjustment is typically done with a Phillips screwdriver or a 10mm socket on adjustment screws on the back of the assembly. Park the vehicle on a level surface facing a wall 25 feet away 🎬 Watch: How to properly aim 5th-gen LED headlights to perform the adjustment.
- AFS Calibration: If you replace an adaptive headlight, the system may need to be calibrated using a professional diagnostic scan tool (like Toyota's Techstream) to relearn the motor positions and steering angle sensor data. Some systems may attempt to self-calibrate after a short drive with several turns.
Cost Comparison
| Part Type | Estimated Cost |
|---|---|
| New OEM (Dealer) | $750 - $1,800 per assembly, depending on type |
| New Aftermarket | $200 - $550 per assembly |
| Used OEM | $250 - $700 per assembly |
| Shop Labor for Replacement | $150 - $300 |
Frequently Asked Questions (FAQ)
Can I upgrade my 2019+ RAV4 LE from halogen-style to the projector LED headlights?
This is not a straightforward upgrade. While aftermarket companies offer solutions, swapping factory halogen for factory LED assemblies involves different wiring harnesses and may require computer programming to function correctly without errors. It is much more complex than simply plugging in a new headlight.
My headlight has a little fog inside. Do I need to replace it?
Not necessarily. According to Toyota, a fine mist that appears after a car wash or in humid weather and disappears after driving with the lights on for 20-30 minutes is normal. However, if you see large water droplets, water pooling at the bottom, or the fog never clears, the seal has failed and the assembly should be replaced.
Why are the OEM LED headlights so expensive to replace?
Factory LED headlights are sold as a complete, sealed assembly. Unlike a halogen light where you can replace a $20 bulb, if a single non-serviceable LED chip or the integrated driver module fails, the entire unit must be replaced. Adaptive versions add motors and sensors, further increasing the cost and complexity.
Does a replacement adaptive headlight need to be calibrated?
Yes, it is highly recommended. After installing a new adaptive headlight, the system's control module needs to 'relearn' the new motor's home position and range of motion. While some systems may self-calibrate, the proper procedure often requires a dealer or qualified shop with a specific scan tool to perform the initialization.
Helpful Videos
Technical Specifications
OEM Part Numbers: 81110-0R160 81110-0R161 81110-0R162 81130-42821 81130-42822 81150-0R140 81185-42670 81130-42820 81145-42840 81170-42D80
Varies by type. Halogen models (2016-2018) typically use a 9012 (HIR2) dual-beam bulb. LED models are integrated, sealed units. Adaptive models include internal motors for swiveling.
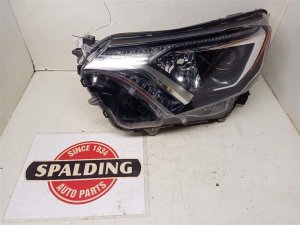
We Have This Part in Stock



The information in this article is provided for general reference and educational purposes only. Vehicle specifications, procedures, and part compatibility can vary by production date, trim level, and region. Always consult your vehicle's factory service manual and verify part numbers before purchasing or performing repairs. Safety-critical components such as airbags, seat belts, and braking systems should be installed by a qualified professional.
- Toyota RAV4:
- 🎬 Helpful Videos
- 🛍️ Shop This Part
- Critical: Two Generations, Zero Interchangeability
- Headlight Variants by Generation and Trim
- 5th Generation (2019-2024)
- 4th Generation (2016-2018)
- Known Issues, TSBs, and Recalls
- Symptoms of a Failing Headlight Assembly
- Buying a Used Headlight Assembly: What to Check
- Physical Inspection Checklist
- Compatibility Verification
- Replacement and Adjustment
- Cost Comparison
- Frequently Asked Questions (FAQ)
- 🎟️ Get 5% Off