

2010-2015 Toyota & Lexus Fog Light Assembly: Fitment, Failures, and Replacement Guide
This guide covers the shared passenger-side fog light assembly for the 2010-2013 4Runner, 2011-2015 IS250/IS350, 2012-2014 Prius V, and 2011-2013 CT200h, including common problems and critical compatibility details.
- This is a bumper-mounted FOG LIGHT assembly, not a headlight. It fits the passenger side of the 2010-13 4Runner, 2011-15 IS250/350, 2012-14 Prius V, and 2011-13 CT200h.
- For Lexus IS models, you must verify fitment for F-Sport, Sedan, or Convertible trims as bumper shapes can differ.
- When buying used, the most critical inspection points are the plastic mounting tabs and the integrity of the lens seal to prevent moisture.
- Aiming the fog light after installation is required to ensure safety and effectiveness; the top of the beam should be 4 inches below the lamp's center at a distance of 25 feet.
Symptoms of a Failing Fog Light Assembly
A faulty fog light can be more than just a cosmetic issue; it can be a safety hazard in poor weather. Here are the most common signs that your fog light assembly or its components may be failing.
1. Fog Light Does Not Turn On
The most obvious symptom is a fog light that won't illuminate. This can be caused by several issues. The simplest cause is a burned-out bulb. Other potential causes include a blown fuse, a bad fog light relay, a faulty switch on the dashboard or steering column stalk, or damaged wiring leading to the assembly. If neither fog light works, the issue is more likely to be the fuse, relay, or switch rather than both bulbs failing simultaneously.
2. Dim or Flickering Light
A fog light that appears dim or flickers while driving often points to a failing bulb or a poor electrical connection. The bulb's filament may be nearing the end of its life. A flickering light could also indicate a loose wiring connector at the back of the assembly or a problem within the fog light relay.
3. Condensation or Moisture Inside the Lens
Finding water droplets or a foggy appearance inside the lens is a clear sign that the assembly's seal has failed. The housing is designed to be watertight, but over time, seals can degrade or the housing can develop small cracks from road debris. This moisture can cause bulbs to burn out prematurely and will degrade the reflector's surface, reducing light output.
4. Cracked or Damaged Lens
Located low on the bumper, fog light lenses are highly susceptible to damage from rocks and other road debris. A cracked lens is not just a cosmetic problem; it allows moisture and dirt to enter the housing, which will quickly ruin the reflector and bulb. In many states, a cracked light lens can also cause a vehicle to fail a safety inspection.
Vehicle-Specific Fitment and Compatibility
While these vehicles share a common fog light assembly, there are critical, model-specific details you must verify before purchasing a replacement. This guide covers the right (passenger side) assembly.
Warning: This is the bumper-mounted fog lamp assembly. It is NOT the main headlight. The part numbers 81210-0W050 and 81210-47010 refer specifically to this lower fog light.
2010-2013 Toyota 4Runner
This fog light fits all trim levels of the 4Runner within this year range. Replacement is generally straightforward, requiring access through the front fender liner.
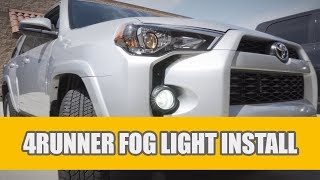
🎬 See this 4Runner fog light bulb upgrade and install2011-2015 Lexus IS250 & IS350
Fitment for the Lexus IS models is the most complex. Compatibility can depend on whether the vehicle is a Sedan or Convertible and, most importantly, if it has the F-Sport package, which often features a different bumper design. Always verify the shape and mounting points of your existing fog light against the replacement part. Aftermarket options are available specifically for F-Sport bumpers.
2012-2014 Toyota Prius V
This part is confirmed to fit the Toyota Prius V (the larger wagon model), not the standard Prius or the smaller Prius C. The fitment is for Prius V models from 2012 through at least 2015.
2011-2013 Lexus CT200h
This fog light assembly is also a direct fit for the Lexus CT200h hybrid hatchback for these model years. The replacement process is similar to the other vehicles, involving access behind the front bumper cover.
Buying a Used Fog Light Assembly: What to Inspect
A used OEM fog light is often a better choice than a cheap aftermarket alternative due to superior materials, lens clarity, and precise fitment. However, you must inspect a used part carefully.
- Lens Condition: Check for deep pits, sandblasting, or yellowing/hazing from UV damage. Minor surface scratches are acceptable, but deep cracks or chips mean the part should be rejected.
- Seal Integrity: Look for any signs of previous moisture intrusion, like a water line or a discolored reflector. A clean, bright reflector is a good sign.
- Mounting Tabs: Carefully inspect all plastic mounting tabs and screw holes. These are the most common points of failure. Even one broken tab can prevent the light from being secured properly, leading to vibration and a shaky beam.
- Housing Cracks: Check the entire black plastic housing on the back for cracks, especially around the mounting points and where the bulb twists in.
- Included Components: Verify if the bulb and wiring pigtail are included. Often they are, but it's best to confirm. Assume you will need to use your old bulb or buy a new one.
Bulb Type: Halogen H11 vs. H16
Most of these vehicles use a halogen bulb. There can be confusion between H11 and H16 bulb types, as they often share the same physical connector. The primary difference is wattage; the H11 is a 55-watt bulb, while the H16 is a lower-wattage (around 19W) bulb. Using a higher-wattage H11 bulb in a housing designed for an H16 can potentially generate too much heat, risking damage to the housing or wiring over time. It is best to replace the bulb with the type specified for your vehicle. For example, some listings for the Prius V specify an H11 bulb for the fog lights.
Pro Tip: When replacing a bulb, it's a good idea to replace them in pairs. Halogen bulbs have a finite lifespan, and if one has failed, the other is likely not far behind. This also ensures consistent light color and brightness between the two sides.
Replacement and Aiming
Replacing the fog light assembly is a feasible DIY job for most people with basic tools.
- Access the Assembly: This usually involves turning the front wheels to one side and removing several plastic clips or screws from the fender liner to peel it back. This exposes the rear of the fog light assembly.
- Disconnect and Remove: Unplug the electrical connector and remove the screws or bolts holding the assembly to the bumper.
- Install the New Assembly: Bolt the new assembly in place, reconnect the electrical plug, and test the light before re-securing the fender liner.
Aiming is Required
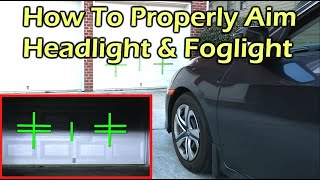
After installation, you must aim the fog light. Misaligned fog lights can be ineffective and can blind oncoming drivers. The process is simple:
- Park the car on a level surface about 25 feet away from a flat wall or garage door.
- Measure the height from the ground to the center of your fog light lens.
- On the wall, make a horizontal mark at that same height.
- The top of the fog light's bright beam pattern should be aimed 4 inches below your horizontal mark on the wall.
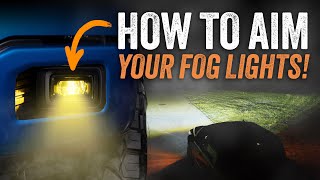
- Use the adjustment screw, typically found on the back or bottom of the fog light housing, to raise or lower the beam until it's correctly aimed. 🎬 Watch: How to aim your fog lights the right way
Known Issues, Recalls, and TSBs
As of late 2023, there are no major recalls or Technical Service Bulletins (TSBs) specifically related to the fog light assemblies on these particular models. Most issues are related to normal wear and tear, such as bulb failure or damage from road debris. Some Toyota models have had recalls for accessory lighting kits, but these do not apply to the factory-installed fog lights covered here.
Cost Comparison
| Part Type | Estimated Price Range |
|---|---|
| New OEM | $140 - $210 |
| New Aftermarket | $25 - $85 |
| Used OEM | $50 - $120 |
| Shop Labor | $50 - $100 |
Frequently Asked Questions (FAQ)
Can I upgrade to LED fog lights?
Yes, you can upgrade to either LED bulbs in the stock housing or a complete LED fog light assembly. If you choose LED bulbs, select a high-quality brand to ensure a proper beam pattern that won't create glare for other drivers. Complete LED assemblies, like those from Morimoto or Diode Dynamics, are often a better option as their optics are specifically designed for the LED light source, providing superior performance.
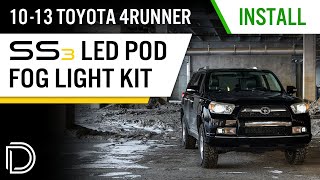
🎬 Watch: How to install a Diode Dynamics fog light kitIs a cracked fog light lens illegal?
In many jurisdictions, any cracked or broken lens on a required light can be cause for a traffic ticket or a failed safety inspection. Even if the bulb still works, the crack allows moisture in and can create a distracting or dangerous beam pattern.
Do I need to disconnect the battery to replace the fog light?
While it is not strictly necessary, it is always a recommended safety precaution to disconnect the negative battery terminal before working on any part of your vehicle's electrical system.
Why is my new fog light a different color than the old one?
If you only replace one fog light bulb, the new bulb will likely be brighter and whiter than the old one on the other side. Halogen bulbs dim and change color slightly as they age. This is why it is always recommended to replace bulbs in pairs to ensure a perfect match.
Helpful Videos
Technical Specifications
OEM Part Numbers: 81210-0W050 81210-47010
Bulb Type: Typically Halogen (H11 or H16 type)

The information in this article is provided for general reference and educational purposes only. Vehicle specifications, procedures, and part compatibility can vary by production date, trim level, and region. Always consult your vehicle's factory service manual and verify part numbers before purchasing or performing repairs. Safety-critical components such as airbags, seat belts, and braking systems should be installed by a qualified professional.
- Toyota 4Runner:
- Lexus IS350:
- Lexus IS250:
- Toyota Prius V:
- Lexus CT200h:
- 🎬 Helpful Videos
- Symptoms of a Failing Fog Light Assembly
- 1. Fog Light Does Not Turn On
- 2. Dim or Flickering Light
- 3. Condensation or Moisture Inside the Lens
- 4. Cracked or Damaged Lens
- Vehicle-Specific Fitment and Compatibility
- 2010-2013 Toyota 4Runner
- 2011-2015 Lexus IS250 & IS350
- 2012-2014 Toyota Prius V
- 2011-2013 Lexus CT200h
- Buying a Used Fog Light Assembly: What to Inspect
- Bulb Type: Halogen H11 vs. H16
- Replacement and Aiming
- Aiming is Required
- Known Issues, Recalls, and TSBs
- Cost Comparison
- Frequently Asked Questions (FAQ)
- 🎟️ Get 5% Off