

2016-2021 Tesla Model X Headlight: Solving DRL Burnout & Condensation Issues
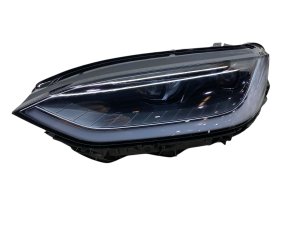
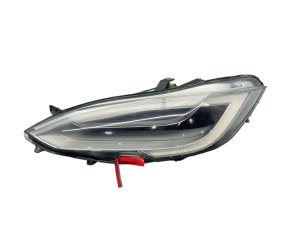
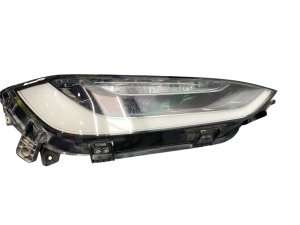
This guide covers the adaptive LED projector headlights for the pre-refresh 2016-2021 Tesla Model X, explaining common failures and how to ensure you buy the right replacement part.
- This headlight only fits pre-refresh Tesla Model X vehicles from 2016 to early 2021; it is NOT compatible with newer models.
- Moisture and condensation are the primary cause of failure, leading to yellowed DRLs and burnt-out electronics.
- After replacement, a 'Software Reinstall' via Service Mode is mandatory for the new headlight to be recognized by the car.
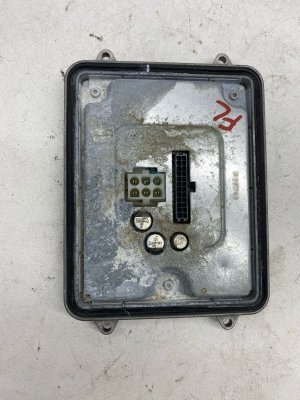
- A faulty LED driver module (ballast) can cause a dead headlight and can be replaced separately as a cheaper repair option.
Critical Compatibility Warning: Pre-Refresh vs. Post-Refresh Headlights

Before purchasing a headlight for a Tesla Model X, it is essential to understand the difference between the two incompatible generations. The year range of 2016-2025 spans two completely different headlight designs.
- Pre-Refresh (2016 - early 2021): These models use a full LED adaptive projector headlight. This is the part covered by this guide and associated with part numbers like 1034315-00-F.
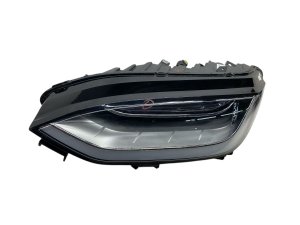
- Post-Refresh (late 2021 - 2025): These newer models use an advanced Matrix LED "Global" headlight.
Warning: The headlights for pre-refresh and post-refresh vehicles are NOT interchangeable. They have different physical shapes, mounting points, wiring connectors, and require different software. Do not attempt to install a newer Matrix LED headlight on an older vehicle.
Symptoms of a Failing Headlight Assembly

Failures in these sealed units can manifest in several ways, often starting as minor issues before progressing to a complete outage.
1. Condensation or Moisture Inside the Lens
This is the most common issue reported by owners. Headlight assemblies are vented to handle pressure changes, so a light mist after a car wash or in humid weather that disappears on its own is often considered normal. However, if you see large water droplets, streaks, or a puddle of water inside the housing, the seal has failed. This 🎬 Watch: How to handle headlight water condensation issues persistent moisture will corrode the internal electronics and lead to the failure of the LED driver module and other components.
2. Dim, Yellow, or Burnt-Out Daytime Running Light (DRL)
A very common failure is the signature LED DRL strip that borders the headlight. Chronic moisture exposure can cause the light guide to degrade, turning the crisp white light into a dim, yellowed color. Eventually, segments of the DRL or the entire strip may burn out, leaving the headlight looking incomplete. This is a frequent reason for replacing the entire assembly.
3. Flickering or Dim Headlight Beam
If the main low or high beam flickers or appears noticeably dimmer than the other side, it can point to a failing internal component or an issue with the LED driver module (ballast) attached to the bottom of the housing. While sometimes a software glitch can cause flickering, consistent issues usually indicate a hardware problem.
4. Complete Headlight Failure
In some cases, the entire headlight assembly will go dark. This is often the final stage after experiencing intermittent flickering or moisture issues. The cause is typically a failed LED driver module or widespread corrosion of the internal circuitry.
Pro Tip: Before replacing the entire headlight for a flickering or dead beam, consider swapping the LED driver module from the working headlight to the non-working side. These modules are often the point of failure and can be replaced separately for a fraction of the cost of a full assembly. If the problem moves to the other side, you only need to replace the module.
Known Issues, TSBs, and Recalls
While there are no major recalls specifically for the 2016-2021 Model X headlight assembly, there is a relevant recall for newer models that owners should be aware of.
- NHTSA Recall 24V-904 (Flickering Headlights): This recall affects a very small number of 2024 Model X vehicles. The issue, caused by a specific hardware and software combination, resulted in flickering low beams at certain temperatures. Tesla addressed this with an over-the-air (OTA) software update (version 2024.26.8 or later), and no physical parts replacement is needed. This does not apply to the pre-refresh headlights covered in this guide.
Buying a Used Headlight Assembly: What to Inspect

Given the high cost of a new OEM headlight, a used assembly is a popular choice. However, careful inspection is crucial to avoid buying someone else's problem.
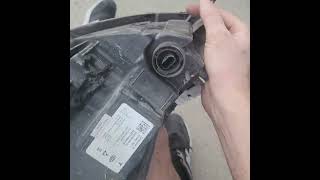
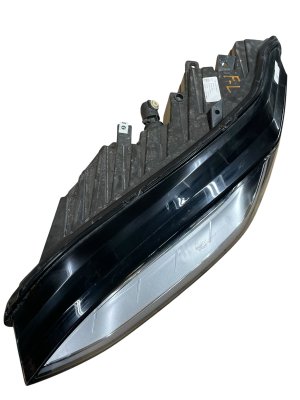
- Verify the Part Number: This is the most important step. Ensure the part number on the used assembly matches your original part. The part number is printed on a sticker on the headlight housing. For the pre-refresh Model X passenger side, look for numbers like 1034315-00-F or similar variants.
- Inspect All Mounting Tabs: The plastic mounting tabs are brittle and often break during vehicle disassembly. Carefully inspect all tabs for cracks or repairs. While some minor tabs can be repaired, the main structural mounting points must be intact for proper and secure fitment.
- Check the Lens for Damage: Look for deep scratches, cracks, or "crazing" (a network of fine cracks) from UV damage. While minor surface hazing can be polished, any cracks in the lens mean the unit's seal is compromised and it should be rejected.
- Look for Signs of Internal Moisture: Check the inside of the lens for a "tide line" or mineral deposits. These are clear signs that the headlight has had water inside it before, indicating a bad seal. Avoid any headlight with evidence of past water intrusion.
- Examine the Electrical Connector: Ensure the main electrical connector and its pins are clean, straight, and free of corrosion. A damaged connector can cause a host of electrical issues.
Replacement and Calibration Overview
Replacing the headlight assembly is a complex job that is feasible for an experienced DIYer but requires significant disassembly.
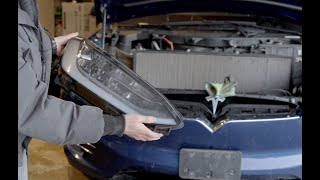
- Bumper and Frunk Removal: Accessing the headlight bolts requires removing the front bumper cover and the underhood storage unit, commonly known as the "frunk". 🎬 See this step-by-step headlight replacement walkthrough
- Software Reinstall: After the new headlight is physically installed, the vehicle's computer may not recognize the new hardware. You must put the car into Service Mode via the touchscreen and perform a "Software Reinstall". This forces the car to scan for new components and initialize the headlight. Without this step, the new headlight may not work at all.
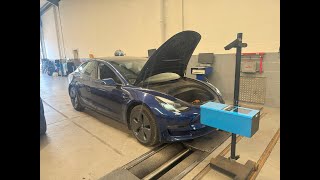
- Headlight Aiming: After installation, the headlight beam must be properly aimed to ensure road safety and prevent blinding other drivers. This is also done through the "Adjust Headlights" option in the vehicle's Service Mode menu, using the steering wheel scroll wheels to adjust the beam against a wall. 🎬 Watch: How to adjust and aim your headlights
Cost of Replacement
| Item | Estimated Cost |
|---|---|
| New OEM (from Tesla) | $1,600 - $2,600+ (part only) |
| Used OEM (Recycled) | $200 - $700 |
| New Aftermarket | $400 - $800 (Quality and compatibility vary) |
| Shop Labor Cost | $400 - $800 |
Frequently Asked Questions (FAQ)
Can I upgrade my 2017 Model X to the newer 2023 Matrix headlights?
No. This is not a direct swap. The physical shape, mounting points, wiring, and control software are completely different between the pre-refresh and post-refresh headlights. Attempting this would require extensive and costly custom fabrication.
My headlight has some fog inside after a car wash. Is it broken?
Not necessarily. Headlight housings are vented, and minor, light condensation that appears and then disappears after driving with the lights on is considered normal. However, if you see large water droplets, pooling water at the bottom, or the fog never goes away, the headlight's main seal has failed and the unit must be replaced to prevent electrical damage.
Why doesn't my new headlight work after I installed it?
The vehicle's computer has not recognized the new hardware. You must enter Service Mode through the touchscreen and perform a "Software Reinstall." This forces the car to re-scan its components and initialize the new headlight module. If it still doesn't work after a successful reinstall, there may be an issue with the part itself or the wiring.
Do I have to replace the whole headlight if the LED DRL strip burns out?
Yes. The headlight is a sealed unit, and the internal components like the LED DRL strip are not designed to be serviced or replaced individually. If any part of the lighting inside the housing fails, the entire assembly must be replaced.
Helpful Videos
Technical Specifications
OEM Part Numbers: 1034312 1034312-00-D 103431300c 1034314 1034314-00-F 1034314-00-G 103431400F 1034315-00-F 1034315-00-G 103431500F 103431600C 1034319-00-F
Type: Full LED Adaptive Projector. Voltage: 12V. Technology: Light Emitting Diode (LED).
We Have This Part in Stock

The information in this article is provided for general reference and educational purposes only. Vehicle specifications, procedures, and part compatibility can vary by production date, trim level, and region. Always consult your vehicle's factory service manual and verify part numbers before purchasing or performing repairs. Safety-critical components such as airbags, seat belts, and braking systems should be installed by a qualified professional.
- Tesla X:
- Tesla S:
- 🎬 Helpful Videos
- 🛍️ Shop This Part
- Critical Compatibility Warning: Pre-Refresh vs. Post-Refresh Headlights
- Symptoms of a Failing Headlight Assembly
- 1. Condensation or Moisture Inside the Lens
- 2. Dim, Yellow, or Burnt-Out Daytime Running Light (DRL)
- 3. Flickering or Dim Headlight Beam
- 4. Complete Headlight Failure
- Known Issues, TSBs, and Recalls
- Buying a Used Headlight Assembly: What to Inspect
- Replacement and Calibration Overview
- Cost of Replacement
- Frequently Asked Questions (FAQ)
- 🎟️ Get 5% Off