

Tesla Model S & X Headlight Guide (2016-2025): Decoding Refresh vs. Pre-Refresh, Condensation, and Replacement
This guide clarifies the critical differences between headlight generations for the 2016-2025 Tesla Model X and 2021-2024 Tesla Model S, covering common failures and replacement.
- There are two incompatible headlight generations: Pre-Refresh (2016-early 2023 X / 2016-2020 S) and Post-Refresh Matrix LED (mid-2023+ X / 2021+ S). You must buy the correct one.
- Minor condensation that disappears is normal; pooled water inside the lens means the seal has failed and the unit must be replaced.
- Replacement is a major job requiring removal of the front bumper and underhood storage unit (frunk).
- After installation, a 'Software Reinstall' via Service Mode is often required for the new headlight to function, followed by beam aiming.
Critical Compatibility Warning: Pre-Refresh vs. Post-Refresh Headlights

The single most important factor when replacing a headlight on a Tesla Model S or Model X is understanding which generation of vehicle you have. The headlights are NOT interchangeable across the major vehicle updates, often called the 'refresh'. Installing the wrong headlight will result in fitment issues and electronic incompatibility.
Warning: The year range 2016-2025 for the Model X spans two different, incompatible headlight designs. You must verify your vehicle's specific production date before purchasing a replacement part.
| Vehicle | Generation | Years (Approximate) | Headlight Type |
|---|---|---|---|
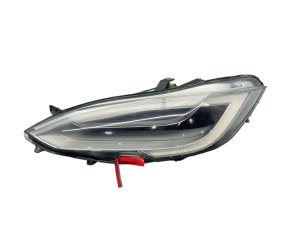
| Tesla Model X | Pre-Refresh | 2016 - Early 2023 | Full LED Adaptive Projector |
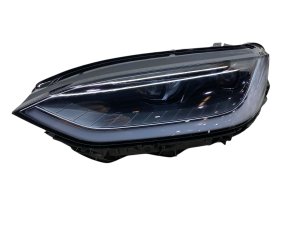
| Tesla Model X | Post-Refresh | Mid-2023 - 2025 | Matrix LED "Global" Headlight |
| Tesla Model S | Pre-Refresh (Facelift) | 2016 - 2020 | Full LED Adaptive Projector |
| Tesla Model S | Post-Refresh ("Palladium") | 2021 - 2024 | Matrix LED "Global" Headlight |
Symptoms of a Failing Headlight Assembly


Headlight issues can range from minor annoyances to critical safety failures. Here are the most common problems owners experience.
1. Condensation or Moisture Inside the Lens
Seeing fog or moisture inside a headlight is alarming, but it is not always a sign of a defect. Headlight assemblies are vented to equalize pressure, and under certain weather conditions, minor condensation can form.
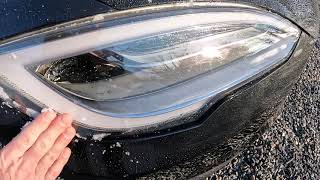
- Normal Condensation: A light, misty film that appears after a car wash or during humid, cold weather. This type of fogging should disappear on its own as the headlight warms up from use or as ambient humidity decreases.
- Problematic Water Ingress: If you see large water droplets, streaks, or a visible puddle of water at the bottom of the housing, the headlight's seal has failed. This is a serious problem that will lead to corrosion of the internal electronics and eventual failure of the LED driver module. This is often caused by a bad gasket on the rear inspection cover. 🎬 See how to fix Model S headlight condensation for free.
2. Flickering Lights (2024 Model X Recall)
A small number of 2024 Model X vehicles, built between June and August 2024, were subject to a recall (NHTSA ID: 24V-904) for flickering low beams and parking lights. This issue was caused by a specific combination of headlight hardware and vehicle software and would occur at certain ambient temperatures. Tesla addressed this by deploying an over-the-air (OTA) software update (version 2024.26.8 or later), and no physical repair is needed for affected vehicles that have been updated.
3. "Adaptive Headlight Feature Unavailable" Error
An error message on the main display indicating that adaptive features are unavailable can be caused by several factors. The adaptive system relies on the forward-facing cameras mounted on the windshield. If the camera's view is obscured by dirt, frost, or heavy rain, the system may temporarily disable itself. The error can also indicate a software glitch, which can sometimes be resolved by rebooting the car's computer or performing a software reinstall. If the error persists, it may point to a hardware failure within the headlight or a calibration issue.
4. Dim or Completely Dead Headlight
While LEDs are long-lasting, they can fail. A common failure point is the signature LED daytime running light (DRL) strip along the edge of the headlight, which can go dim or burn out entirely. In other cases, the main low or high beam may stop working. This can be caused by a failure of the LEDs themselves or, more commonly, the external LED driver module that powers them. Sometimes, a loose internal connector can be the culprit, but accessing it requires removing the headlight.
Buying a Used Headlight Assembly: What to Inspect

Purchasing a used OEM headlight is a cost-effective way to replace a damaged unit, but careful inspection is key to getting a good part. Given the complexity and cost of these parts, a used OEM unit is often a better choice than a cheap aftermarket alternative, which may lack adaptive functionality or have poor beam patterns.
- Verify the Part Number: This is the most critical step. Match the part number exactly to your original headlight. Pay close attention to the generation (pre-refresh vs. post-refresh) and the side (Left/Driver vs. Right/Passenger). Part numbers like 1034314-00-G and 1034315-00-F are for pre-refresh Model X vehicles. Post-refresh Matrix headlights use different numbers, such as 1800040-00-C.
- Inspect All Mounting Tabs: The headlight assembly is secured by several plastic tabs and mounting points. These are brittle and often break during a collision or even during improper removal. Ensure all tabs are intact. A broken tab can cause the headlight to vibrate or be misaligned.
- Check the Lens Condition: Look for deep scratches, rock chips, and 'crazing' (a network of fine cracks from UV damage). Also, check for internal hazing or water lines, which indicate a past or present moisture problem.
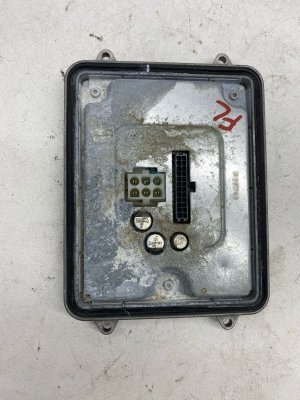
- Confirm Modules are Included: The headlight assembly relies on an external LED driver module, which is typically bolted to the housing. Confirm with the seller that this module is included and that the connectors are not damaged.
Replacement and Calibration Overview
Replacing a headlight on a Model S or Model X is a complex procedure and is not recommended for beginners. The difficulty is high due to the number of components that must be removed for access.
Pro Tip: Before starting the replacement, it's wise to try a software reinstall from the car's Service Mode. If a new headlight is installed and doesn't work, this step is often required to make the car recognize the new hardware.
- Vehicle Power-Down: The vehicle's high-voltage and 12V systems must be safely powered down.
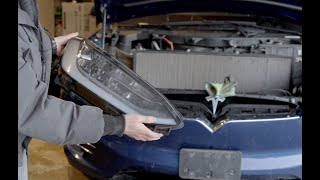
- Bumper and Frunk Removal: The front bumper fascia must be completely removed to access the headlight mounting bolts. This involves removing numerous clips, bolts in the wheel wells, and disconnecting sensors. The underhood storage unit (frunk tub) also needs to be taken out. 🎬 Watch this step-by-step guide for a Model X headlight replacement.
- Headlight Removal: Once access is gained, the headlight is held in by several bolts. After unbolting it, the main electrical connector is disconnected, and the assembly can be removed.
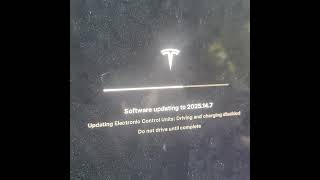
- Installation and Software Reinstall: Installation is the reverse of removal. After the new headlight is connected, you may need to enter the vehicle's Service Mode via the touchscreen and perform a 'Software Reinstall' to get the car to recognize the new part.
- Aiming and Calibration: After installation, the headlights must be aimed. This can be done through the 'Lights' menu on the touchscreen, which provides a mode for adjusting the beam height against a wall. A final camera and adaptive light calibration may also be necessary.
Cost of Replacement
Replacing a Tesla headlight can be expensive, especially when purchased new from the manufacturer. Used OEM parts offer significant savings.
| Part / Service | Estimated Cost |
|---|---|
| New OEM Headlight | $1,500 - $2,500+ (per side, from Tesla) |
| New Aftermarket Headlight | $250 - $600 (Functionality may be limited) |
| Used OEM Headlight | $250 - $700 (Depending on condition and generation) |
| Shop Labor for Replacement | $400 - $800 (2-4 hours of labor) |
Frequently Asked Questions (FAQ)
Is a little bit of fog inside my Tesla headlight normal?
Yes, minor fogging or a light mist that appears in humid or cold weather and disappears on its own is considered normal by Tesla. This happens because the headlights are vented. However, if you see large water drops or the moisture never goes away, the headlight seal has failed and it needs to be repaired or replaced.
Why doesn't my new headlight work after I installed it?
The vehicle's computer may not recognize the new hardware. You need to put the car in Service Mode and perform a 'Software Reinstall'. This forces the car to re-scan its hardware and initialize the new headlight. If it still doesn't work, there may be an issue with the part itself or the wiring.
Do I need to aim or calibrate the headlights after replacement?
Yes, absolutely. After replacing a headlight, you must perform an alignment to ensure the beams are pointed correctly and not blinding other drivers. This can be done from the vehicle's touchscreen menu. The adaptive functions may also require calibration.
Can I upgrade my 2018 Model X headlights to the new 2024 Matrix LEDs?
This is not a direct swap. The physical shape and mounting points are different between the pre-refresh and post-refresh headlights. While some companies sell adapter harnesses, it is a complex conversion that may also require software changes and is not guaranteed to provide full functionality. It is best to replace your headlight with the correct part for your vehicle's specific model year.
Helpful Videos
Technical Specifications
OEM Part Numbers: 1034312 1034312-00-D 103431300c 1034314 1034314-00-F 1034314-00-G 103431400F 1034315-00-F 1034315-00-G 103431500F 103431600C 1034319-00-F 1800040-00-C 1800041-00-C
Lighting Technology: Full LED, Adaptive. Post-refresh models use Matrix LED technology.
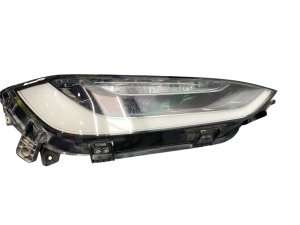
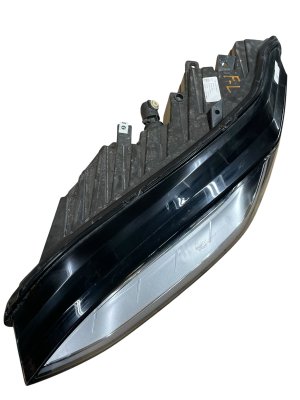
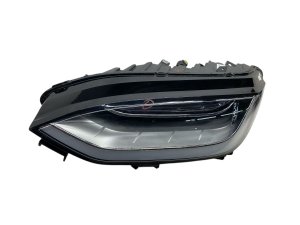
We Have This Part in Stock

The information in this article is provided for general reference and educational purposes only. Vehicle specifications, procedures, and part compatibility can vary by production date, trim level, and region. Always consult your vehicle's factory service manual and verify part numbers before purchasing or performing repairs. Safety-critical components such as airbags, seat belts, and braking systems should be installed by a qualified professional.
- Tesla Model X:
- Tesla Model S:
- 🎬 Helpful Videos
- 🛍️ Shop This Part
- Critical Compatibility Warning: Pre-Refresh vs. Post-Refresh Headlights
- Symptoms of a Failing Headlight Assembly
- 1. Condensation or Moisture Inside the Lens
- 2. Flickering Lights (2024 Model X Recall)
- 3. "Adaptive Headlight Feature Unavailable" Error
- 4. Dim or Completely Dead Headlight
- Buying a Used Headlight Assembly: What to Inspect
- Replacement and Calibration Overview
- Cost of Replacement
- Frequently Asked Questions (FAQ)
- 🎟️ Get 5% Off