

2000-2002 Saturn S-Series Headlight: Solving Hazing, Fitment, and Moisture Issues
This guide covers common failures like lens hazing, explains crucial differences between Sedan/Wagon and Coupe models, and shows how to properly replace the assembly.
- Fitment is critical: These headlights ONLY fit 2000-2002 Saturn S-Series Sedans (SL) and Wagons (SW). They do NOT fit Coupes (SC) or any model from 1999 or earlier.
- The most common failure is lens hazing from UV damage, which severely dims light output. Replacing the entire assembly is the best permanent fix.
- The lighting system is simple halogen, using a 9006 low beam and 9005 high beam bulb. No special ballasts or modules are needed.
- Replacement is extremely easy for a DIYer, requiring only the removal of two 10mm bolts per side.
Compatibility: The Most Common Mistake
Crucial Fitment Warning: This headlight assembly ONLY fits 2000, 2001, and 2002 Saturn S-Series Sedan (SL, SL1, SL2) and Station Wagon (SW1, SW2) models. These vehicles were part of a "facelift" or model refresh. The headlights are smaller and more curved than earlier models. They will NOT fit 1999-or-earlier S-Series Sedans/Wagons, nor will they fit ANY year of the Saturn SC Coupe, which has its own unique headlight design. Always verify your vehicle's year and body style before purchasing.
Symptoms of a Failing Headlight Assembly
While a burnt-out bulb is obvious, the assembly itself can fail in ways that are just as critical. Look for these signs:
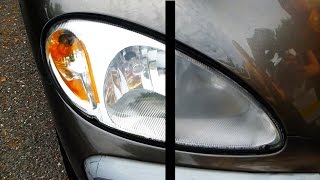
- Extremely Dim or Yellow Light Output: This is the most common issue. Over time, the plastic lens is damaged by the sun's UV rays, causing it to become cloudy, hazy, or yellow. This oxidation can drastically reduce the amount of light reaching the road, making night driving dangerous, even with new bulbs.
- Moisture or Condensation Inside the Lens: If you see water droplets, fog, or a "fishbowl" effect inside the headlight, the seal between the lens and the housing has failed. This moisture can cause the reflective chrome coating to peel, short out bulbs, and lead to chronic electrical issues.
- Flickering or Intermittent Operation: While this can be a failing bulb, it can also be caused by a corroded bulb socket due to moisture entry. Sometimes, a tap on the headlight will make it work temporarily, which can point to a loose bulb filament or a bad connection in the socket.
- Cracked Lens or Broken Housing: Physical damage from road debris or a minor impact can break the lens or, more commonly, the plastic mounting tabs on the back of the assembly. Broken tabs will cause the headlight to vibrate, shake, or sit crooked.
Known Issues, Recalls, and Technical Service Bulletins (TSBs)
For vehicles of this age, most problems are related to normal wear and tear rather than manufacturing defects.
- No Major Recalls: Searches of the National Highway Traffic Safety Administration (NHTSA) database show no safety recalls specifically for the headlight assemblies on 2000-2002 Saturn S-Series models. Recalls were issued for other components like seatbelts and fuel tanks, but the headlights were not part of a safety campaign.
- No Applicable TSBs: While a Technical Service Bulletin (TSB) existed for rattling headlights on earlier 1996-1999 models, it does not apply to the redesigned 2000-2002 assemblies. The primary issues for this generation—hazing and moisture—are considered age-related degradation.
Buying a Used 2000-2002 Saturn S-Series Headlight
A high-quality used OEM headlight is often a better choice than a cheap, new aftermarket part. Aftermarket parts can suffer from poor beam patterns, premature hazing due to low-quality plastic, and imperfect fitment. Here’s what to inspect on a used OEM unit:
- Lens Clarity: This is the top priority. Look for a lens that is crystal clear with no signs of yellowing or hazy oxidation. A used part with a clear lens is far superior to a new part that will yellow in a year.
- Mounting Tab Integrity: Carefully inspect the back of the assembly. These headlights are held in by two main bolts and a guide pin/hook. Ensure the plastic mounting points where the bolts pass through are not cracked or broken. A broken tab means the headlight cannot be secured properly.
- Check for Internal Moisture: Look for a "water line" or dried mineral deposits on the inside of the chrome reflector. This is a clear sign the assembly had a leak in the past and should be avoided.
- Seal Condition: Check the black sealant around the perimeter where the clear lens meets the black plastic housing. Look for any gaps or areas where the seal appears dried out or pulled away.
- Adjuster Screws: Locate the adjustment screws on the back. If possible, try turning them gently to ensure they are not stripped or seized.
Headlight Technology: Simple and Reliable Halogen
All 2000-2002 Saturn S-Series models came from the factory with standard halogen headlights. This system is simple, inexpensive, and reliable.
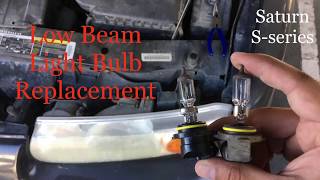
- Bulb Types: The assembly uses two separate bulbs: a 9006 (HB4) for the low beam and a 9005 (HB3) for the high beam.
- No Extra Modules: Halogen systems are straightforward. They do not use or require any external ballasts, igniters, or LED driver modules. The bulbs are powered directly by the car's standard 12-volt electrical system.
Warning: Avoid using aftermarket "plug-and-play" LED or HID (Xenon) bulbs in these halogen housings. The reflector and lens are specifically designed to focus the light from a halogen filament. Using a different light source will result in an improper and dangerous beam pattern, creating excessive glare for other drivers while often providing less usable light on the road. These kits are also not legal for on-road use.
Replacement and Alignment Guide
Step-by-Step Replacement
Replacing the headlight assembly is a very simple job that can be done with basic tools in under 30 minutes.
- Open the Hood: Secure the hood in the open position.
- Locate the Bolts: There are two 10mm bolts that secure the top of the headlight assembly to the radiator core support.
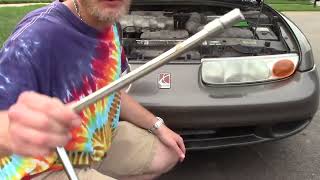
- Remove the Bolts: Using a 10mm socket with an extension, remove both bolts.
- Remove the Assembly: Gently pull the headlight assembly straight forward, away from the vehicle. It may require a slight wiggle to disengage the rear guide pin from its slot.
- Disconnect the Bulbs: With the assembly free, twist each bulb socket (high beam, low beam, and turn signal) counter-clockwise about a quarter turn and pull it out of the housing.
- Install the New Assembly: Transfer the bulbs to the new assembly. Align the new assembly's guide pin and bolt holes and slide it into place. Reinstall the two 10mm bolts and tighten them until snug—the torque spec is minimal at around 61 lb-in (7 N·m). Do not overtighten, as you can crack the plastic tabs.
Headlight Aiming
After installation, you must aim the new headlights to ensure they illuminate the road correctly and don't blind other drivers.
Pro Tip: The vertical adjustment screw on these models is a small, external Torx head, likely an E8 size. Having an E8 socket will make adjustment much easier.
- Park the car on a level surface, 25 feet away from a flat wall or garage door.
- Ensure tire pressures are correct to level the vehicle.
- Turn on the low beams. The top of the beam's cutoff line on the wall should be slightly below the height of the center of the headlight lens itself. A common rule is to aim the cutoff 2 inches below the headlight center height at 25 feet. 🎬 See how to properly adjust and aim your headlights
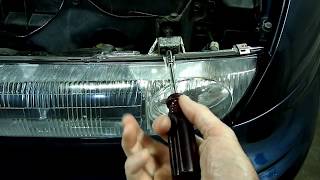
- Use the adjustment screws on the back of the assembly to move the beam up/down and left/right until it is properly aimed.
Cost of a 2000-2002 Saturn SL2 Headlight Assembly
| Part Type | Estimated Cost (per side) | Notes |
|---|---|---|
| New Aftermarket | $45 - $80 | Most common option. Quality can vary significantly. |
| Used OEM | $50 - $100 | Often the best value if the lens is clear and all tabs are intact. |
| New OEM | $150+ (If available) | Likely discontinued or very difficult to find. May be New Old Stock (NOS). |
| Shop Labor | $50 - $100 | This is a quick job, typically 0.5 hours of labor per side. |
Frequently Asked Questions (FAQ)
Can I just polish or restore my hazy headlights?
Yes, headlight restoration kits can temporarily improve clarity by sanding off the oxidized plastic. However, this process also removes what's left of the factory UV-protective coating. Unless you apply a high-quality, long-lasting UV sealant afterward, the hazing will return very quickly, sometimes in just a few months. 🎬 Watch: How to permanently restore hazy headlight lenses Replacing the assembly is the only permanent solution.
Why is there water inside my headlight?
Moisture gets in when a seal fails. This is usually the main seal between the clear lens and the black housing, or a worn-out rubber gasket on one of the twist-on caps where the bulbs are inserted. Sometimes the small breather vents on the housing can become clogged, trapping normal condensation.
Will a headlight from a 2001 Saturn SC2 Coupe fit my 2001 SL2 Sedan?
No, absolutely not. The Coupe (SC) has a completely different front bumper, grille, and headlight shape than the Sedan (SL) and Wagon (SW). They are not interchangeable under any circumstances.
What bulbs do I need for my 2002 Saturn SL2 headlight?
You need one 9006 (HB4) bulb for the low beam and one 9005 (HB3) bulb for the high beam. The front turn signal/parking light bulb, which also mounts in the assembly, is typically a 3457 or similar bulb.
Helpful Videos
Technical Specifications
OEM Part Numbers: Right (Passenger Side): 21112456, GM2503206 Left (Driver Side): 21112455, GM2502206
Technology: Halogen Low Beam Bulb: 9006 / HB4 High Beam Bulb: 9005 / HB3 Mounting: 2 bolts (10mm head)
We Have This Part in Stock


The information in this article is provided for general reference and educational purposes only. Vehicle specifications, procedures, and part compatibility can vary by production date, trim level, and region. Always consult your vehicle's factory service manual and verify part numbers before purchasing or performing repairs. Safety-critical components such as airbags, seat belts, and braking systems should be installed by a qualified professional.
- Saturn SL2:
- 🎬 Helpful Videos
- 🛍️ Shop This Part
- Compatibility: The Most Common Mistake
- Symptoms of a Failing Headlight Assembly
- Known Issues, Recalls, and Technical Service Bulletins (TSBs)
- Buying a Used 2000-2002 Saturn S-Series Headlight
- Headlight Technology: Simple and Reliable Halogen
- Replacement and Alignment Guide
- Step-by-Step Replacement
- Headlight Aiming
- Cost of a 2000-2002 Saturn SL2 Headlight Assembly
- Frequently Asked Questions (FAQ)
- 🎟️ Get 5% Off