

1988-1991 Oldsmobile Calais Headlight: Decoding the Composite 'Euro' Style Assembly
This guide covers common failures, inspection tips for used units, and the critical differences from earlier sealed-beam models.
- The 1988-1991 Calais uses a composite halogen headlight assembly with a replaceable 9004 bulb, which is not compatible with the sealed-beam units from 1985-1987 models.
- When buying a used assembly, the most critical inspection is for broken or repaired mounting tabs, as this is the most common failure point.
- Aftermarket LED or HID bulbs should not be used in the original halogen housings as they will create a dangerous and illegal beam pattern.
- Properly aiming the headlights after replacement is a mandatory step for safety and is typically done with two adjuster screws on the back of the housing.
Understanding the 1988-1991 Calais Headlight
The 1988 model year marked a key transition for the Oldsmobile Calais, moving from the traditional sealed-beam headlights of the 1985-1987 models to a more modern composite halogen assembly. This "Euro style" housing uses a replaceable 9004-type halogen bulb for both high and low beam functions. This design was shared across the GM N-body platform, including the Pontiac Grand Am and Buick Skylark of the era. These assemblies are not interchangeable with the earlier sealed-beam units, making it crucial to identify the correct type for your vehicle.
Symptoms of a Failing Headlight Assembly
While a burned-out bulb is the most common headlight issue, the assembly itself can fail in several ways, especially after decades of use. Recognizing these symptoms can help you determine if you need a new bulb or a complete housing.
- Dim or Yellowed Light Output: Over time, the plastic lens is exposed to UV radiation, causing it to haze over and turn yellow. This oxidation blocks light, significantly reducing visibility at night. The internal chrome reflector can also become dull or clouded, preventing it from properly projecting the light from the bulb.
- Moisture or Condensation Inside the Lens: The seal between the lens and the rear housing can degrade, allowing water to seep in. This can cause a foggy appearance, water droplets, or even standing water inside the assembly. Chronic moisture will damage the reflective coating and can cause electrical shorts or corrosion in the bulb socket.
- Cracked Lens or Housing: Impacts from road debris or minor collisions can easily crack the plastic lens or the mounting points on the back of the housing. A cracked lens will allow moisture in and can create a distracting or illegal beam pattern.
- Flickering or Intermittent Operation: If the bulb is known to be good, flickering often points to a problem with the electrical connector at the back of the assembly. The plastic connector can become brittle and break, or the metal terminals inside can corrode, leading to a poor connection.
Warning: Do not confuse the 1988-1991 composite assemblies with aftermarket LED conversion kits advertised for older sealed-beam cars. They are entirely different systems.
Known Issues, Recalls, and TSBs
As of this writing, there are no specific recalls or Technical Service Bulletins (TSBs) from the National Highway Traffic Safety Administration (NHTSA) that directly address the headlight assemblies for the 1988-1991 Oldsmobile Calais. The most common issues reported by owners are related to the natural aging of the plastic materials, such as hazing, broken mounting tabs, and failing seals. The primary challenge is physical degradation, not a specific design or manufacturing defect.
Buying a Used Headlight Assembly: What to Inspect
Given the age of these vehicles, a quality used OEM headlight is often the best and only option, as new OEM stock is largely discontinued. Used OEM parts typically offer better fit and optical quality than cheap aftermarket alternatives. Here’s what to look for when inspecting a used unit:
- Check All Mounting Tabs: This is the most critical inspection point. The plastic tabs and mounting points are brittle and often break during vehicle disassembly. Carefully inspect every tab for cracks, stress marks, or signs of glue or plastic-weld repairs. A broken tab will prevent the headlight from being secured and aimed correctly.
- Examine the Lens for Damage: Look for deep cracks, rock chips, and severe yellowing. Minor surface hazing can often be polished out with a restoration kit, but deep internal crazing or yellowing that has penetrated the plastic is permanent.
- Inspect for Moisture Intrusion: Hold the assembly up to the light and look for water lines, mineral deposits, or a foggy film on the inside of the lens. This indicates the seal has failed, and the unit will likely fog up again once installed.
- Assess the Reflector Condition: The chrome reflector bowl inside the housing should be bright and shiny. A dull, burnt, or hazy reflector will not project light effectively, resulting in poor visibility even with a new, bright bulb.
- Verify the Electrical Connector: Check the main electrical connector on the housing and the pigtail for the bulb. Ensure the plastic isn't melted and the metal pins aren't green with corrosion.
Pro Tip: When possible, buy headlights in pairs. This ensures they will match in clarity and appearance. Replacing only one can result in one clear, new-looking light and one old, yellowed light, which can be visually jarring.
Headlight Aiming After Installation
Proper aiming is required any time a headlight assembly is replaced. Incorrectly aimed headlights can blind oncoming drivers or fail to illuminate the road adequately. The process is straightforward and can be done with basic tools.
The 1988-1991 Calais uses adjuster screws on the back or top of the headlight assembly to control vertical and horizontal aim. While some GM vehicles of this era used special star-shaped bolts, many use simple 1/4" hex screws.
- Park the car on a level surface, 25 feet away from a flat, vertical wall (like a garage door).
- Measure the distance from the ground to the center of the headlight lens.
- On the wall, make a horizontal mark at that same height.
- Turn on the low beams. The top of the most intense part of the beam pattern should be at or just below the horizontal mark on the wall.
- Use the adjuster screws to move the beam up/down and left/right until it is properly aligned. Typically, one screw handles vertical aim and the other handles horizontal. 🎬 Watch: How to adjust headlights on a GM vehicle
Cost of Replacement
Pricing for a 1988-1991 Oldsmobile Calais headlight assembly can vary significantly based on condition and source.
| Part Source | Estimated Price (per side) | Notes |
|---|---|---|
| New OEM | $150 - $250+ (If found) | Largely discontinued and extremely difficult to find. Prices reflect new-old-stock (NOS) rarity. |
| New Aftermarket | $40 - $80 | Widely available from various online retailers. Fit and optical quality can be inconsistent compared to OEM. |
| Used OEM | $50 - $100 | The most common replacement option. Price depends heavily on condition, especially lens clarity and tab integrity. |
| Shop Labor | $75 - $150 | Replacement is typically a simple job, taking about 0.5 to 1.0 hour of labor per side. |
Frequently Asked Questions
What type of headlight bulb do I need for a 1990 Oldsmobile Calais?
The 1988-1991 Oldsmobile Calais uses a single 9004 (also known as HB1) halogen bulb for both the low and high beam functions. This is a dual-filament bulb.
Can I install LED or HID bulbs in my original Calais headlight housings?
It is not recommended. The reflector inside the halogen assembly is specifically designed to focus light from a halogen filament. Installing an LED or HID bulb, which has a different size and shape light source, will result in an improper and often illegal beam pattern, causing glare for other drivers and poor road illumination for you.
Is the driver's side headlight the same as the passenger's side?
No, the headlight assemblies are side-specific. They have different part numbers and are not interchangeable. Be sure to order the correct side for your needs (Left for driver's side, Right for passenger's side).
My headlights are hazy. Do I need to replace the whole assembly?
Not necessarily. If the hazing is on the outside surface of the lens, you can often restore clarity using a headlight restoration kit. These kits use a series of abrasives and polishes to remove the oxidized layer. However, if the lens is yellowed all the way through, cracked, or has moisture inside, the entire assembly should be replaced.
How do I replace the headlight assembly?
On most GM cars of this era, the process is relatively simple. After opening the hood, you typically need to remove a few bolts or retaining clips that hold the assembly in place. Once the fasteners are removed, the assembly can be pulled forward and the electrical connector disconnected from the back. Installation is the reverse of removal, followed by proper aiming.
Helpful Videos
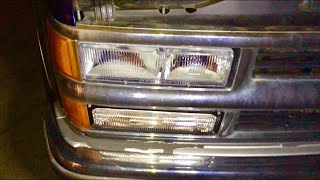
Technical Specifications
OEM Part Numbers: 16503032 16505712 16509212 16509448
Bulb Type: 9004 / HB1 (Dual-filament Halogen)
We Have This Part in Stock


The information in this article is provided for general reference and educational purposes only. Vehicle specifications, procedures, and part compatibility can vary by production date, trim level, and region. Always consult your vehicle's factory service manual and verify part numbers before purchasing or performing repairs. Safety-critical components such as airbags, seat belts, and braking systems should be installed by a qualified professional.
- Oldsmobile Calais: