

1987-1991 Oldsmobile 88 Headlight Guide: Solving Haze, Moisture, and Replacement
This guide covers the common failures of the composite headlights on the 1987-1991 Oldsmobile 88 and explains why finding a good used OEM assembly is your best option.
- New aftermarket assemblies are not readily available, making a high-quality used OEM part the primary replacement option.
- The most critical inspection points on a used assembly are the clarity of the lens and the integrity of all plastic mounting tabs.
- These assemblies fit 1987-1991 Oldsmobile Delta 88 models with composite headlights; they are not interchangeable with other GM H-body cars.
- Do not use plug-in LED or HID bulbs in these halogen housings, as it will create dangerous glare and an illegal beam pattern.
Symptoms of a Failing Headlight Assembly
When a headlight assembly begins to fail, it's not always the bulb's fault. The housing itself can cause several issues that compromise safety and performance.
- Dim or Yellowed Light Output: The most common issue is the polycarbonate lens becoming hazy, yellowed, or cloudy from years of UV exposure. This oxidation on the lens surface scatters and absorbs light, significantly reducing visibility at night even with a brand-new bulb.
- Moisture or Condensation Inside: If you see water droplets, fog, or a visible water line inside the lens, the seal between the lens and the housing has failed. This moisture can cause the reflective chrome surface to peel or corrode and can short out the bulb or its electrical connector.
- Flickering or Intermittent Operation: While often caused by a bad bulb or wiring elsewhere, moisture inside the assembly can corrode the bulb's socket and electrical contacts, leading to a poor connection that causes the light to flicker or work intermittently.
- Vibrating or Shaky Beam: If the light beam appears to shake or vibrate while driving, especially over bumps, it's a strong sign that one or more of the plastic mounting tabs on the housing are broken or cracked.
Known Issues, TSBs, and Recalls
For a vehicle of this age, most problems are related to wear and tear rather than manufacturing defects. There are no major recalls or Technical Service Bulletins (TSBs) specifically for the headlight assemblies on the 1990 Oldsmobile 88.
- NHTSA Recall 91V-034: There was a recall for some 1990 models concerning the digital instrument cluster not dimming correctly, but this did not involve the headlight assemblies themselves.
- Lens Degradation: The primary known issue is the aging of the polycarbonate lens. Sun exposure, heat, and environmental contaminants cause the plastic to oxidize, leading to the classic yellow, hazy appearance that restricts light output.
- Seal Failure: The adhesive sealant used to bond the lens to the housing can dry out and crack over time, creating a path for water to enter during rain or car washes.
- Electrical Connector Failure: The pigtail connector that attaches to the 9004 bulb can become brittle from heat and age, causing the locking tabs to break or the internal contacts to corrode.
Warning: Do not attempt to install modern HID or LED bulbs into these original halogen housings. The reflector is not designed for the different light source, which will result in a poor beam pattern, excessive glare for oncoming drivers, and is not legal for road use.
Buying a Used 1987-1991 Oldsmobile 88 Headlight Assembly
New aftermarket headlight assemblies for this specific model are not commonly produced, making a good-quality used OEM part the most practical and often best choice. New Old Stock (NOS) OEM parts are sometimes available but can be expensive. Here’s what to look for when buying used.
Step 1: Verify Compatibility
This composite-style headlight assembly fits the 1987, 1988, 1989, 1990, and 1991 Oldsmobile Delta 88. Ensure you are buying the correct side, as the driver (left) and passenger (right) side assemblies are not interchangeable.
Step 2: Inspect the Lens Condition
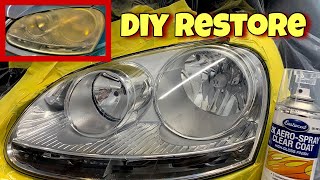
Closely examine the lens for clarity. Minor surface hazing can often be polished out with a headlight restoration kit. 🎬 Watch: How to permanently restore cloudy headlight lenses However, look for deeper issues that cannot be fixed:
- Micro-cracks (Crazing): A network of tiny cracks within the plastic, often caused by age and UV damage. These cannot be polished away.
- Deep Yellowing: If the plastic is yellowed all the way through, not just on the surface, restoration will have little effect.
- Peeling Clear Coat: Look for signs of a failing factory clear coat, which will appear as flaky or peeling patches. This requires full sanding and re-clearing, not just polishing.
Step 3: Check for Seal Integrity and Moisture Damage
Turn the assembly over and look for any signs that it has held water. A faint, dirty line on the inside of the lens or corrosion on the chrome reflector are red flags. Check the bulb socket for any green or white powder, which indicates corrosion from moisture.
Step 4: Examine All Mounting Tabs and Points
This is one of the most critical checks. After 30+ years, the plastic mounting tabs become very brittle and can easily snap. Carefully inspect every tab and mounting point for cracks or previous repairs (like epoxy or glue). A single broken tab can prevent the headlight from being secured properly, leading to vibration and incorrect alignment.
Pro Tip: A clear, intact used OEM headlight is almost always a better choice than a cheap aftermarket part (if you could find one). The OEM part was designed by GM to fit perfectly and produce a specific, safe beam pattern. Aftermarket parts for other vehicles are notorious for poor fitment, lower quality plastic, and reflectors that create glare.
Replacement and Aiming Procedure
Replacing the headlight assembly is a straightforward process that is feasible for a DIY mechanic.
Replacement Overview
While specific steps may vary slightly, the general process involves removing the trim panel(s) around the headlight to access its mounting hardware. The assembly is typically held in by several bolts or screws. Once unbolted, you can pull it forward and disconnect the main electrical harness from the bulb at the back. Installation is the reverse of removal.
How to Aim the Headlights
Aiming is required after installation to ensure the light is directed correctly on the road and doesn't blind other drivers. You will need a tape measure, painter's tape, and a Phillips screwdriver or a small 1/4" socket.
- Park the car on a level surface, 25 feet away from a flat, vertical wall (like a garage door). Ensure tire pressures are set correctly.
- Measure the distance from the ground to the center of the headlight lens. There is often a small dot or circle in the center of the lens for this purpose.
- On the wall, create a horizontal line of tape at that same height. Then, create a second horizontal line 2 inches below the first line.
- Turn on the low beams. The top of the bright, focused part of the beam pattern should be aligned with the lower tape line on the wall.
- Locate the adjustment screws on the back or top of the headlight assembly. There is typically one for vertical (up/down) adjustment and one for horizontal (left/right) adjustment.
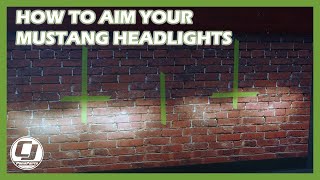
- Turn the vertical adjustment screw until the top of the beam cutoff is level with that lower line on the wall. Cover one headlight while you adjust the other to avoid confusion. 🎬 See this quick guide on aiming headlights
Cost of Replacement
The cost can vary significantly based on the source of the part.
| Part Source | Estimated Cost |
|---|---|
| New OEM (NOS) | $60 - $130+ (if found) |
| New Aftermarket | Not commonly available |
| Used OEM | $40 - $80 |
| Shop Labor | $75 - $150 |
Frequently Asked Questions (FAQ)
Can I just replace the foggy lens on my headlight?
No, the headlight is a sealed assembly. The lens is permanently bonded to the housing. To fix a foggy lens, you must replace the entire headlight assembly.
Can I upgrade my 1990 Oldsmobile 88 to LED headlights?
You should not install LED "plug-and-play" bulbs into the original halogen housings. The reflectors are not engineered for an LED light source and will create an improper and unsafe beam pattern, causing glare for other drivers. The only proper way to upgrade would be a full custom retrofit with LED projectors, which is a complex and expensive job.
My headlight is foggy on the inside. Can I just dry it out?
Drying out the headlight is a temporary fix. The condensation is a symptom of a failed seal. Unless the entry point for the moisture is found and resealed, the problem will return quickly. Replacing the assembly is the only permanent solution.
Are the headlights for the Buick LeSabre or Pontiac Bonneville from the same years interchangeable?
No. While these cars share the same GM H-Body platform, their front-end styling, including the shape and mounting of the headlights, is unique. You must use a headlight assembly specifically for the 1987-1991 Oldsmobile 88.
Helpful Videos
Technical Specifications
OEM Part Numbers: 16505902 16505904 22530640
Bulb Type: 9004 (Halogen, Dual-Filament) Lens Material: Polycarbonate Technology: Halogen Reflector
We Have This Part in Stock


The information in this article is provided for general reference and educational purposes only. Vehicle specifications, procedures, and part compatibility can vary by production date, trim level, and region. Always consult your vehicle's factory service manual and verify part numbers before purchasing or performing repairs. Safety-critical components such as airbags, seat belts, and braking systems should be installed by a qualified professional.
- Oldsmobile 88:
- 🎬 Helpful Videos
- 🛍️ Shop This Part
- Symptoms of a Failing Headlight Assembly
- Known Issues, TSBs, and Recalls
- Buying a Used 1987-1991 Oldsmobile 88 Headlight Assembly
- Step 1: Verify Compatibility
- Step 2: Inspect the Lens Condition
- Step 3: Check for Seal Integrity and Moisture Damage
- Step 4: Examine All Mounting Tabs and Points
- Replacement and Aiming Procedure
- Replacement Overview
- How to Aim the Headlights
- Cost of Replacement
- Frequently Asked Questions (FAQ)
- 🎟️ Get 5% Off